Showing posts with label Snacks. Show all posts

Sunday, 8 November 2015

Thattai - Thattai recipe - Easy snack - Flat Deep fried Crisps - Gluten Free

Tattai is a personal favourite of mine. Though I have eaten it umpteen times, I have never made them before. As I was making things that each person likes, I thought I owe this to me! And big surprise, turns out everyone else loves it as much.

The good thing about this snack is that it does not need any gadgets to make. Most South Indian Snacks need the murukku press. This one is just your hands. So anyone can easily whip up a batch. Why not give it a go this Diwali?


Friday, 6 November 2015

Thenkozhal - Thenkozhal Murukku - Diwali Snack Recipe - Gluten Free, Vegan Option

Diwali is a time when all Indian homes are busy with the preparation of many varieties of sweets and snacks. Usually everyone in the house will have their own favourites. When we were little my mom used to make snacks and sweets per each persons request. Its the same in my mother in laws place as well. Somehow each person will wish for a different one and during diwali all those wishes are granted!


I am also busy making a variety of snacks and sweets. My dad is visiting and all the hard work of pressing the murukku was done by him. How lucky for me.

This Murukku is famous for its melt in the mouth texture. It does not have any spice like chilli powder or pepper added to it. Flavour comes from the cumin seeds.

Thursday, 29 October 2015

Skull and Bone Crackers - Easy Halloween Recipe - Tortilla Crisps - Vegan


Super Easy treat for your next Halloween party. Not making for Halloween, You can just make it in any shape and enjoy. Remember, do not throw away the scarps. They bake great as well. :-)

Sunday, 2 November 2014

Garlic Eyeballs - Pizza Dough Balls with Olives


Halloween has come and gone. We had a fun celebration this year. Yes Yes. I know there are people asking why celebrate a pagan festival, why celebrate vampires, what has it got to do with Indians etc. Let me put all your thoughts to rest. We just had loads of fun dressing up, partying with friends, making and eating loads of food. My little one was dressed up as Spiderman for one and Mr. Bump for another. I was a witch in one and a robber in another. My H had fun as Wally (Where's Wally). 

Tuesday, 21 October 2014

Kara Boondi - Kaara Boondi - Diwali Special

Boondi is basically fried balls made from Chick pea flour. It is the main component of South Indian Mixture. The spicy version of the Boondi called Kara Boondi can be made as a snack on its own. You could just make the boondi part or add a few things like Cashews, Peanuts, Pottu Kadalai, Curry Leaves etc for enhanced taste.


People think Boondi is a very difficult thing to make. But trust me. Just figure out the right consistency of the batter and you will be done in no time at all.

Monday, 31 March 2014

Pesto Tarts

Puff Pastry sheets are very commonly used in our house. I make a variety of Indian Puff Items like the Soya Puff or the Egg Puff. The Pesto Sauce I used is yet another family favourite and I have used in it many variations including this Creamy Vegan Pasta and Potato Sandwich

When I needed to make a quick starter for a group of friends, I chose to make this simple Pesto Tarts which turned out to be a huge hit at the party.


Saturday, 8 February 2014

Gobi Tikka - Grilled Cauliflower


Cauliflower is used extensively in Indian Cooking. It absorbs a lot of flavours and when cooked right has a beautiful texture to it as well.

Friday, 29 November 2013

Original Pav Bhaji - Mumbai Juhu Beach Style - Authentic Recipe


Mumbai (Bombay) is famous for its Chaat Recipes. I guess it is safe to say that Chaat has spread its wings all over the country and even abroad. Most of us love eating an evening Chaat as a snack. These days even when you are shopping in a mall, getting a plate of Chaat is becoming a tradition.

So where did all this begin. Chaat is quite famous in the beaches of Bombay. The other day I was talking to some of my English friends about Beach! Here as you know people go to beach during the day and mainly to lounge in the sand and picnic.

Friday, 22 November 2013

Parippu Vada - Masala Vadai - Paruppu Vadai - With tips to making crunchy vadas


Parippu Vada (as it is known in Kerala) or Masala Vadai or Paruppu Vadai (as it is known in Tamil Nadu) is a very popular snack in Southern India. Nothing can beat the taste of a good Parippu Vada with some tea (or coffee may be) on a cloudy/rainy day.


When munching on Vada or any savoury fried items for that matter with some tea, I always wonder about the cultural difference. To start closer to home, in Kerala most people prefer to have tea with Vada where as in Tamil Nadu (especially in my husbands place) it is always coffee. I like my vada and tea at the same time (one in each hand), where as I find most tamilians prefer to finish their snacks and then drink their coffee.

Now moving on to place where I am now, yes you got it in UK. On a daily basis biscuits are enjoyed with tea (by dunking). Well, that is one thing Indians have learned from British. The taste of dunked biscuits is just awesome. On special days or when a few ladies meet (what could be more special than friends getting together), it is cakes with tea/coffee. In India we almost always associate cake with dessert. So for me it is quite hard to get my head around cake with tea. Does something sweet not affect the taste of the drink? Well, to each their own.

What is your tea time story? Do share with me!


The Key to a good Parippu Vada is the crunchiness. Though quite simple to make, getting the texture right can be quite daunting if you do not know the trick. If you add too much water, the batter will be too soft resulting in a vada that does not have that crunch and texture to it. If you add little and you do not shape it right, it will disintegrate the moment you drop it in oil. Read below for tricks of how to get that perfect crunch!

Ingredients

Channa Dal  1 cup
Rice Flour 2 tbsp
Onion 1 finely chopped
Coriander Leaves finely chopped
Salt little less than 1 tsp (or to taste)
Oil for Deep frying

Make a paste
Curry Leaves 2 sprigs
Ginger 1 inch piece
Fennel seeds 1 tsp
Green Chilli 1 (more for spicier vada)

Method of Preparation

1. Soak the channa dal for 3 hours. Drain the water.

2. Make a rough paste of curry leaves, ginger, fennel seeds and green chilli without adding any water.

3. Pulse the channa dal without any water in a food processor till it is broken dal kind of stage. Take 1/3 of this and add to a blender with 1-2 tbsp of water and make a fine paste. If you do not have food processor, take 2/3 of dal and pulse in a blender/mixie. Then take the rest 1/3 and make a paste.

4. Take all of the dal in a bowl. Add the curry leaf paste to it. Add rice flour, salt, finely chopped onions and finely chopped coriander leaves to this. Mix everything well.

5. Heat oil in pan for frying. Keep a big bowl of water for dipping your hand.

6. When the oil is ready, keep it in low flame. Dip your fingers in the bowl of water. Take a small walnut size portion of the vada mix. Roll into a ball. Wet your fingers again and gently flatten the ball making sure that it does not crack on the top or sides.

7. Gently slide it into the oil.

8. Repeat for 2 or 3 more balls.

9. Increase the flame to medium. Do not touch it till the bottom side is cooked.

10. Once done, flip them over and cook the other side.

11. Drain on to a paper towel.

12. Repeat from step 6 for the rest of the mix.

Enjoy with a piping cup of tea (or coffee). 

Sunday, 3 November 2013

Zucchini Tots - Courgette Tots


Zucchini tots is basically bite size Grated Zucchini Bake. It takes its name cause of its resemblance to Tater tots which are made with Potatoes. I first heard about this from a friend with whom I share lunch box recipes. It is quite easy to make and works as a great lunch box item or a party item. How about making this for a quick Breakfast!


This month Groovy Gourmets are making Canapés. Canapés are basically bite size food. I totally loved that idea and decided to make these tots for the theme. I do not have mini muffin pans, the one that bakes 24 in a tray. I have the 12 hole one. The 24 hole one work even better cause the tots will be even smaller and hence more bite size. But who is complaining. When the food is so good, you do not mind a few extra bites, do you?


Adapted from here

Ingredients (Makes 6)

Zucchini/Courgette 1 grated
Large Egg 1
Cheddar Cheese Grated 2 tbsp
Mozerella Cheese Grated 2 tbsp
Seasoned breadcrumbs 1/4 cup
Salt and pepper to taste
Oil to brush the muffin tin

Method of Preparation

1. Preheat oven to 200 C.  Brush the muffin tin with some oil.

2. Grate the zucchini. Wring all of the excess water out of the zucchini.

3. In a bowl combine all of the ingredients and season with salt and pepper to taste.

4. Fill each muffin section to the top, pushing down on the filling with your spoon so it's nice and compacted so they don't fall apart when you take them out of the tin. I needed about 3 tbsp to fill my medium size muffin tin. It filled 6 holes.

5. Bake for 16-18 minutes, or until the tops are golden.I needed to bake for about 20 min. The original recipe used mini muffin tins.

6. Use a plastic knife or rubber spatula around the edges of each tot to remove them from the muffin tin.

Wednesday, 30 October 2013

Madras Mixture - South Indian Mixture - Diwali Snack - Step by Step Recipe


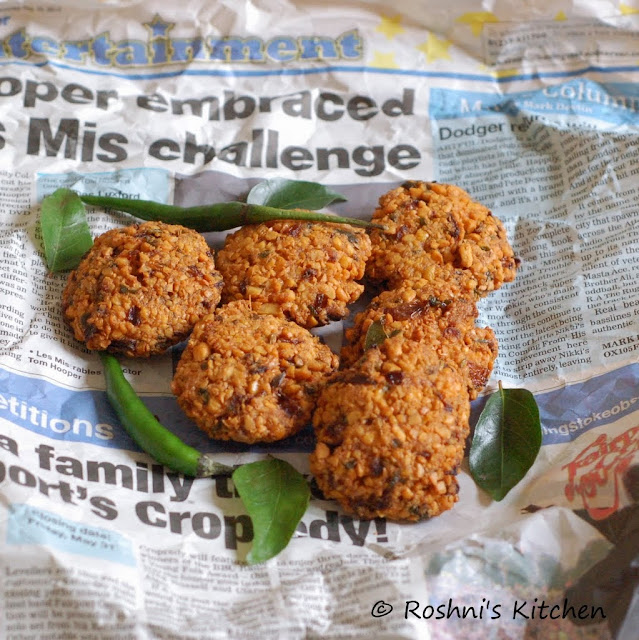
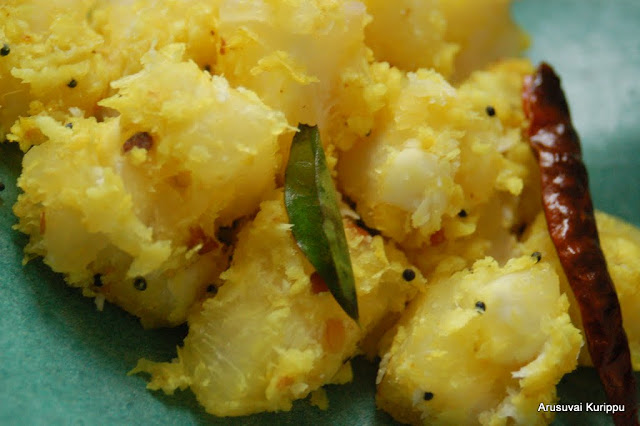
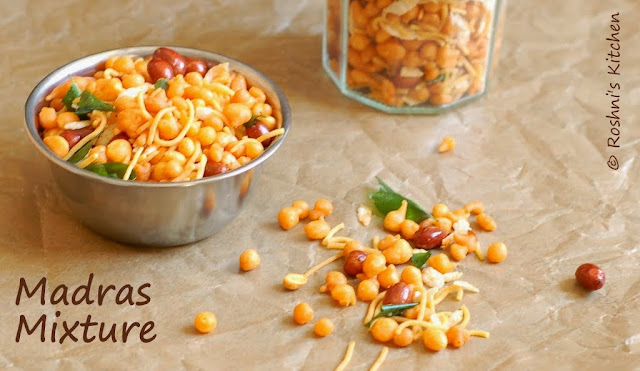
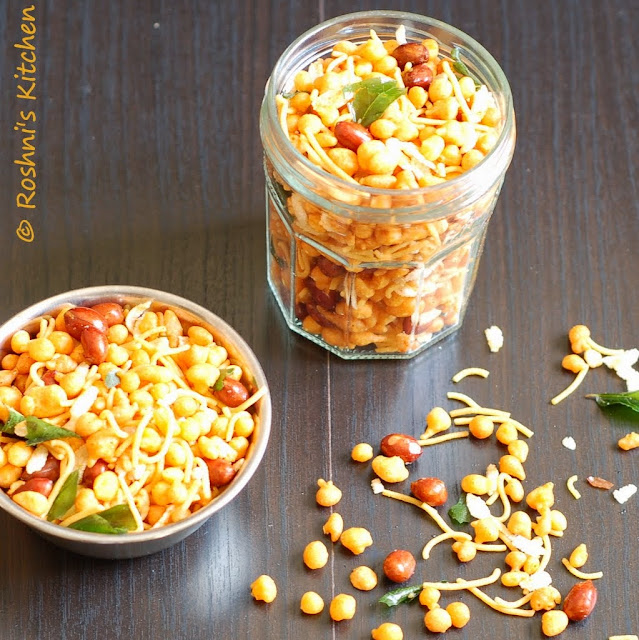
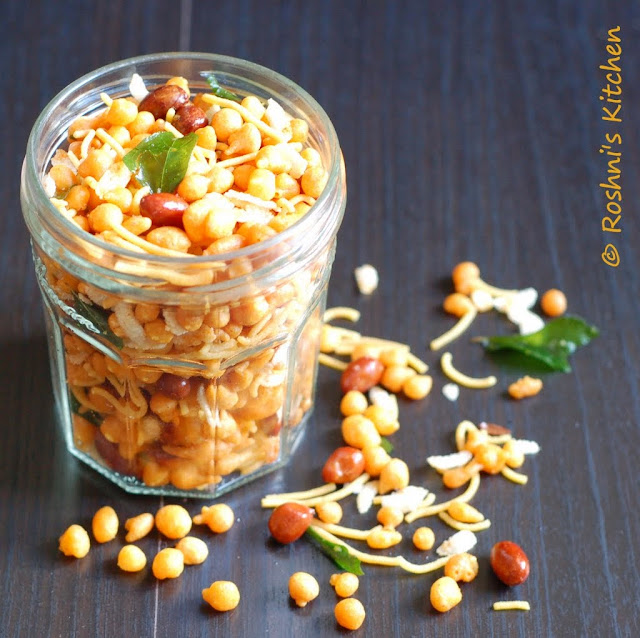
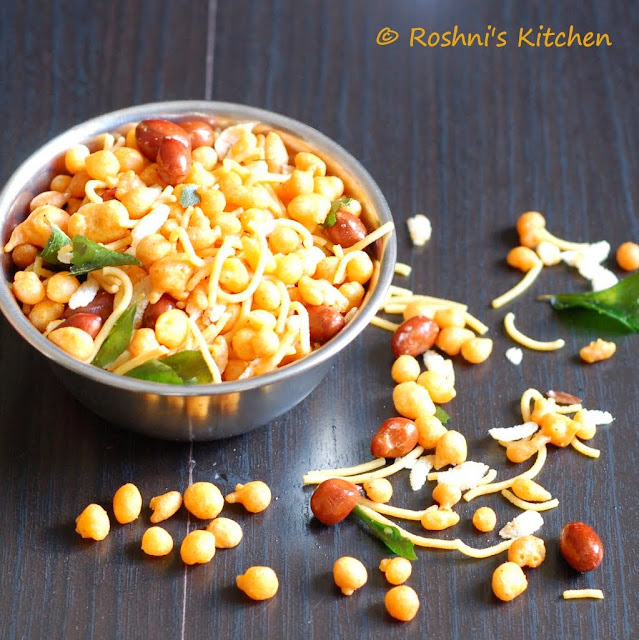
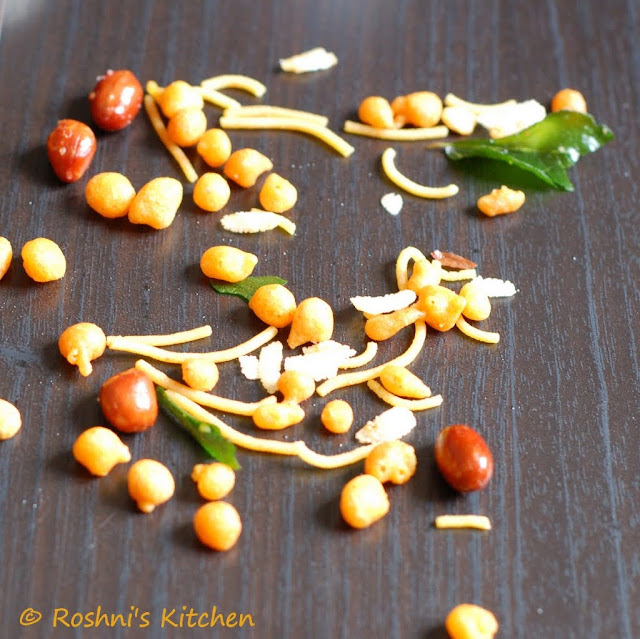
Mixture is a very popular Indian Snack. As the name suggests, it is a mixture of a lot of stuff! What goes into your mixture depends on who is making it. It varies also from place to place in India. Today I present to you the Madras Mixture. The main 2 components are the Boondi and Omapodi. Boondi is basically fried balls made from Chick pea flour. Omapodi (also known as sev) is little noodles made again from chick pea flour. The other components like Aval, Peanuts, Pottu Kadalai, Curry Leaves etc are added for enhanced taste.


My mother-in-law makes Mixture every year for Diwali. I have always wanted to try my hands on it. I did not have the boondi spoon required to make it till now. This time I got it and was waiting for Diwali to make it. It came out really good for me. Now I am thinking Boondi is probably one of the easiest things to make. No I am not kidding. Once you know what you are doing, it is quite fun to make.


I have prepared a big batch here. Do feel free to half the below recipe when you are making for 3-4 ppl.

Ingredients (Makes about 12 cups)

Boondi  (from 2 cups of besan) See recipe below
Omapodi (from 1 cup of besan) See recipe here
Peanuts 1.5 cups
Pottu Kadalai (Roasted Gram Dal) 1/2 cup
Aval/Poha/Beaten Rice flakes 1 cup
Curry Leaves 20-25
Chilli Powder 1 tsp (optional)
Salt a little

Oil for Deep Frying

Method of Preparation

1. Make boondi as mentioned below.

2. Make Omapodi as here

3. In the same oil add the peanuts in 2-3 batches and fry till it is roasted. It will take only a minute or less. Drain and keep aside. Be careful incase your peanuts burst.

4. Add the pottu kadalai and fry till it is roasted. Drain and keep aside.

5. Add the Aval and fry. This will be done in 5-10 sec. Drain and keep aside.

6. Finally add the curry leaves and fry for 5 sec. Drain and keep aside.

7. Add the peanuts, pottukadalai, and aval to a bowl. Add a little salt and chilli powder. Mix well.

8. Add the boondi and omapodi.  Mix everything well.

9. Finally stir in the Curry leaves.

10. Wait till everything cools. Store in an airtight container.

To Make Boondi

Ingredients
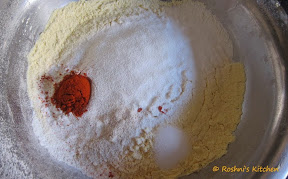
Besan/Chickpea Flour 2 cups
Rice Four 5 tbsp
Chilli Powder 2 tsp
Hing 1/4 tsp
Salt about 1 tsp (add to your taste)
Oil to deep fry

Method of Preparation

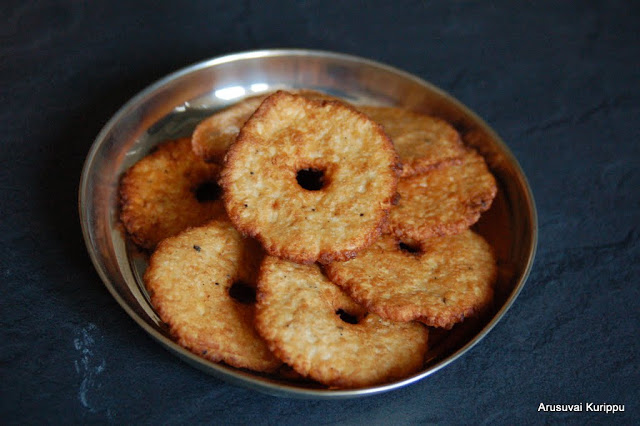
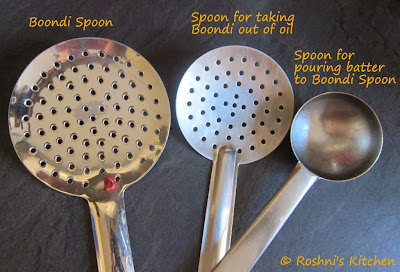
To prepare Boondi the first thing you need are these spoons


1. Sieve the besan and rice flour. Add the chilli powder, hing and salt. Mix everything together.


2. Add little water and mix well. Add more water to get a pouring consistency. I needed a little less than 1 cup of water. This will vary. Add very little at a time.


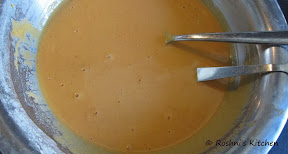
3. Once ready, dip the tip and let a drop fall into the hot oil. If it falls flat it means the batter is too runny add more besan (1 tsp at a time). If it forms a tail, it means it is too thick. Add a little more water (1 tsp at a time).


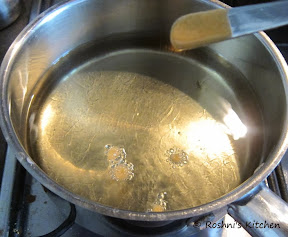
4. Now you are ready to make the boondi. Heat oil and then keep it at low.Pour a ladlde of batter on the boondi spoon. Gently do circular motion with the laddle to let the batter drip down to the hot oil.


5. Clean the boondi spoon and keep ready. Cook the boondi till it is done and using another laddle fish it out to a kitchen paper for the oil to be absorbed.

6. Repeat till all the batter is done. 

Tuesday, 27 August 2013

Baked Uppu Seedai - Salt Seedai (Cheedai)

Happy Krishna Jayanthi to all of you. Krishna Jayanthi (Gokulashtami) is a celebration of the birth of Lord Krishna. It falls in the Aug-Sept month. A lot of snacks that Krishna likes are prepared to celebrate. Young kids dress up as Krishna and Radha and perform dances. In the evening, Prasadam (all food prepared) is offered to God and little steps are drawn from outside to the prasadam to represent the foot prints of little Krishna (symbolic of Krishna coming and eating the snacks).

Uppu Seedai is a very popular snack made in Tamil Nadu for Krishna. Making it is quite easy. The dough balls are made as in the recipe below and deep fried. But it has a small problem. It is quite notorious for bursting while frying in the oil. I had an accident (minor one) last year and so I am very scared of making seedai now. Luckily I saw a message from a friend of mine  (latha), who said she made Baked Seedai. So I decided to give it a go. It was really good actually.


Ingredients

Rice Flour 1 cup
Roasted Urad Dal Flour 1 tbsp (see below)
Asafotida 1/2 tsp
Salt 1/2 tsp (or to taste)
Pepper Powder 1/4 tsp
Butter 1 tbsp (Just use oil for a vegan version, butter adds to the authentic taste)
Oil 2 tbsp

More Oil to brush

Method of Preparation

1. Dry Roast the rice flour in a low flame till the colour changes slightly and a nice aroma comes.

2. Dry roast the pealed whole urad dal. Let it cool and powder into a fine flour.

3. In a bowl, mix the rice flour, urad dal flour, asafotida, salt and pepper.

4. Add butter (at room temperature) and oil. Crumble with your hands.

5. Add little water at a time and make a stiff dough. I needed less than 1/2 cup of water. The idea is to make a dough that can be rolled into balls.

6. Preheat the oven to 200C. Line a baking sheet with parchment paper.

7. Make small balls (size of a marble). Arrange on the sheet. Brush a little oil on the balls.

8. Bake on the preheated oven for 20-30 min. I baked mine for 30 min. Check half way thru and give the tray a shake to get uniform baking.

You are looking for a Golden Brown colour for the Seedai. 

Tuesday, 23 April 2013

Medhu Vadai - Ulundu Vadai - Uzhunnu Vada


Medhu Vadai is also known as Ulundu Vadai and Uzhunnu Vada in Kerala. It is basically Urad Dal ground into a batter and deep fried. It is crispy on the outside and soft on the inside.


No festival meal in Tamil Nadu is complete without this Vada. Ofcourse, it can be enjoyed as part of breakfast with idli and dosa. Chutneys (coconut, mint etc) and sambar make a great accompaniment to these Vadas. Once you master the art of making these Vadas, you can make Sambar Vada, Thayir Vada (Dahi Vada) etc.


Ingredients

Pealed Whole Urad Dal 1 cup
Curry leaves few
Green chilli 1-2
Corn Flour 1 tsp
Salt to taste

Oil for frying


Method of Preparation

1. Soak the urad dal for about an hour. Drain water.

2. In a grinder, add the urad dal. Grind into smooth paste. Do not add any water. Just keep sprinkling water as the dal is getting ground.

3. Grind till it is a smooth paste. It took me about 10 minutes in my grinder.

4. Test that the dal is perfect - if you take a small pea sized ball and put it in a bowl of water, it should float. If you hold it upside down in your palm, it should not fall down.

5. Add the corn flour just before switching off so that it gets mixed well.

6. Transfer to a bowl. Cover and refrigerate for 30 minutes.

7. Finely chop green chillies and curry leaves. Mix it to the batter along with salt just before making Vada.

8. Heat oil to deep fry the vada.

9. Take a small portion of batter in your hand. Put it on top of a ziploc bag (Banana leaf or Milk packets used in India earlier). Pat it flat. Using your finger poke a hole in the centre.

10. Gently transfer it to the heated oil. Add 2-3 more to the pan depending on its size.

11. Cook on once side in medium heat till it is browned. Turn and cook on the other side as well.

12, Drain and transfer to a plate lined with kitchen paper.

Enjoy with some coconut chutney and sambar.

Tuesday, 12 March 2013

Kerala Style Egg Puffs


Puff is one thing we used to get a lot from our neighbourhood bakery along with plum cake (sliced and packed in paper wrapper). In those days, baking anything at home was not an option. We did not have an oven. When I moved to US, I found puff pastry sheets and learnt how easy it was to make puffs with these. When I made Croissants from scratch, i learnt the 'Lamination' technique of layering dough and butter. Now I appreciate how hard it is to actually make Puffs.

Puffs come in different shapes in my hometown (guessing same in most places), based on the stuffing. For eg, Veg puffs are always made rectangular like here. Egg puffs are made squarish by pulling the corners together. Chicken puffs are made triangular. Its easy for the baker and customer to not make any mistakes. I guess that is why they are shaped like that :-)

I have used store bought puff pastry sheets for this recipe.

Ingredients

Puff Pastry sheet 1
Eggs 3
Onion 1 big thinly sliced
Green chilli 3
Curry leaves few
Cumin/Jeera 1 tsp
Turmeric powder 1/2 tsp
Coriander powder 1 tsp
Oil and Salt as required

Method of Preparation


1. Heat oil in a pan. Add Cumin, green chilli and curry leaf.

2. When they sizzle, add sliced onions. Saute till it is nice and brown.

3. Add coriander powder, turmeric and salt. Mix well. Switch off after a few minutes. Split into 6 parts.

4. Boil water in a pan. Add some salt to it. (this will prevent the egg from leaking even if they collide and one of them breaks). Add the eggs. Cook for 10-12 minutes. Switch off. Drain water and add cold water. Let it sit for 5 minutes. Peal the eggs. Slice into 2.


5. Lay the pastry sheet on a surface. Mine was 15cm by 10 cm. So I cut them into 6 squares of 5 cm * 5cm. I felt it was slightly big. But cutting into 9 would have made it very little.

6. Place a portion of the onion mix on it.

7. Place a slice of egg cut side down.

8. Pull 2 sides and wrap over the egg. Usually, it will just reach. As mine were bigger squares, it wrapped around well.

9. Pull the other sides and cover the egg.


10. Place on a baking sheet lined with parchment paper.

11. Brush with some milk.

12. Preheat an oven to 200C. Bake the puffs for 15-20 min. Mine were done in 18 min.

13. Cool in a wire rack. Serve!

Sunday, 10 March 2013

Kappa masala - Marachini Thoran - Kappa Thoran - Tapioca tempered with Kerala Spices

Kappa or Marachini is a super healthy and super tasty root vegetable quite popular in Kerala. It usually grows in most backyards. It is a great combination with either Kanji (rice soup) or with fish curry. In most toddy shops (local bars), they serve Kappa, pickle and fish along with toddy. I had been meaning to make this for a while. When I saw the recipe posted here, I just could not stop myself from running to the Indian store.


Ingredients


Tapioca/Kappa/Marachini 6-7 cups (1 big kappa)
Coconut oil 2-3 tbsp
Mustard 1/2 tsp
Urad dal 1 tsp
Curry leaves 2 sprigs
Dry Red Chilli 5
Garlic 4-5 small pods
Coconut 3/4 cup
Turmeric 1/2 tsp

Method of Preparation

1. Peal the tapioca. To peal it, hold the tapioca on your left hand (if you are right handed) and knife on the right hand. Give the tapioca a gentle tap with the sharp side of the knife and give it a twist. The peal will come off. Repeat till it is completely pealed.

2. Now time to chop. Use the same trick as above. But this time, tap harder. The tapioca has a thread in the middle. We need to remove that. If you are finding it difficult to chop like mentioned above, just cut pieces around the centre. Discard the centre.


3. Wash well and drain.

4. In a pot add all the tapioca and fill it with water so that the water is above the vegetable.

5. Bring water to boil. Cook till the tapioca is cooked well. You want it to be cooked, but still holding shape. It will be done in about 10-15 min, depending on your root.

6. Drain the water and keep aside.

7. In a mixie, roughly pulse the coconut and garlic. You can add the chillies as well. I did not as I did not want it to be spicy for my little one. I added the chillies to the tempering.

8. In a pan, heat some coconut oil. Any oil will work. But coconut oil gives the dish its unique taste.

9. Add mustard. When it sputters, add curry leaves, red chillies and turmeric.

10. When it sizzles, add the coconut-garlic mix. Saute for a couple of minutes.

11. Add  the cooked tapioca and salt. Mix everything together and switch off immediately.

This can be enjoyed best with some Kanji (rice porridge) or with Fish curry (Check veg version here) or just as a snack on its own.


Check out Kanji and payaru, manga acharu, thenga chammandi and kappa


Sunday, 3 March 2013

Chickpeas Bonda

I had plans to make falafel. When it turned into a disaster, this Bonda was born. A Protein rich variation of Potato Bonda :-)


Ingredients (Makes about 30 small bondas)

Chickpeas cooked 3 cups
Parsley a handful
Chilli powder 1 tsp
Cumin powder 1 tsp
Onion 1


For batter

Besan 1/2 cup heaped
All Purpose Flour 1/2 cup heaped
Rice Flour 2 tbsp
Chilli Powder 1/2 tsp
Turmeric 1/4 tsp
Hing a little
Salt

Method of Preparation

1. Soak and cook chickpeas in a pressure cooker. I had soaked about 1.5 cups and got about 3 cups of cooked chickpeas. You can use canned chickpeas as well.

2. Drain water and add to a mixie. Pulse and transfer to a vessel.

3. Add finely chopped onions and parsley. Also add chilli powder and salt.

4. Mix everything together and roll into small balls. Keep aside.

5. Prepare the batter by mixing besan (chickpea flour), maida (all purpose flour), rice flour, chilli powder, turmeric, hing and salt. You can add some baking soda as well if you want.

6. Add a little water and make a thick batter.

7. Heat oil for frying.

8. Dip the chickpea balls in the batter. Add to the hot oil. Fry a few balls at a time.

9. Once it is nice and golden, drain from the oil and transfer to a kitchen towel.

Enjoy with your favourite chutney


Monday, 14 January 2013

Milagu Vadai - Anjeneyar Vadai - Hanuman Vadai

Anjaneyar temple in Nanganallur is quite famous. The deity is a 32 ft Hamunam carved out of a single stone. The neivedhyam there is Vada Malai (Garland made of Vadai). On an average 30-40 small garlends (about a couple of feet long) and 3 big garlands (head to toe of the hanuman) are offered by devotes each day. There is so much demand to book it. The small ones have atleast a month long wait and large ones are about a year long wait.

When I saw the recipe for Milagu Vadai in this site, I wanted to try it. I made it for Hanuman Jayanthi last Friday.

Milagu vadai uses the same dal (urad dal) as medhu vadai. But it is very thin and crisp.


Ingredients

Urad Dal (whole pealed) 1 cup
Rice Flour 1 tsp
Black Pepper 1/2 tsp
Salt 1 tsp

Method of Preparation

1. Soak the Urad dal for an hour.

2. Drain and let it rest for 30 minutes.

3. Grind into a coarse paste without adding water. Sprinkle a little water if need be. Transfer to a bowl.

4. Pulse the peppers and add to the bowl along with salt and rice flour.

5. Mix everything together.

6. Heat oil for frying.

7. Take a plastic sheet of paper or a ziploc bag. I just tore the ziploc and opened its 2 sides. Grease the paper with a little oil.

8. Take a small ball of dough. Place it on the sheet. Cover it with the other side of the ziploc (or another sheet).

9. With a small vessel (I used a steel dawara), press on the ball to get a thin disc like that of a thattai.

10. Open and then put a small hole in the centre.

11. Peal gently and transfer to the hot oil. Fry till both sides are cooked. 

Thursday, 11 October 2012

Peri Peri Nuts - Nandos style

AGC this month is kicking off with the theme - 5 ingredients or less. This is a bit of a challenge for me as I always have a few different things going on in my recipes. My husband on the other hand is of the type - less is good. But even he accepts that for some curries, all the different flavours going in give it the taste.

We are crazy fans of a restaurant called Nandos in UK. Recently came to know that they are open in a few cities in India as well. They are famous for their spicy peri peri sauce. It is just out of the world. It comes in different spice levels - mild, medium, hot and extra hot. I always go for the extra hot in my burgers. My husband sticks to the hot. Most ppl order medium or hot. So you get the idea. The best part is everything is grilled there. No deep frying.

Peri Peri nuts is something we always order to munch on while waiting for the food. The sad part is that we get a small cup of nuts for the £3 and we are always fighting for it. So I decided to make it at home as it is super simple to make once you have the sauce.


Armed with the sauce, I tried a few different times to get the timing, sauce and oil right. All the batches disappeared within minutes.

Ingredients

Almonds 1/2 cup
Oil 1 tsp
Peri Peri Sauce 2-3 tsp
Salt a pinch

Method of Preparation

1. Toss all the ingredients together. Arrange in a microwave safe plate and cook for 1 minute.

2. Take out and toss well. Add more salt if needed. Microwave for 30 more seconds.

3. Take out and check again. If required microwave for 30 more seconds. You will smell roasted almonds when it is done.

Mine was done in 2 min. When I tried a smaller batch with (1/4 cup) I needed only 1 min. So keep an eye on timing.


I enjoyed some peri peri nuts with my cup of tea and Ponniyin Selvan. For those who do not know what Ponniyin Selvan is - It is a historical fiction written in Tamil by Kalki. First appeared in a periodical called Kalki and then was published as a 5 part book. My Tamil is not strong enough to read that series. So I enjoy it in English. Reading for the third time now. Reading in Tamil is one of my things to do before I die.

Have you read Ponniyin Selvan and do you like it? How many times have you read the book?


Check out the other AGC thoughout this week 
AnushaJayanthiKavithaPriya MRadhikaVeenaPriya S

Linking this to Lets Cook - Protein Rich Food Event by Radhika

Linking this to What's with my cuppa - Event by Nupur

I saw a recipe of Piri-Piri Sauce online and am adding here for those who do not get it. It is a recipe  by jamie oliver and i have not tried it.

PIRI PIRI SAUCE

  • ½ red onion
  • 2 cloves of garlic
  • 1-2 bird's-eye chillies
  • 1tbsp sweet smoked paprika
  • 1 lemon
  • 2tbsp white wine vinegar
  • 1tbsp Worcestershire sauce
  • A bunch of fresh basil 

PIRI PIRI SAUCE: Peel and roughly chop the red onion and add to the liquidiser with 2 peeled cloves of garlic. Add the chillies (stalks removed), 1tbsp paprika, the zest of 1 lemon and juice of ½ a lemon. Add 2tbsp white wine vinegar, 1tbsp Worcestershire sauce, a good pinch of salt and pepper, the bunch of basil and a swig of water. Blitz until smooth.