Friday 28 June 2013

Kothamalli Thogayal - No coconut recipe - Super Spicy Recipe


Inspired by my Red Chilli Chutney, I made this Thogayal. Be warned that it is super spicy. You can make this very mild as well by reducing the chilli used. It is a no coconut recipe. So it will keep good in Fridge for a couple of days.

Ingredients

Coriander Leaves 1 big bunch
Onion 1
Whole Pealed Urad dal 1 tbsp
Dry Red Chilli 10
Tamarind 1/2 tsp
Hing a little
Oil and Salt to taste

Method of Preparation

1. Heat a little oil in a pan. Add chopped onions. Saute till it starts to brown.

2. Add urad dal. Let it turn slightly brown.

3. Add red chillies and saute for another min or two

4. Add all these to a mixie. Also add tamarind paste, hing and salt.

5. Grind into a smooth paste. Add coriander leaves and a little water. Grind into a paste

Makes a perfect side dish for idli and dosa!

Thursday 27 June 2013

Kerala Soya Stew - Vegetarian Chicken Stew - Kerala Ishtu - Side for Aappam - Vegan

Growing up in Kerala eating awesome food, Kerala Cuisine has a special place in my heart. I love the flavours that go in the dishes, the spices! Have I told you before that my favourite herb is curry leaf? Ofcourse, I have told you. Nothing gives me more happiness in the kitchen than the smell and sound of curry leaf sputtering when we do the tempering.


I have made a version of Stew before. Interestingly that is actually my first post for this blog. As I was just starting off, it got lost in the bottom of the pile.

Though I make Stew (or Ishtu as some people like to call it) often I always felt that my recipe was not the perfect one. I was always on the lookout for something that will take the humble Stew to a new level. That is when I saw the Chicken Stew recipe in this site. With so many Authentic Christian Dishes, this site is a perfect place to find Authentic Kerala Non Veg Dishes.


Well as you know I do not cook meat at home. So I had to do my own twist!! If you do not know, I have worked my way thru a lot of non veg dishes and made it into Veg (mostly Vegan) sides. Go ahead try some of it and I bet you will love it. Here is a list of some of those.

You can also make simple Potato Stew or Vegetable Stew as well using this method.

Ingredients

Soya Chunks 3 cups or use chicken if you want
Potato 1 big or 2 medium (about 1.5 cups cubed)
Peas 1.5 cups
Coconut Milk 1 can

Cinnamon 2 inch piece
Cardamom 4
Clove 4
Star Anise 1
Bay Leaf 1

Onions 2 sliced
Garlic 5 pods sliced
Green Chillies 4 sliced
Ginger 1 inch piece sliced
Curry Leaves 2-3 sprigs

Pepper powder 1/2 tsp
Garam Masala 1 tsp

To fry
Onions 1 sliced
Cashews 10-15

Oil and salt to taste


Method of Preparation

1. Heat water in a pot. When it comes to boil, add the soy chunks. Cook for 5-6 minutes. Drain. Add some cold water. When it cools, squeeze the soy chunks so that it does not have any water in it.

2. In a pan, heat some oil. Add cashews. Fry little till it browns a little. Remove to a bowl.

3. In the same oil, add 1 sliced onion. Saute till it is nicely browned. Keep it along with the cashews.

4. In the same pan, add the Cinnamon, cardamom, Clove, Star Anise and bay leaf.

5. When it sizzles, add sliced onions. Saute till it starts to brown.

6. Add sliced garlic, ginger, green chilli and curry leaves. Saute till the onions brown a little.

7. Peal and cube the potatoes. Add to the pan. Saute till it is almost cooked.

8. Add the drained soya chunks. Saute till it all roasted a little. If using chicken, add along with potatoes and let it cook completely.

9. Add steamed peas. Mix well.

10. Also add the pepper powder, garam masala and salt.

11. Take part of the coconut milk (about 1/2 to 1 cup). Mix with 1 cup of water and add to the pan.

12. Close and cook in low-medium heat till all the veggies are cooked and everything comes together.

13. Finally add the rest of the coconut milk and cook in low flame for 5 more minutes. Adjust seasoning as required at this stage.

Serve with some Aappam, Kerala Parota, Idiyappam. This will taste great as a side for Roti or Rice as well.

How better can I close this month's Palooza in a Pan cooking Lentils and Legumes that cook with my favourite Soya Chunks! Other recipes cooked so far this month

Mathanga Erissery - with Van Payar (Tatta payar, Red Chori, Cow Peas)
Mediterranean Vegan Sandwich - Chicke peas
Pasi Paruppu Paniyaram - Moong Dal 

Wednesday 26 June 2013

Whole Wheat Ceylon Paratas with Moong Sprouts - Kelangu Rotti - Srilankan Rotti


I had once prepared and posted a Ceylon Parata made with potatoes and chickpeas. It was a really tasty dish which does not even need any sides. This week when I had some sprouts, I thought why not try a similar rotti with it. And so I made this. It was quite good, though I would still vote for this one.


Avant Garde Cookies are making Srilankan dishes and I tried a couple that did not work out. So here is my choice. Will have to work on some more Authentic Srilankan Dishes.

Ingredients (Makes 10)

Wheat Flour 2 cups
All Purpose Flour 1 cup
Oil 2 tbsp
Salt to taste

For Stuffing

Onions 2
Potato 3 Boiled
Moong Sprouts 2 cups
Coriander Leaves 2-3 tbsp
Coriander Powder 1 tbsp
Red Chilli Powder 1 tsp

Oil and salt to taste

Grind to Paste

Ginger 1 inch piece
Garlic 6 pods
Cinnamon 1 inch piece
Clove 4
Star Anise 2
Fennel Seeds 1 tsp
Cumin 1tsp


Method of Preparation

1. Mix the All Purpose Flour (Maida) and Wheat Flour in a bowl. Add salt to it and mix well.

2. Add a little oil and the knead into a smooth dough by adding enough water. Remember that because of Maida it will require less water than regular chapatti dough.

3. Place in a bowl. Cover with cling film. Let this rest for a couple of hours.

4. Heat a little oil in a pan. Add finely chopped onions. Saute till it starts to brown.

5. Grind ingredients under - grind to paste. Add to the pan. Saute for a few more minutes.

6. Add moong sprouts and toss for a couple of minutes. Sprinkle some water and cover and cook till the moong is cooked.

7. Add salt, coriander powder and chilli powder. Mix well.

8. Finally garnish with some coriander leaves.

9. Divide the dough and stuffing to 10 parts.

10. Take one portion of the dough. Roll it into a big circle.

11. Add the stuffing and shape it into a square.

12. Fold the dough from left to right and right to left with a little overlap.

13. Fold from top to bottom and bottom to top with a little overlap.

14. Now it will resemble a parcel.

15. Heat a tawa and place the parcel on the pan. Cook on one side and then turn and cook on the other side. You can add a little oil or butter while cooking this.

Enjoy as is or with some raita. Another combination is a gravy called Salna. I will post recipe for that soon.


Check out the other AGC thoughout this week 
AnushaJayanthiKavithaPriya MRadhikaPriya S

Tuesday 25 June 2013

Lemon Drizzle Cake - Mary Berry's Lemon Drizzle Cake Recipe - Happy Birthday!

When I see all the fancy cakes baked by my friends, I always think I will bake it one day. But I guess that will just be a dream for me. No one in my family likes cakes with butter cream or fondant. So when it was time to bake a cake for my husband's birthday, I decided to bake the cake he wanted.


My son and I are having a blast baking different stuff lately. If left to him, we would be baking everyday. The new Kitchen Aid Stand Mixer is making the baking more fun. Well, I guess soon we will be carrying the weight of the Mixer on our bodies :-)


I have baked a few cakes before which were made without eggs. Those were tasty and we all loved it. As I cannot eat a lot of eggs, I personally loved them. But I have lately come to realize that to get light, fluffy cakes you need the eggs and butter. This was a super light, spongy cake filled with the goodness of lemon.


I made 2 cakes with 7" round cake tins. You can halve the below recipe and just make one of the 7" cakes. Recipe Adapted from Mary Berry's Recipe

Ingredients (Makes two 7" round cakes)

Large Eggs 3
Self Raising Flour 175gms
Caster Sugar 175gms
Softened Butter 175gms
Baking Powder 1.5tsp
Finely grated zest of 1 lemon

For the Lemon Drizzle
Granulated Sugar 100gms
Juice of 1 Lemon


Method of Preparation

1. Preheat the oven to 180 C (350 F).

2. Prepare the cake tins by greasing the bottom with some butter, line the bottom with a parchment paper and dust with some flour. Keep aside.

3. Beat together the eggs, flour, sugar, butter, baking powder and lemon zest until smooth in a large mixing bowl.

4. Pour the batter into the prepared cake tins. 

5. Bake in the pre-heated oven for about 20-25 mins, or until golden brown, shrinking away from the sides of the tin and springy to the touch.

6. While the cake is still warm, make the lemon drizzle topping. Mix together the sugar and lemon juice, and pour over the warm cake.

7. Leave to cool a little and loosen the sides of the cake, then lift the cake out of the tin. Cool on a wire rack. 

Sunday 23 June 2013

Pasi Paruppu Paniyaram - Moong Dal Paniyaram


Paniyarams are just awesome breakfast items. Super healthy, Super Tasty, Kid Friendly -What more can you ask for. This Paniyaram is just perfect cause it is mainly Moong dal based. No rice, just a little poha. If you love Paniyarams, bet you will love this as well.

Recipe from Sangeetha's blog.

Ingredients

Yellow Split Moong dal 2 cups
Poha/Aval 1 cup

Onion 1 finely chopped
Green chilli or red chilli 1-2 finely chopped
Curry leaf few finely chopped
Ginger 1 inch finely chopped

Salt and oil (if using)


Method of Preparation

1. Soak Moong dal overnight (or atleast a couple of hours).

2. Wash the Aval/Poha under a tap in a sieve till it is soaked well. If your poha needs more soaking time, soak that as well.

3. Grind drained moong dal, poha, green chilli or red chilli, curry leaf and ginger into a paste. Add very little water and make a very thick dough (like adai maavu, thicker than idli maavu). You can add more after the dough is prepared as well.

4. Mix finely chopped onions and salt to the batter.

5, Heat a paniyaram pan. Pour batter into the holes. Cook on one side. Turn and cook on the other side. Repeat for the rest of the dough. You can add a little oil to the holes if you want. I made some   batches with oil and some without. I think it tasted almost the same.

Serve with some chutney of your choice. A few chutneys that we love with paniyarams are below.

Tomato Chutney
Red Chilli Chutney
Naga Tomato Chutney (No oil)

Also check out the other variations of Paniyarams in my blog.

Authentic Paniyaram - not idli batter
Vegetable Paniyaram
Adai Paniyaram


This one is part of Palooza in a Pan. This month we are cooking with Legumes. Other recipes cooked so far this month

Mathanga Erissery - with Van Payar (Tatta payar, Red Chori, Cow Peas)
Mediterranean Vegan Sandwich

Saturday 22 June 2013

Stuffed Bell Peppers - Peppers Stuffed with Broccoli, Potato and Quinoa - Vegan Stuffed Peppers - Indian Flavoured Stuffed Peppers


I have been wanting to make Stuffed Peppers for ages. I somehow lack confidence when trying to make stuffed dishes. Another one in my list is Stuffed Okra. I cannot imagine how you can slit okra and stuff it with things without breaking it. When compared to that, stuffing pepper was a breeze. There is so much space to stuff :-)


Jayanthi, my friend has a lot of amazing recipes in her blog. The best part is, they are not your everyday stuff. Most of them sound quite Exotic! Had a hard time trying to choose a recipe from her blog for this month's AGC. I really wanted to make the Chocolate Caramel Brownie Cookies and Chocolate Baklava Cigars. But this recipe for Stuffed Peppers caught my attention. I made it for dinner yesterday and we all totally enjoyed it.


Ingredients

Red Pepper 3
Yellow Pepper 3
Onions 2
Tomato 2
Ginger 1 inch piece
Garlic 6 pods
Potato 2
Broccoli 1 head
Quinoa 1 cup (uncooked)

Coriander powder 2 tsp
Chilli Powder 1 tsp
Cumin Powder 1 tsp
Garam Masala 1 tsp
Turmeric 1 tsp
Cumin 1 tsp

Oil and salt to taste


Method of Preparation

1. Heat 2 cups of water in a pan. When it comes to boil, add the quinoa and cook in medium heat till all water is absorbed and quinoa is cooked.

2. Boil or microwave potatoes till they are well cooked. Peal and Mash.

3. In a pan, heat a little oil. Add cumin seeds.

4. When it sizzles, add finely chopped onions and saute till they start to brown.

5. Make a paste of ginger and garlic and add to pan. Saute till the onion mixture is nicely browned.

6. Make a paste of the tomatoes and add to pan. Cook till water is almost absorbed and tomatoes are cooked.

7. Add finely chopped broccoli and saute till it is partly cooked.

8. Add coriander powder, cumin powder, garam masala, chilli powder and turmeric along with some salt. Saute for a couple more minutes.

9. Add mashed potatoes and cooked quinoa and mix everything together. Cook for a couple of minutes and switch off. Let it cool.

10. In the meanwhile, prep the peppers. Using a small knife gently core the top of the peppers and remove the seeds from the inside. You can use a mix of red and yellow peppers or just use red peppers.

11. Stuff each pepper with a portion of the stuffing. You can brush a little oil on the peppers. Place on a baking sheet. Cover with Aluminium Foil, making small dents to let air escape.

12. Preheat oven to 200 C (400 F).

13. Bake the peppers till it is well cooked. It took me 1.5 hrs. It should have been done by an hour, not sure why mine were not. But the end result was fabulous. I turned them around a little bit. Also laid down a couple peppers in between.


The peppers can be enjoyed as a dinner or can be served as a side for Roti.


Check out the other AGC thoughout this week 
AnushaJayanthiKavithaPriya MRadhikaPriya S

Thursday 20 June 2013

Vegetable Kurma - New Recipe

Kurma makes a great combination for Aappam, Idiyappam and Parota. It can be eaten with rice or roti as well. I have made an array of Kurma recipes in my blog. Do check them all out. I have tried a slightly different recipe this time. Hope you enjoy it.

Navarathna Kurma
Paneer Kurma
Tomato Kurma
Peas Kurma
Nilgiri Kurma


Ingredients

Onions 2
Tomato 3
Potato 3
Mixed Vegetables 5 cups
Green Chilli 2
Curry Leaves few
Coriander leaves a little

For Paste

Mustard 1/2 tsp
Coriander seeds 2 tbsp
Cumin 1 tbsp
Pepper 1/2 tsp
Rice 1 tbsp
Channa Dal 2 tbsp
Fenugreek seeds 1/2 tsp
Clove 2
Cinnamon 1 inch piece
Star Anise 1
Fennel seeds 1 tsp
Ginger 1 inch piece
Garlic 6 pods
Curry leaves few
Tomato 1
Coconut 1/2 cup

Oil and salt to taste

Method of Preparation

1. Boil the potatoes. Peal and cube it.

2. Steam the mixed vegetables in the microwave.

3. Heat a pot and add all the ingredients for making paste, other than coconut and tomato.

4. Once it is roasted a little, add the coconut and tomato and roast for a few more minutes.

5. Add to a mixie and grind into a smooth paste adding a little water.

6. In the same pot, add a little oil. Add sliced onions.

7. Once it is sauted a little, add tomatoes and saute till it is cooked.

8. Add the paste and cook for a few more minutes. Add a little water if needed.

9. Now add the cooked vegetables and boiled potatoes along with some salt and more water if needed.

10. Bring to a boil. Simmer for a little while. Switch off and garnish with coriander leaves.

Tuesday 18 June 2013

Mediterranean Vegan Sandwich - Ciabatta, Chickpea Spread, Sundried Tomatoes, Artichoke Hearts and Aragula Sandwich


When you are going on a hike/walk, a picnic lunch is just awesome. Packing something when you leave house means, you can just walk miles and then when you get to a nice scenic spot, you can sit down and munch your heart away. I have tried quite a few Sandwiches. Though they come off ok, it always left me with a wish to do something better.

That was until I made this simple, yet amazing sandwich. It would not be an exaggeration to say that it is the 'Best Veggie Sandwich' that I have ever eaten. So what are you waiting for. Go ahead. Make yourself one.


Ingredients (Makes 7-8 rolls)

Ciabatta Rolls 8
Chickpea Spread (see recipe below) or use Hummus
Artichoke Hearts about 8-10
Sun Dried Tomatoes 8
Aragula/Rocket 2-3 cups (enough to top all the rolls)

For spread
Chickpeas 1 can
Mint 1/2 cup
Salt to taste
Oil as needed

Method of Preparation

1. Prepare the spread by adding chickpeas, mint and salt to the mixie. Add a few tbsp of olive oil to make a smooth paste. I used to oil from the sundried tomatoes.

2. Slice the Ciabatta rolls into 2.

3. Roughly chop the artichoke hearts and sundried tomatoes.

4. Apply a generous portion of the spread on both sides of the roll.

5. Top with some artichoke hearts and sundried tomatoes.

6. Add the aragula/rocket leaves.

7. Cover with the top of the roll

Enjoy the best sandwich you will ever eat in your life!!

This one is part of Palooza in a Pan. This month we are cooking with Legumes. Other recipes cooked so far this month

Mathanga Erissery - with Van Payar (Tatta payar, Red Chori, Cow Peas)

Thursday 13 June 2013

Triple Chocolate and Coffee Brownie - Father's Day Special - Eggless, Butterless Recipe


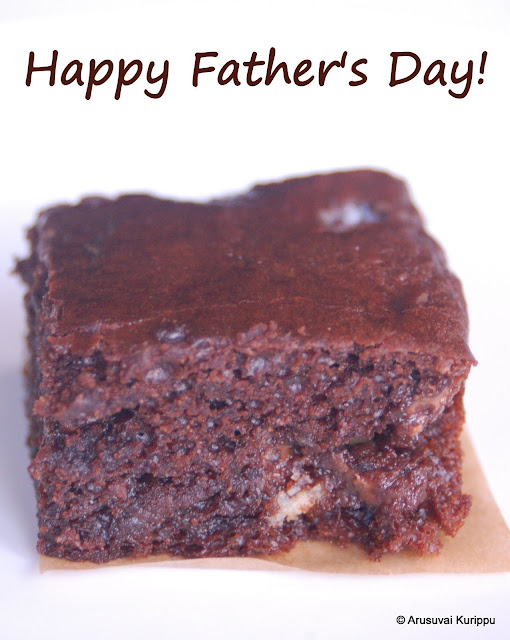
Father's day is round the corner and if you are looking for a recipe to work with your little one to make for his/her dad this is the recipe for you. The kids and the dad will love you for this. It is very simple to make. Just mix all the ingredients together, pour into a pan, Bake! How simple can it get... My son and I had a lot of fun making it and eating with his dad and my dad! Fun Family Day!


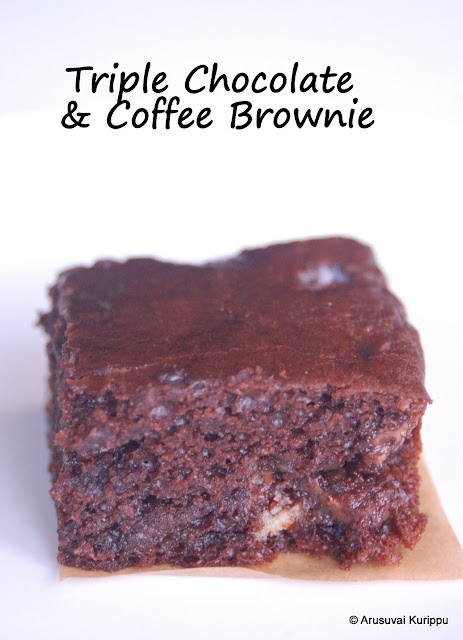
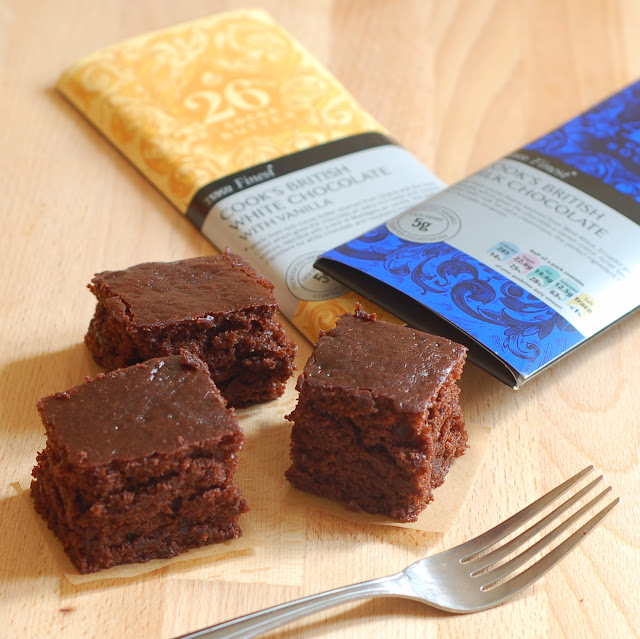
Just cause it is simple does not mean it is not tasty. Its just the opposite. It is 'Triple Chocolate' guys. Did you not read the title!!! Cocoa, White Chocolate and Milk Chocolate. Yumm! And why coffee? Well, coffee just brings out the best in chocolate. The slight bitter taste and the sweetness of chocolate make an awesome combo.


Brownies are kind of a middle ground between cakes and cookies, usually baked in square pans and cut into smaller squares (usually 16 of them). It tastes awesome just as is. You can pair it with a glass of cold milk when serving for kids. Or if you feel indulgent, warm brownies with a scoop of Vanilla Ice cream makes a perfect dessert! Don't you agree?


I had bookmarked a few recipes. And I wanted to try them all, they are all sooo good. But this one caught my eye cause it looked so chocolaty and dark and good. My friends Kavitha and Anu tried this and claimed this to be the best Brownie recipe ever. Now I had to try. I had been lately baking with eggs (recipes coming along, do wait). Which means I cannot enjoy a lot of them (intollerance, won't bother you with details). So I loved the fact that 'The Best Brownie Ever' was eggless! So here you go...


Ingredients
(I used measurements in gms, but have given measurements in cups as well for your convenience)

Dry Ingredients
All Purpose Flour 130 gms (1 cup)
Cocoa Powder 23 gms (1/4 cup)
Castor Sugar 90 gms (1/3 c + 2 tbsp)
Baking Powder 1 tsp
Baking Soda 1/4 tsp
Salt 1/4 tsp
White Chocolate 90 gms (chopped)
Milk (or Dark) Chocolate 90 gms (chopped)

Wet Ingredients
Warm Milk 1/3 cup + 2 tsp of coffee (Soy Milk for Vegan)
Yogurt 1/2 cup (Soy Yoghurt for Vegan)
Oil 1/4 cup
Vanilla Extract 1 tsp

Method of Preparation

1. Brush a 8 * 8 square baking pan with a little oil and line it with Parchment Paper (such that a bit of paper hangs out on two sides of the pan). This will help in easily taking the brownie out. Dust it with some flour.

2. Preheat oven to 150C.

3. Take 2 tsp of flour from the 1 cup of flour and dust the chocolates with it. This will prevent the chocolates from sinking to the bottom.

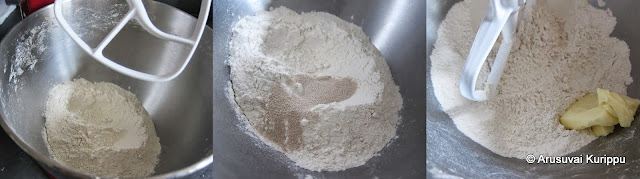
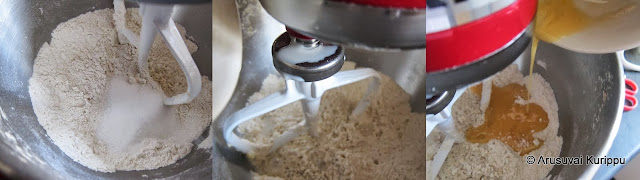
4. In a large mixing bowl, mix together all the dry ingredients (flour, cocoa powder, sugar, baking powder, baking soda and salt) other than chocolate.

5. In another bowl, mix the milk + coffee, yogurt, oil and vanilla.

6. Add the wet ingredients to the dry ingredients. Give it a mix till combined well.

7. Pour half the batter to the prepared pan. Spread it gently with a spatula.

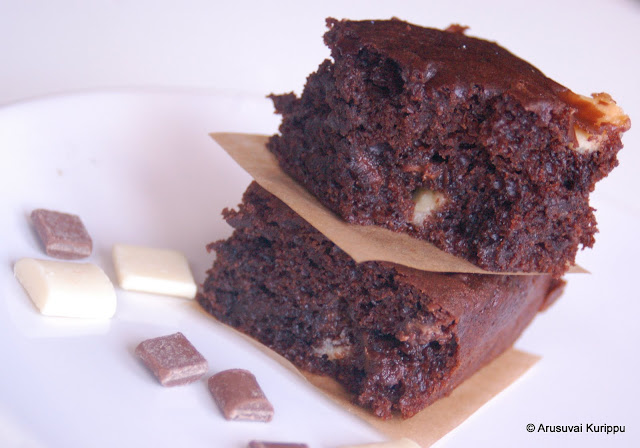
8. Add the white chocolates all over the top evenly.

9. Mix the milk (or dark) chocolate with the rest of the batter.

10. Pour the batter into the pan. Give the pan a tap on the counter to let any air bubbles escape.

11. Transfer to the over and bake for 30-40 min till a  toothpick comes out clean. I baked for 37 min.

(When I first checked at 30 min, the pick came out all gooy and I was a little worried. But then I realized that I had hit a chocolate. The other sections were quite dry. So do check at a couple of spots).

12. Take out of the oven and leave it in the pan for an hour. Well, this is the toughest part when baking with kids! :-)

13. Once cooled, take out of the pan using the parchment paper. Cut into 16 squares.

Eat away!!!

Wednesday 12 June 2013

Mint and Potato Parata - Flaky Flatbread Flavoured with Mint, Green Chilli and Potatoes

I set out to make a Mint Parata. And my husband tagged behind me and said, do add Aloo, won't you? Now you cannot deny a man (especially your loving husband) his wish, can you? But I did not want to make Aloo Parata. So I made this Mint Aloo Parata (Not Aloo Mint Parata). It has a dominant taste of mint and green chillies and potato is used as a binder.


Hope you will try it and enjoy this flavourful flaky paratas.


Ingredients (Makes 12 Paratas)

Wheat Flour 3 cups
Salt
Oil 1 tsp
Water as needed

Stuffing
Mint 2 cups
Potato 1
Green Chilli 2 (add more for a spicy parata)
Salt a little

Method of Preparation

1. Prepare the dough first. Add Wheat Flour to a bowl. Add salt and mix well. Add oil and mix. Add enough water and knead into an elastic dough. Cover and let it sit for an hour (atleast 1/2 an hour).

2. In a mixie make a paste of mint, green chilli and salt.

3. Boil, peal and mash the potato.

4. Mix the mint mix and potato. Divide into 12 portions. It will be very small marble size portions.


5. Divide the dough also into 12 portions.

6. Spread one and Apply a little oil on it.

7. In the centre spread one portion of the stuffing diagonally.

8. Roll like a cigar so that the stuffing is inside the cigar along its length.

9. Now roll the cigar like a rope.

10. Flatten and roll again into a circle.


11. Put in a tawa and cook by applying ghee on both sides.

This is not the soft kind of parata. It is more a flaky parata like the malabar parata. We ate it with the Sprouts Raita (recipe here)

Monday 10 June 2013

Raita with Sprouts

You do get bored making the same Onion-Tomato Raita every day, don't you? Well, nothing wrong with it. It is just awesome and I have to agree nothing can beat the taste of that.

But every so often we do need a change. When one of those waves struck, I made this Masala Raita a long time ago. It was loved by one and all.

Now it was time to experiment with some sprouts. And I have to say, it was way too good. No one would believe something as healthy as this could be this tasty. Perfect accompaniment to some Parata or Biriyani.


Ingredients

Onions 1
Sprouts 1 cup
Yogurt 1.5 cups
Water 1/4 cup (or as needed)
Salt to taste
Oil

Red Chilli powder a few pinches while serving
Chaat Masala a few pinches while serving

Method of Preparation

1. Heat a little oil in a pan. Add the onions and saute for a minute.

2. Add the sprouts and saute for a couple more minutes.

3. Transfer to a bowl and let it cool.

4. Whisk the yogurt well. Add a little water if needed. Add some salt as well.

5. Add the yogurt to the sprout mix. Stir well.

6. Serve topped with some chilli powder and chaat masala.

Avant Garde Cookies are making a dish starting with the first letter of their name. So with R it is Raita!


Check out the other AGC thoughout this week 
AnushaJayanthiKavithaPriya MRadhikaPriya S

Sunday 9 June 2013

Chaat Pulao


Do you love Bhel Puri? Then this is a recipe for you. I had plans of making Bhel Puri and then ofcource, that cannot be dinner. So I thought I will make some Vegetable Rice as well. Then it occured to me, Why not combine both these and make a dinner out it? I usually am a person who finds recipes and follows it. I do not get such brain waves often. I am just glad I got this idea. It was loved by one and all in our house.

It kind of gives the feel of eating bhel puri without it being predominantly all the oily fried stuff. The rice and vegetables up the health quotient of the Chaat without affecting the taste. Try it to believe it.


Ingredients

Rice 1.5 cups
Mixed Veg 3 cups

Oil
Peanuts 1/4 cup
Channa Dal 2 tbsp
Urad 1 tbsp
Cumin 1 tbsp
Turmeric 1 tsp
Hing 1/4 tsp

Mint handful
Green chilli 2-3
Water 1/4 cup

Tamarind chutney 2 tbsp

To serve

Onions
Mamra
Sev

Method of Preparation

1. Pressure cook the rice adding enough water. Make sure the rice is not sticky. Transfer to a big bowl and let it cool. Do not use a spatula as it will become mushy.

2. Heat a little oil in a pan. Add Peanuts, Channa Dal, Urad dal.

3. When they start to colour, add Cumin, Turmeric and Hing.

4. Add mixed vegetables. Saute till they are cooked. Mine was frozen. I thawed it in microwave for a 10 minutes before adding. Add some salt as well. 

5. In a mixie, add the mint leaves, green chilli and a little water. Make a paste. Add to the pot.

6. Add tamarind dates chutney used for chaats. If you do not have any handy, mix a little tamarind paste, sugar/jaggery and water. Add to the pot.

7. Mix it all well till the water is mostly absorbed. 

8. Switch off. Finally mix in the cooked and cooled rice.

9. For serving, add this rice to a plate. Top it it with loads of mamra and sev. Add some chopped raw onions. You can also add some coriander leaves and/or chutneys (mint/tamarind) if desired.

Enjoy!

Saturday 8 June 2013

Mathanga Erissery with Van Payar - Pumpkin Erissery - Pumpkin and Cow Peas cooked in a peppery coconut gravy

Erissery is a dish very popular in Kerala. No Sadya (festive meal) is complete without this. Though not as popular as Avial, this is a dish loved by all Malayalees.


There are a couple of variations to this dish. It can be made with a combo of Vazhakka (Plantain) and Chena (Yam) or with Pumpkin. I have already posted the Vazhakka Erissery. So today I have made the Mathanga Erissery.

The use of Cow Peas (Thatta payar, Van Payar, Red Chori) is quite optional. Some people like it and some don't. I never miss the chance to add loads of Lentils and Legumes in my dishes. So I have used 1 cup of cow peas. You can reduce it to 1/2 cup as well or skip it.

From this month on Anusha, Radhika and I are joining hands to party with our cooking pans - Palooza in a Pan. The idea is to cook 4 dishes of a theme exploring different things together. Am really excited about it. This month we are cooking with Legumes. Do check out my friends as well.


Ingredients

Pumpkin (or use Butternut Squash) 4 cups
Turmeric 1/2 tsp
Salt to taste

Cow Peas 1 cup

To grind to paste
Coconut 1/2 cup
Pepper 1/2 tsp (add 1 tsp for more spicy flavour)
Jeera/Cumin 1 tsp

To Roast
Coconut oil (or any oil) 2 tsp
Mustard 1 tsp
Coconut 1/4 cup
Dry Red Chilli 2
Curry leaves few

Method of Preparation

1. Soak the cow peas overnight and pressure cook by adding enough water for 1 whistle till it is cooked well, but retains its shape.

2. Cut the pumpkin into small pieces. Add 1-2 cups of water and boil till it is almost fully cooked.

3. In the meanwhile make a paste of coconut, pepper and jeera adding enough water.

4. In a small pan, add the coconut oil. Add mustard. When it sputters, add the red chilli and curry leaves. When it sizzles, add the coconut and saute in a medium-low flame till it is nicely browned. Keep aside.

5. When the pumpkin is ready, add the cowpeas and coconut paste. Add water if required. Bring to a boil and simmer till water is almost absorbed and everything comes together. About 5-10 min.

6. Finally add in the roasted coconut and stir well.

Serve with rice. We enjoyed it with some Roti today. It was also a good combination (unexpected)!

Friday 7 June 2013

Baingan Bharta with green peas - Mashed Eggplant with Green Peas in an Onion Tomato Gravy

I have made Baingan Bharta before and I got an idea to add green peas from my friend Sangee. So I made it with peas today. I also changed a couple of things like adding chilli powder instead of green chillies and making a puree of tomato before adding to the pan. 

This is a big hit in our house. Even if you use a lot of eggplants, you will end up with just a little paste. So add lots of onions to make up for quantity. The addition of green peas will also help you greatly. It brings some colour, texture and flavour to the dish.


Do check out my other version of Baingan Bharta here.

Ingredients (Serves 6)

Eggplant/Baingan/Kathirikka 4 big
Green Peas 2 cups
Jeera/Cumin 2 tsp
Onion 3 big finely chopped
Garlic 10 pods
Ginger 2 inch piece
Tomato 5

Garam Masala 3 tsp
Chilli powder 2 tsp
Turmeric 1 tsp

Oil and salt to taste


Method of Preparation

1. Preheat the oven to 230C. Line a baking pan with aluminium foil. Place the eggplant. Make a couple of slits on it. Brush the whole eggplant with a little oil. Bake in the oven for 25-30 minutes till the outer surface is roasted and wrinkled. I turned the eggplant once at 20 minutes.


2. Take out the eggplant and cool a little. Peal the skin and collect the inside part. Run a knife thru it and mash it. Keep ready.

3. While the eggplant is getting roasted, you can work on the gravy. Heat oil in a pan. Add cumin.

4. When it sizzles, add the onions. Saute till it starts to brown.

5. Make a paste of ginger and garlic. Add to pan. Saute.

6. Make a paste of tomato and add to the pan. Cook till it comes together. 


7. Now add the garam masala, chilli powder, turmeric and salt. Mix well and cook for 2 more minutes.

8. Add the roasted eggplant. Mix well. Mash it so that there are no lumps.


9. Steam the frozen peas in microwave for a few minutes to get it cooked. Add it to the eggplant. Mix well. Do not add earlier as you will not be able to mash the tomato-onion paste and eggplant. Add only at the end. 

Serve with rotis.

Thursday 6 June 2013

Lemon Sevai - Lemon Flavoured South Indian Rice Noodles


Sevai is basically South Indian Rice Noodles. Many people enjoy eating Sevai in different ways. Back home it is always Sevai and Mor Kozhambu. But in my husband's family, it is mixed variety sevai. I have already posted recipes for Coconut Sevai, Ulundu Sevai, Sprouts Sevai. This Lemon Sevai is another variation.


You can find the basic recipe for making white plain Sevai here

Ingredients

Sevai (made from 2 cups of rice, recipe here)

Sesame Oil (or any oil) 2 tbsp
Peanuts 2 tbsp
Channa Dal 2 tsp
Split Urad Dal 1 tsp
Curry leaves few
Green Chilli 2-3 chopped
Turmeric 1 tsp
Hing a little

Lemon Juice 2-3 tbsp (as per taste)

Method of Preparation

1. Heat a little oil (preferably sesame oil) in a small pan.

2. Add Peanuts, Channa dal and Urad Dal. Roast till it starts to brown.

3. Add Curry leaves, green chilli, turmeric and hing. Let it sizzle.

4. Add to the cooked sevai along with lemon juice and some salt.

5. Mix everything together. Mix very gently taking care not to mash it. Also, wait for the sevai to cool a little, about 10 min before doing the mixing.

Tuesday 4 June 2013

Cinnamon Sugar Donuts - Doughnuts - Raised Donuts - Step by Step Recipe - Donuts using KitchenAid Stand Mixer

Donuts or Doughnuts are basically Fried and Sweetened Bread or Cake enjoyed usually for Breakfast. It is made quite popular in US by chains like Dunkin Donuts and Krispy Kreme. It is made of flour, sugar, egg, butter and milk mixed together to form a dough. The other important ingredient is the rising agent. The Raised Donuts are made with Yeast as the raising agent giving it a bread like texture. Cake Donuts are made with Baking Soda as the raising agent giving it a cake like texture. 


Today I have made a Raised Donut. I will post the recipe for Cake Donut some other time. I have simply coated the finished donut with Granulated Sugar and Cinnamon. You can also coat with Glazed Sugar, Chocolate, Sprinkles, Stawberry Glaze, Vanilla Galze. The options are endless.

I have followed the recipe from Joy of Baking (Video Recipe). It is am amazing resource and I am surprised how I never knew about it before.


Today I also present to you the first recipe I made with my KitchenAid Artisan Stand Mixer.. Yes, I am the proud owner!! An Advance Birthday gift from my husband!!!


Ingredients


All Purpose Flour 21/4 cup (295gm)
Active Dry Yeast 11/2 tsp
Butter at room temperature 3 tbsp (40gm)
Granulated White Sugar 3tbsp (35gm)
Salt 1/4 tsp
Warm Milk 1/2 cup (120ml)
Large Egg 1 beaten

For Topping
Sugar 1/2 cup (100gm)
Cinnamon 1/2 tsp (more for a stronger taste. this was very mild)

Method of Preparation

1. In a large bowl whisk together 2 1/4 cups (295 grams) flour and the yeast. (If using a Stand Mixer, add the flour and yeast and using a flat beater mix for minute.)

2. Add the butter and rub the butter into the flour mixture until you have coarse crumbs. 


3. Stir in the sugar and salt.

4. Make a well in the center of the flour mixture and add the lukewarm milk and lightly beaten egg and stir until you have a ball of dough. Add more flour, a tablespoon at a time, if necessary.


5. Then transfer the dough to a lightly floured surface and knead until the dough is no longer sticky and is smooth and elastic (about five minutes). If using a Stand Mixer, switch the flat beater to a dough hook and continue kneading till you have a smooth elastic dough.


6. Shape the dough into a ball and place in a large lightly greased bowl, turning once. Cover the bowl with plastic wrap and let rise in a warm place until doubled (approximately 1 1/2 - 2 hours).

7. Place the dough on a lightly floured surface, and gently punch the dough to release the air. 

8. With a lightly floured rolling pin,roll the dough to a thickness of about 1/2 inch (1 cm). 


9. Cut the dough into about 2 1/2 - 3 inch (6-7 cm) circles, using a lightly floured doughnut cutter or cookie cutter (will need a smaller cookie cutter to cut out the center "hole"). 

10. Place the doughnuts on a lightly floured baking sheet, lined with parchment or wax paper. 

11. Gather up the scraps, roll, and cut out remaining doughnuts. You can keep the donut holes to fry separately, if you like. Loosely cover the doughnuts with plastic wrap (lightly butter or spray the plastic wrap with a non stick vegetable spray so the doughnuts won't stick) and let rise in a warm place until almost doubled (about 30-60 minutes).


12. Heat oil in a pan. The original recipe mentions 190C (375F). I do not have a Thermometer. So I just went by instincts!

13. Carefully place the doughnuts into the hot oil, about 2 to 3 at a time (do not over crowd). 

14. Fry each side until golden brown, about 45-60 seconds per side. The doughnut holes will only take about 30 seconds per side. Carefully remove the doughnuts from the hot fat with the end of a wooden spoon, tongs, slotted spoon, bamboo chopstick, or Chinese skimmer. 

15. Place on a baking sheet lined with clean paper towels. After a minute, roll the doughnuts in the sugar and cinnamon mix. These doughnuts are best freshly made.

I made about 12 - 3 inch doughnuts and 12 doughnut holes with the above recipe.