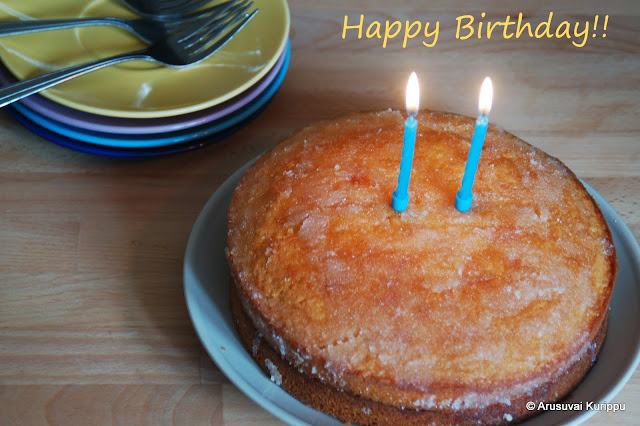
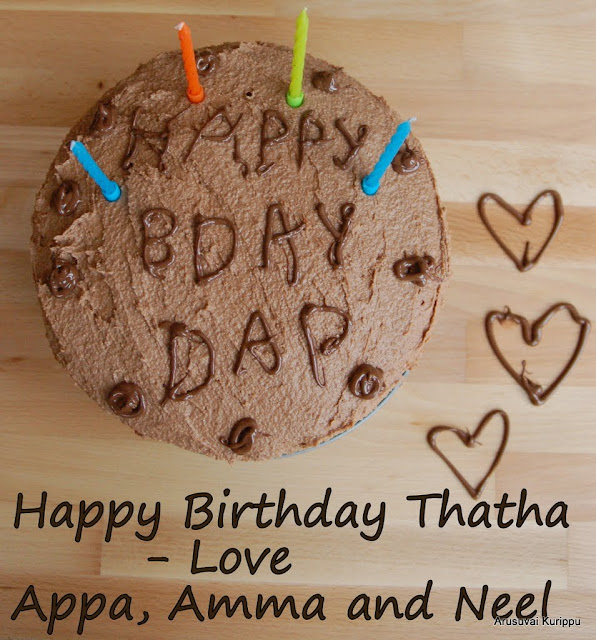
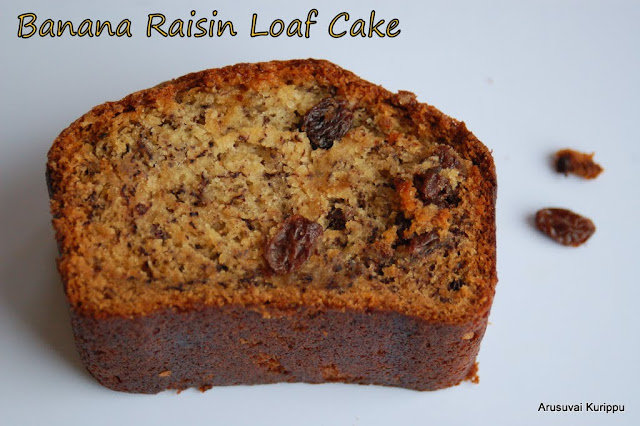
Showing posts with label Baking - Cakes. Show all posts

Friday, 17 July 2020

Vegan Starbucks Style Banana Bread


Ingredients 

Flour 2 cups (260 gms)
Sugar 1 cup (200 gms)
Baking Soda 1 tsp
Salt 1/4 tsp
Banana Mashed 1 cup (about 2-3 bananas)
Pecans (or use Walnuts as in Starbucks) 3/4 cup divided
Vanilla Extract 1 tsp
Oil 1/2 cup

Method of Preparation

1. Preheat oven to 175 C (350F). Grease and line a 2lb loaf tin (9*5*3 inches). Dust with FLour

2. Add all the ingredients to a mixer and beat well.

3. Pour into the pan.

4. Now the baking time is a little tricky. It depends on your banana, flour, oven etc. I have seen recipes saying from 45 min to 70 min. Mine baked for about 65 min. So please check occasionally and figure out what works best for you. 

Monday, 17 October 2016

Pineapple Upside Down Cake - King Arthur Flour Recipe

Pineapple Upside Down Cake is an American Classic. The light cake married with the sugar and butter topping is all you need to enjoy the sticky sweet dessert. Pineapple and cherries add an amazing flavour to the cake.

I may say this about a lot of cakes I make, but trust me this is by far one of the best I have baked. I baked it for the first time for my Husband's birthday a few months back. I have baked it a few times since and it has been a winnner always. If you like yours less sweet, do reduce the sugar in the topping a little. We loved it this way.


Tuesday, 11 November 2014

Star Wars Cake - R2D2 Cake - Vanilla Sponge Cake with a Vanilla Buttercream frosting - Step by Step pictorial

Happy 3rd Birthday to my blog! I am so excited that the little journey I began 3 years ago has brought me to this place in life. Though this year has been a little slow with respect to the number of recipes posted, it has been a wonderful year. The highlight of it is the Indian Food Bloggers Meet. I was able to meet some food bloggers who I have come to regard as some of my closest friends (and a little sad to have missed some of them).


When it comes to a birthday, there has to be a cake. I wish I could tell you that I am a big Star Wars fan and this cake is a dedication to that love. But no, the star wars fan is a my 5 year old son. And this cake was baked way back in July for his birthday. I traveled to India a couple of days after his birthday and never got to post it for you.

Tuesday, 4 March 2014

Chocolate Vanilla Marble Cake - Zebra Cake


Chocolate Vanilla Marble cake has been in my list of cakes for a long long time. Something about this simple butter cake is Magical. I found an interesting cake recipe and decided to follow it. This is my first cake/bake using the Bundt pan that I bought recently. I looked high and low for a decent priced Bundt pan and was glad when I found one in a nearby Supermarket.

Sunday, 2 February 2014

Vegan Naturally Coloured Red Velvet Cupcakes - Eggless Red Velvet Cake - No Artificial Colour

February is a month with Romance in the air. Whether you care or not, it is hard not to get caught up in the festivities. Valentine's Day is here and you might as well celebrate and enjoy! Now when it comes to celebration, what better way to celebrate than with a piece of cake?


Red Velvet Cake fits the romantic bill perfectly. The beautiful red colour contracted by the white frosting... hmmm, yumm!! The cake has a hint of cocoa and of course as the name suggests, it is red in colour. The frosting is usually Cream Cheese.

Tuesday, 21 January 2014

Lemon Madeleine - Traditional French Madeleines


Madeleines are soft cake/cookies from France. They are noticeable for their unique shell shape. They are spongy in the middle and slightly crispy on the edges. We were introduced to these yummy goodies way back in US when we were shopping in Costco. So it goes without saying that we bulk purchased loads of them and devoured them.

Wednesday, 25 September 2013

Peanut Butter Cupcakes with Reese's Peanut Butter Cups - 500th post

Peanut Butter Cups from Reese's (Hershey) is a family favourite. So it is no surprise that when my husband travelled to US last week that was what my little one and I wanted for Sweeties. My little one calls it 'the american chocolate'. I wanted to make something special for my 500th post and when he landed a couple of days ago with a bag of these, I knew I wanted to bake with them. Totally loved it.


Now coming to the milestone. You know I love you all for staying with me, reading all that I write, trying recipes, giving me feedback, and encouraging me. It been amazing journey. Every Milestone that I achieve is special. Its almost going to be 2 years (well couple more months to go). And I have enjoyed this journey thoroughly. Thank You all.


This post also is for the Palooza ( AnuRadhika and Me) Theme this month of making a couple of things in the muffin/cup cake pan. I wanted to do something that is not a muffin or cupcake for that. But this fits so perfectly. The last one I do for that theme will defenitely be something different. I promise (well, I will try).


Recipe from here

Ingredients

All Purpose Flour 163 gms (11/4 cup)
Baking Powder 1 tsp
Salt 1/4 tsp

Peanut Butter 2/3 cup
Butter 113 gms (1/2 cup)
Caster Sugar 150gms (3/4 cup)
Eggs 2
Vanilla 1 tsp
Milk 3 tbsp

Peanut Butter cups 12

Method of Preparation

1. In a bowl or stand mixer, add the peanut butter and butter. Cream them together.

2. Add sugar and beat till it is light and fluffy.

3. Add eggs one at a time and beat till combined.

4. Add the vanilla extract as well and mix.

5. Mix the flour, baking powder and salt in a bowl.

6. Add the flour and milk to the bowl and mix till combined. Do not overmix.

7. Scoop into lined cupcake tray. Use an icecream scoop to easily scoop the batter.

8. Place peanut butter cups on each cake and gently press it in.

9. Gently cover the chocolate with the dough from around it.

10. Preheat oven to 175 C (350 F).

11. Bake for 23-25 min till well baked.

12. It tasted great as is. But if you are really interested you can make a simple glaze.

Add 1 tbsp of peanut butter, 2 tbsp of powdered sugar and 1 tbsp of milk. Mix it all together till nice and smooth.  This should be enough to glaze 3 cupcakes. Top it with some chopped Reese's Peanut Butter cups.

Thursday, 8 August 2013

Dinosaur Cake (with the recipe for the Perfect Vanilla Sponge Cake)


My son wanted to do a Dinosaur Theme for his 4th Birthday! I ordered some balloons, banners, candles, plates, cups etc with that theme. Planned for a little tea party with his friends and their family. I have not made any elaborate cakes before. So the option was to order some fancy cake or to make a simple (no frosting one) at home.

With the new KitchenAid Stand Mixer sitting on my counter, ordering cake seemed wrong. So I was thinking of making something super simple. While looking online to see how complicated making a dino cake is, I saw a lot of 3D ones and I knew they were not for me. I suddenly chanced upon this one and this seemed alright. My husband promised me all the support and so we embarked on the cake making journey. Have to say it was not as bad as I thought it is going to be.

This cake also is for the wonderful group of bloggers part of Avant Garde Cookies (AnushaJayanthiKavithaPriya MRadhikaPriya S and Me). We cookies have cooked with each other for a whole year! Can you believe it, A Whole Year of Fun, Cooking, Clicking and Friendship! I am really thankful for having known each of you and all the chit chats that I have shared with you. I would not be writing this post with a cake if it had not been for your support and push! Love you gals!


I have made this Dinosaur cake with 2 round 7" Vanilla Sponge Cakes. You can make the same with other cakes like Chocolate cake. Also can be made with 8" or 9" cakes.

Ingredients (Makes two 7" round cakes)

Large Eggs 3
Self Raising Flour 175gms
Caster Sugar 175gms
Softened Butter 175gms
Baking Powder 1.5tsp
Vanilla Extract 1 tsp

Method of Preparation

1. Preheat the oven to 180 C (350 F).

2. Prepare the cake tins by greasing the bottom with some butter, line the bottom with a parchment paper and dust with some flour. Keep aside.

3. Beat together the eggs, flour, sugar, butter, baking powder and vanilla extract until smooth in a large mixing bowl.

4. Pour the batter into the prepared cake tins. 

5. Bake in the pre-heated oven for about 20-25 mins, or until golden brown, shrinking away from the sides of the tin and springy to the touch.

6. Leave to cool a little and loosen the sides of the cake, then lift the cake out of the tin. Cool on a wire rack. 

7. Leave it in the fridge for a few hours (or over night).

Butter Cream Frosting 

I did only a thin layer of buttercream and had about 1/3 of it left over.

Softened Butter 250gms
Icing Sugar 500 gms

1. Add the butter to a stand mixer. Give it a mix till it is softened.

2. Add the sugar a little at a time and mix till it is combined and is nice and creamy.

How to Assemble - use this template from Betty Crocker!

1.  Cut out Head and Tail from one cake (Though I baked a 7" cake, I just used the 9" template).

2. For body, cut 1-inch slice from edge of remaining whole cake. From cut edge, cut out a small inverted U-shaped piece. You can use the template for this as well.

3. Place body on tray; arrange head and tail pieces next to body.

4. Apply a thin layer of frosting called the crumb coat.

5. Apply the remaining frosting on the cake.

6. Decorate with chocolate buttons. Draw in eye and mouth (I was lazy to make a frosting, so just used some Nutella). 

Tuesday, 25 June 2013

Lemon Drizzle Cake - Mary Berry's Lemon Drizzle Cake Recipe - Happy Birthday!

When I see all the fancy cakes baked by my friends, I always think I will bake it one day. But I guess that will just be a dream for me. No one in my family likes cakes with butter cream or fondant. So when it was time to bake a cake for my husband's birthday, I decided to bake the cake he wanted.


My son and I are having a blast baking different stuff lately. If left to him, we would be baking everyday. The new Kitchen Aid Stand Mixer is making the baking more fun. Well, I guess soon we will be carrying the weight of the Mixer on our bodies :-)


I have baked a few cakes before which were made without eggs. Those were tasty and we all loved it. As I cannot eat a lot of eggs, I personally loved them. But I have lately come to realize that to get light, fluffy cakes you need the eggs and butter. This was a super light, spongy cake filled with the goodness of lemon.


I made 2 cakes with 7" round cake tins. You can halve the below recipe and just make one of the 7" cakes. Recipe Adapted from Mary Berry's Recipe

Ingredients (Makes two 7" round cakes)

Large Eggs 3
Self Raising Flour 175gms
Caster Sugar 175gms
Softened Butter 175gms
Baking Powder 1.5tsp
Finely grated zest of 1 lemon

For the Lemon Drizzle
Granulated Sugar 100gms
Juice of 1 Lemon


Method of Preparation

1. Preheat the oven to 180 C (350 F).

2. Prepare the cake tins by greasing the bottom with some butter, line the bottom with a parchment paper and dust with some flour. Keep aside.

3. Beat together the eggs, flour, sugar, butter, baking powder and lemon zest until smooth in a large mixing bowl.

4. Pour the batter into the prepared cake tins. 

5. Bake in the pre-heated oven for about 20-25 mins, or until golden brown, shrinking away from the sides of the tin and springy to the touch.

6. While the cake is still warm, make the lemon drizzle topping. Mix together the sugar and lemon juice, and pour over the warm cake.

7. Leave to cool a little and loosen the sides of the cake, then lift the cake out of the tin. Cool on a wire rack. 

Monday, 25 March 2013

Eggless Vanilla Sponge Cake with Nutella Buttercream Frosting


When you live far from your family, its very sad that you miss all birthdays, festivals etc. So I get super excited when we get to celebrate it together. My Dad, Mom and Brother celebrate birthdays within 12 days of each other. As a child I always used to feel left out as mine was a few months later. So this time of year is a Birthday time at our house. 

Interestingly, this is the second time in a row that I am able to celebrate my dad's birthday with him. Last year, I was in India at this time and this year he is visiting us.

Happy Birthday Daddy!!


I made this Eggless (cake is butterless as well) Vanilla Sponge Cake for his birthday. It is my first attempt to frost a cake. Very happy with what I made. Will keep working on my skills to get a perfect decoration next time :-)

This is a very simple recipe to follow and can be adapted to make any other cake if you wish. I have made it eggless and without butter. Well, the fact that the Buttercream frosting is loaded with butter beats the purpose. But then you can just make it without any frosting and enjoy it with tea/coffee in the afternoon. It uses Yogurt and Oil.

I do not need to sell the Nutella, do I? Have never seen anyone who does not like Nutella. Usually to eat nutella you do not need anything but the jar and your fingers :-). If that is not you, ok then the jar and a spoon. That is as far as I get with my jar. So to spare some to cook with it took some will power. I had some left over frosting. It was divine to just dig into it with a spoon.. Nope not a teaspoon, a tablespoon!!


I doubled all the measurements below and made 2 cakes in 7" round tins. Make sure all the ingredients are at room temperature.


Ingredients for 1 cake (7" round tin)

Recipe from Sharmis Passions

All Purpose Flour 1.5 cups
Yogurt 1 cup
Sugar 3/4 cup
Baking soda 1/2 tsp
Baking powder 11/4 tsp
Oil 1/2 cup
Vanilla Essence 1.5 tsp

Method of Preparation

1. In the mixing bowl, take the yogurt and powdered sugar. Mix well.

2. Add Baking soda and Baking powder and mix. Let it rest for 5 minutes till bubbles form on the top.

3. In the mean, while sieve the APF twice and keep ready.

4. Grease a baking tin and dust it with a little flour. Preheat the oven to 200 C.

5. When the yogurt mix is bubbled, add oil and vanilla essence. Mix again.

6. Add the flour and give it a nice mix till it is all incorporated.

7. Pour into the baking tray.

8. Bake for 10 min at 200 C and then reduce oven temperature to 180 C. Bake for a total of about 25-30 min. Mine was done in 29 min (next time I plan to stop at 28 min).


Nutella Butter Cream Frosting

Recipe from Kitchen Treaty

Ingredients

Butter 1 cup (about 250 gm)
Powdered Sugar 2 cups
Nutella 2/3 cup
Vanilla 1 tsp

Method of Preparation

1. Add soft butter at room temperature to a bowl. Using a hand mixer, whip it a little.

2. Add sugar and continue to beat till it is creamy. around 10 minutes.

3. Add the nutella and vanilla. Beat for a couple more minutes.

Nutella Butter cream is ready. Yummmmm

Assembly


Cool the cakes well. Place one of the cakes upside down. Apply a generous layer of the butter cream. Place the second cake base side down on top of the butter cream. Apply butter cream on the top and side. I used Nutella in a ziploc bag to write. Will buy some cake decorating and piping bags for next time :-)

Thursday, 7 February 2013

Eggless Carrot Cupcake

Happy Valentine's day to all of you. This month also marks a special occasion in our life. We also celebrate our 7th Wedding Anniversary.

Groovy Gourmets are making cupcakes this month. That would have been ok and fun thing to do (well you know me, have not baked many cakes. but i am not that scared anymore). It was decided we have to make cup cakes with frosting. Ok, you might ask what is the big deal. Big deal is no one at home wants to eat cupcakes with frosting. Well, no we are not a bunch of calorie conscious ppl. Even my little one does not like it.


I made a White chocolate butter cream frosting. I just topped a couple of cupcakes with it (that too not too successfully). You know why :-)

Found the recipe for cake here. I was not too sure how to reduce the quantity. It made 12 cup cakes and then with the remaining batter I just baked separately.

One good thing that came out of this was my little one eats loads of carrot hearts these days. :-)


Ingredients

Carrots 2 cups
White Sugar 1/2 cup
Brown sugar 1/2 cup
Vanilla Extract 1 tsp

Milk 3/4 cup
Oil 2/3 cup

Dry Ingredients

All Purpose Flour 21/4 cup
Baking Powder 1 tsp
Baking Soda 1 tsp
Salt 1/4 tsp
Cinnamon Powder 1/2 tsp
Cardamom Powder 1/4 tsp

Chopped Almonds 1/2 cup

Method of Preparation

1. Grate carrots and add to a vessel. Add the white sugar, brown sugar and vanilla extract. Mix well.

2. Add milk and oil to this and mix.

3. In a separate vessel sieve the dry ingredients.

4. Add this to the carrot mix and gently fold in.

5. Finally add the chopped almonds as well.

6. Preheat oven to 180C.

7. Pour the cake mix into a lined cupcake pan. Fill only up to 3/4 of the cup.

8. Bake for 15-20 min. Mine was done in 17 min.

Frost the cake with butter cream or cream cheese frosting. Or enjoy as is. It was a super moist cake and it disappeared the same day!


Checkout the other Groovy Gourmets @ JayanthiRadhikaVeenaAnamikaKaveri, Anusha, Vardhini


Monday, 3 December 2012

Eggless Peanut Butter Banana Muffin

I was watching a cooking show - Rachel Allen's Cake Diaries with my little one. She made a banana peanut butter muffin and my little one wanted to make those 'cup cakes'. I did not have the heart to tell him that they were not technically cupcakes, and they are muffins. To be honest even today I have not quite figured out the difference myself.

I googled and found this link for an eggless, butterless version of the same muffin and we made it together. My son says he made it and I was his helper. Well he did do most of the mixing and putting the ingredients in the bowl. All I did was measuring them out :-). This is turning out to be a cute mum and son thing.. loving it.


The 'cake' turned out very moist and soft. Really loved it. Do use the chunky peanut butter if you can, as the little bits of peanuts added to the taste of the muffin.

You can make this vegan by using soy yogurt. And for milk you can use soy milk or almond milk or even juice. The original recipe did use some juice instead of milk.


Ingredients

Ripe Banana 3
Chunky Peanut Butter 3/4 cup
Milk 1/2 cup
Yogurt 1/2 cup
Flour 2 cups
Sugar 1 cup
Baking Soda 1 tsp
Baking Powder 1 tsp
Salt 1/2 tsp

Method of Preparation

1. Preheat an oven to 190 C (375F).

2. In a mixing bowl, mash the bananas. Add peanut butter, yogurt and milk. Mix it all together with a wooden spoon.

3. Now add the rest of the ingredients and fold it in with a fork.

4. Pour into greased pan or in a paper lined pan. Mine is a non stick and I just poured directly.

5. Bake for 20 minutes or till a skewer comes out clean.

6. Cool in a wire rack.

Enjoy this healthy treat with evening tea or as a morning breakfast.


Linking this to Sangeetha's Show me your HITS - Festive Food hosted in my blog.


Friday, 19 October 2012

Eggless Banana Raisin Loaf Cake

For the second week this month, AGC are going Hush Hush. My partner for this month, Radhika gave me a cake with banana. :-) She is one who has always inspired me to bake especially with her Lets Bake event and also answering all my questions :-) Thank you Radhika for all the help so far.

When I looking for recipes to make an eggless banana cake, I looked all around. Then I thought - Radhika was not being fair. How can she give me a thing to make that she herself has not made. Then I decided to check at her blog again. And guess what, it is there. I just followed her recipe and baked this awesome cake.


Ingredients

Bread Flour (you can use APF) 11/4 cup
Salt 1/4 tsp
Baking Soda 1 tsp

Banana 2
Sugar 1 cup
Oil 4 tbsp (you can use melted butter as well)
Curd/yogurt 2 tbsp

Milk 1/4 cup
Vanilla Extract 1 tsp

Raisin 1/2 cup


Method of Preparation

1. Preheat the oven to 200C. Grease a loaf pan.

2. Sift the flour, salt and baking soda. Keep ready.

3. In a mixing bowl, add the mashed banana, sugar, oil and yogurt. Mix well. I mashed with a spoon and then went in with the hand mixer.

4. Now add the milk and vanilla extract. Mix well.

5. Add in the dry ingredients. Mix well.

6. Now finally fold in the raisins. You can add tutti fruity or nuts as well.

7. Pour into the baking tray and bake for 40 minutes.

8. Let it cool completely and then slice and enjoy.


Check out the other AGC thoughout this week 
AnushaJayanthiKavithaPriya MRadhikaVeenaPriya S

Linking this to What's with my cuppa - Event by Nupur

Linking this to I Love Baking

Sunday, 24 June 2012

Eggless Mango Cake with Shrikhand and Mango topping

I did it!!! I did it!!! I did it!!! For anyone wondering what I really did do, it is just that I baked a cake :-) You might wonder what's the big deal. It is a big deal to me cause this is my first cake.

Happy Birthday to the love of my life, my darling, my husband!


A special thanks to the lovely ladies who passed on the recipe to me. I had narrowed down on a Vanilla Sponge Cake for this occasion. I thought that will be the best thing to make as that is the simplest cake and should have been the first cake I tried before all my failed attempts. That was when fate intervened.

My son said he felt like eating mangoes. We were out of mangoes at home. So though I did not plan a trip, we drove to the Indian store and got a box of Mangoes. Sangeetha blogged about a microwave mug mango cake the next day. From her page, I went to the source of her recipe at Shoba's blog. I felt that this is the cake I need to make. Gave it a shot and made a perfect cake. We all loved it.

I first thought of making a butter cream frosting. I did not want to do too many things at the first go. But I did not want it to be served plain as well. That is when the idea struck me. I served it with some Shrikhand. It paired well with the mango and cardamom flavour in the cake.


Now off to the recipe

Ingredients
All Purpose Flour 1 1/4 cup
Baking Powder 1 tsp
Baking Soda 1/2 tsp
Salt a pinch

Mango Pulp 1 cup. I used 2 small alphonso mangoes
Sugar 3/4 cup. I used powdered sugar
Milk 1/4 cup + 1.5 tbsp
Oil 1/4 cup
Cardamom 3/4 tsp

Chopped Almonds 1 tbsp (I would recommend 2 tbsp)


Method of preparation

1. Sift the flour, baking soda, baking powder and salt. Keep aside.

2. Preheat the oven to 175C. Greese a 7 inch round baking pan and keep ready.

3. In a bowl mix together mango pulp, powdered sugar, milk, oil and cardamon. I used a handheld electric whisk for a minute or 2.

4. Add the flour mix little at a time and blend in slowly. Add the chopped nuts and mix.

5. Pour the mix to the baking pan. Bake for 25-30 minutes till a cake tester comes out clean.

Serve it topped with some Shrikhand and mangoes.


Recipe for Shrikhand


Ingredients

Curd/Yougurt 500 gm (Made about 1.5 cups of Hung curd)
Sugar 1/2 cup powdered
Cardamom powder 3/4 tsp
Pista 1 tbsp chopped
Almonds 1 tbsp chopped

Method of Preparation

1. Make hung curd from the curd by hanging it from a muslin cloth to remove excess water. I used Greek Yogurt to get a nice thick curd.

2. Add the rest of the ingredients to curd and mix well.

3. Refrigerate and serve.

It would have been good if I made Mango Shrikhand. I did not have enough mangoes. Do check out the recipe for Mango Shrikhand in my precious post.


Linking this to I love Baking
Linking this to Lets Cook - Kids Special
Linking this to EP - Herbs and spices - Basil and Cardamom Event by Julie, hosted by Prathibha


Monday, 5 December 2011

Baking Disaster

Story of my baking -

Planning - Planning started a couple of months ago. I had decided it is high time I did some baking. What am I scared of. When we were in US, I did try making muffin a couple of time and cake once. It came out ok. I remember being stressed. So I went to the store. Walked the isles a few times. So many options. All look the same. What to buy. Bought a few stuff. Came home. That was last week.

Saturday morning - Oh, I did not get x and y. Back to the store. Bought all that. All set.

Sleep deprived me the whole of saturday night. Had nightmares of me falling into a pile of raisins (you guess right, I was going to make a fruit cake). Then I kept stirring at the batter till it woke me up cause I thought I was burning my cake. You guess it, I thought of all possible things including baking myself inside the oven. It will be all fine - I kept telling myself.

Woke up in the morning. Was in a crappy mood. I kept telling my husband - I am scared. Please make everything alright. He was being supportive, poor guy. Hung around in the kitchen while I was trying to make breakfast.

Then realized, I did not have the right tray. Back to store. It was so cold yesterday. Walked all the way and back cursing myself for not getting it yesterday.

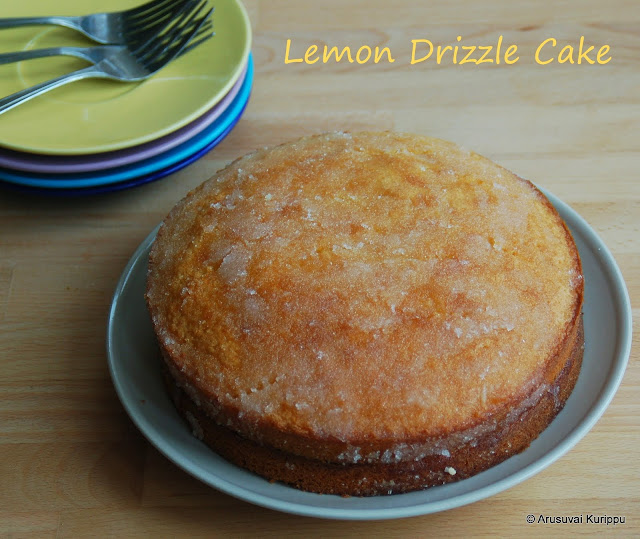
Baking - I decided to use 
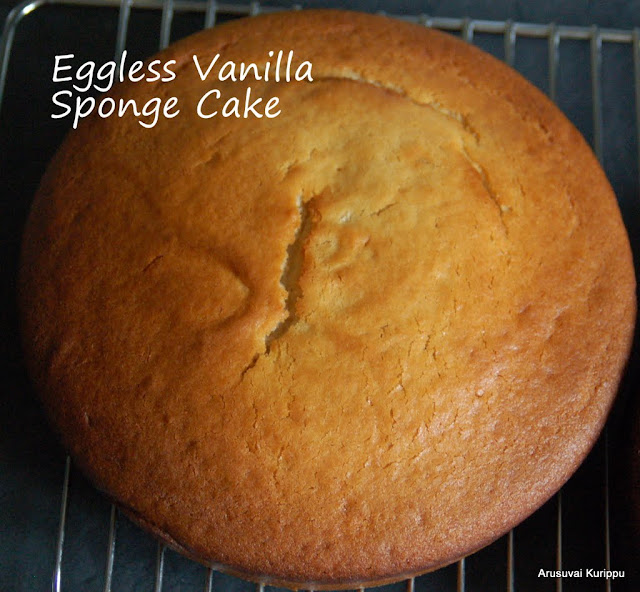
Priya's recipe. I have been following her blog for some time now and like her recipes. She made it all sound simple. Mixed everything up. Greased the pan, poured batter and put it in the oven. Waited for 35-40 min.

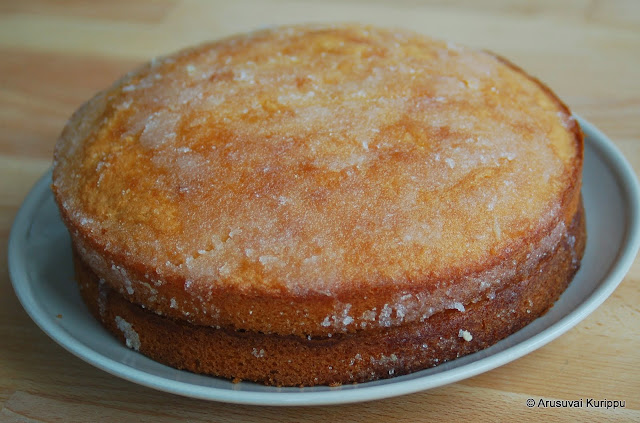
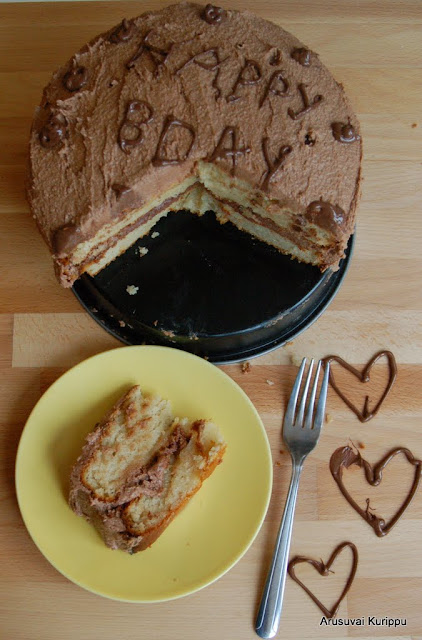
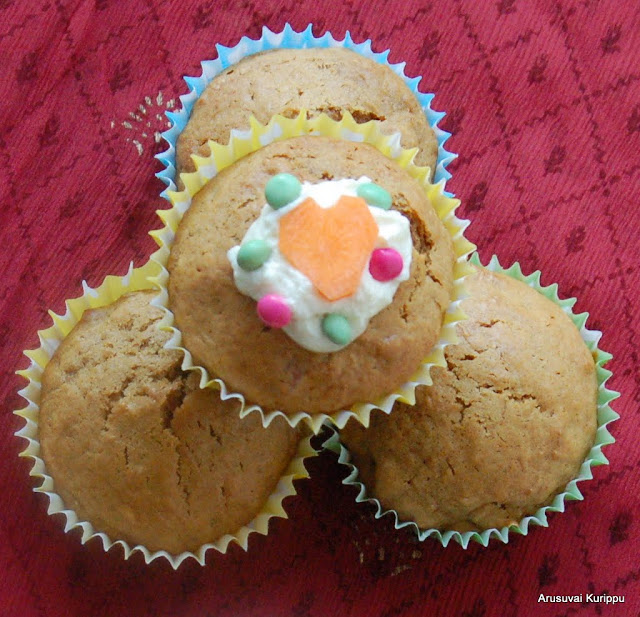
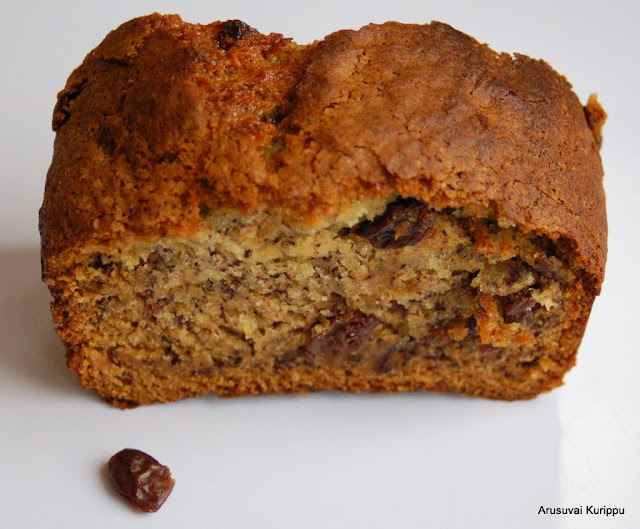
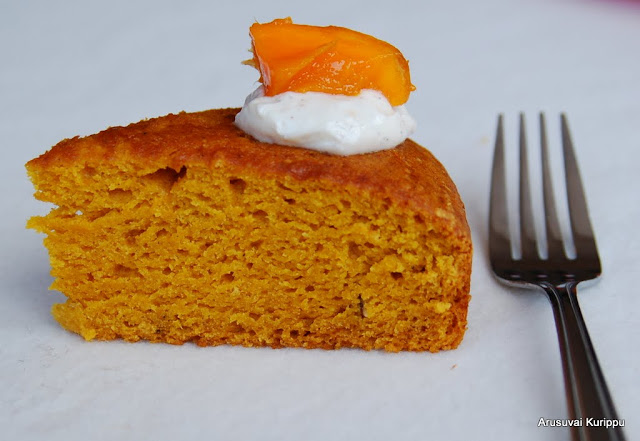
Result - The centre of the cake was falling apart. The hard part tasted so good. I wish the whole cake had come out good.

Possible faults - This is based on what I think I did wrong and also on googling.

1. I may have stirred the batter after adding everything a little too long
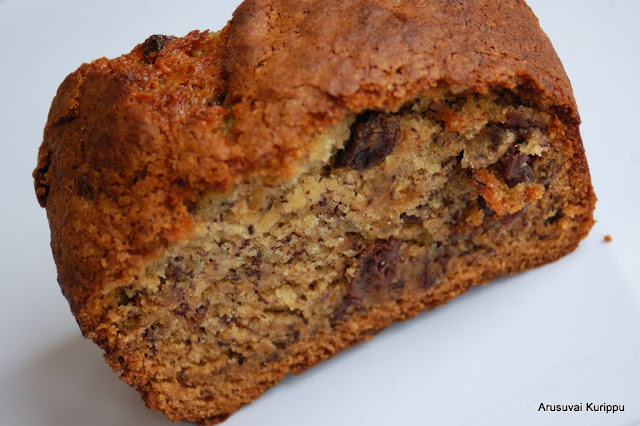
2. I set the oven to 350F (175C). Should I have reduced the temp? The outside of the cake was all browned up and the inside was mushy
3. I did not let the cake cool before I turned it over. After I took out of the oven, I kept it for a few minutes. Could not wait to see what had happened. No patience you see.
4. I did test with a cake tester. The pin came out wet at 35 minutes. But when I tried at 40 min, it was dry. May be I hit a dry patch :-(

Anyways, the end result is really buttery and fruity cake in the parts that was hard. And the rest was all guey :-( Now I am looking at the experts in the blogging world to help me... PLEASEEEE... I do not want to give up. What can I do to make it alright next time???

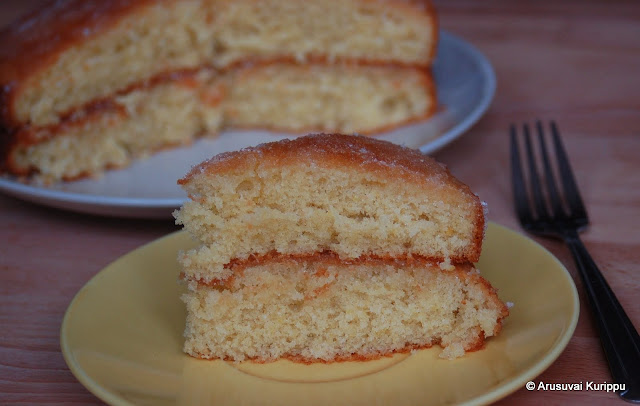
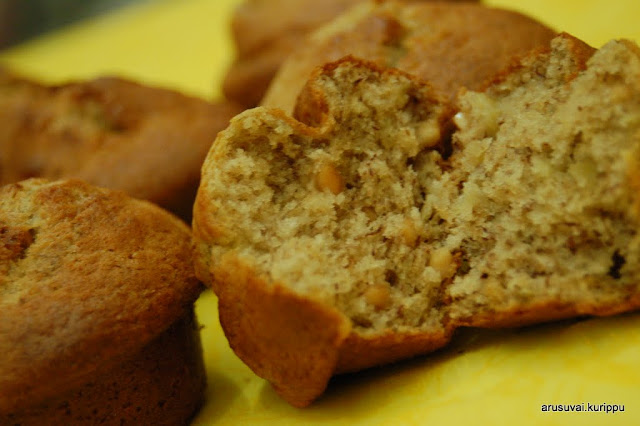
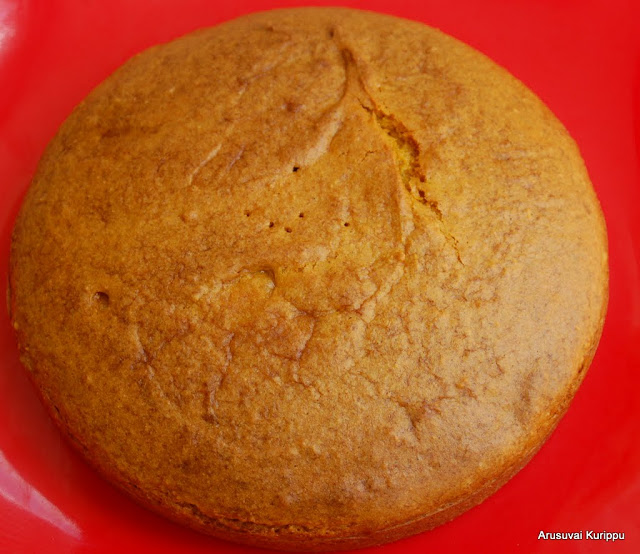
This is the upside down photo after I tipped it from the pan. See how the centre has a dip


Check the stickiness of the cake. some portions were worse than this.