Thursday 31 October 2013

Mysore Pak - Ghee Mysore Pak - Diwali Sweets - Easy Foolproof Recipe


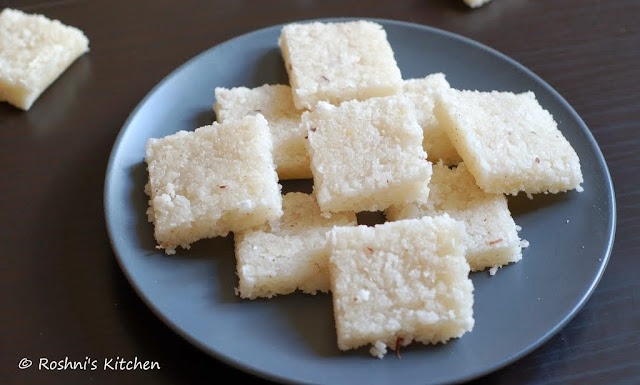
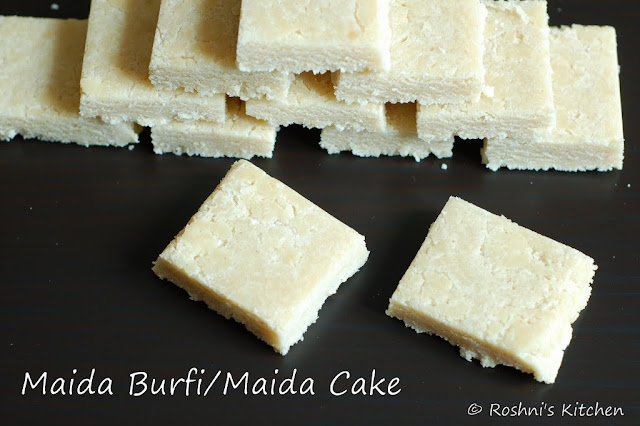
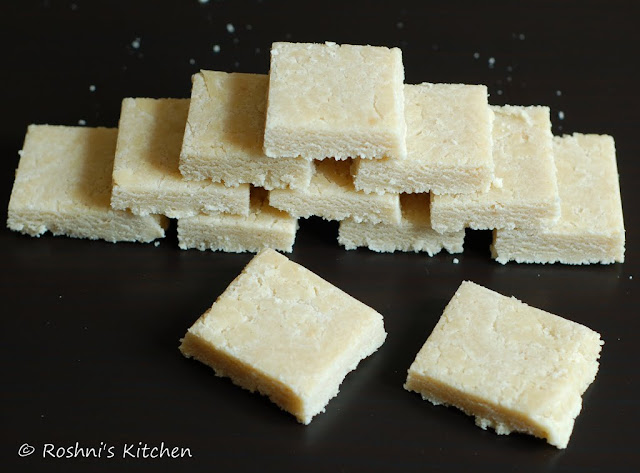
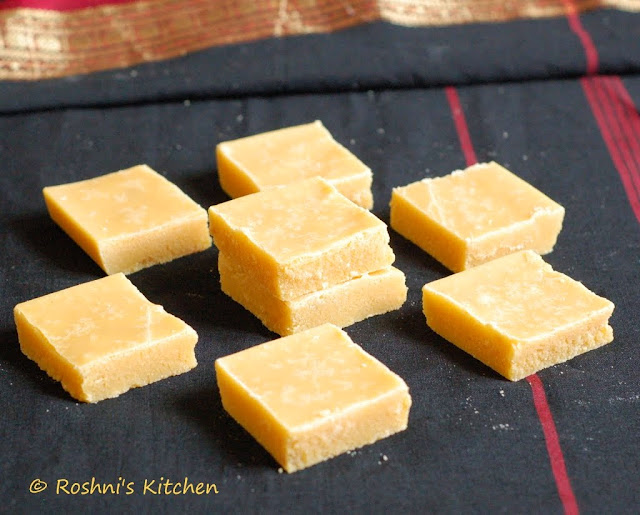
Mysore Pak is a very popular South Indian Sweet made with Chickpea Flour. It just has 3 ingredients - Chickpea Flour, Sugar and Ghee. Growing up I always saw my mum make mysore pak with such ease that I thought it was the easiest sweet ever. When I first moved out of my house for work, I made Mysore Pak for my first Diwali. I had my mom on phone all the while :-)


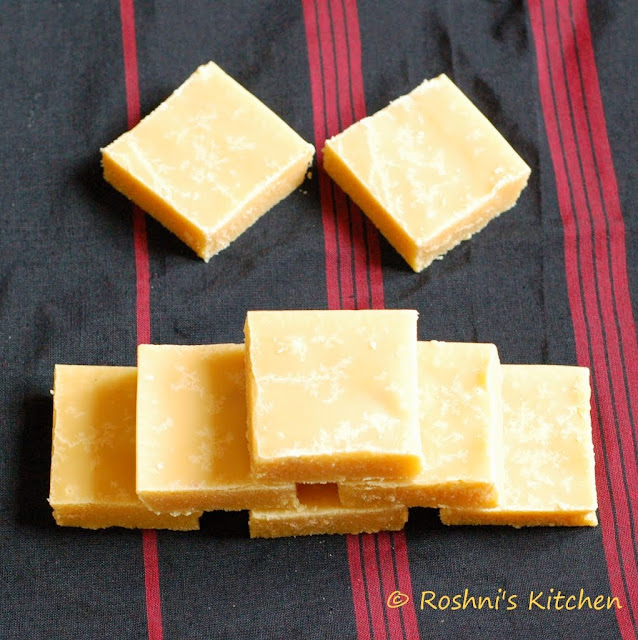
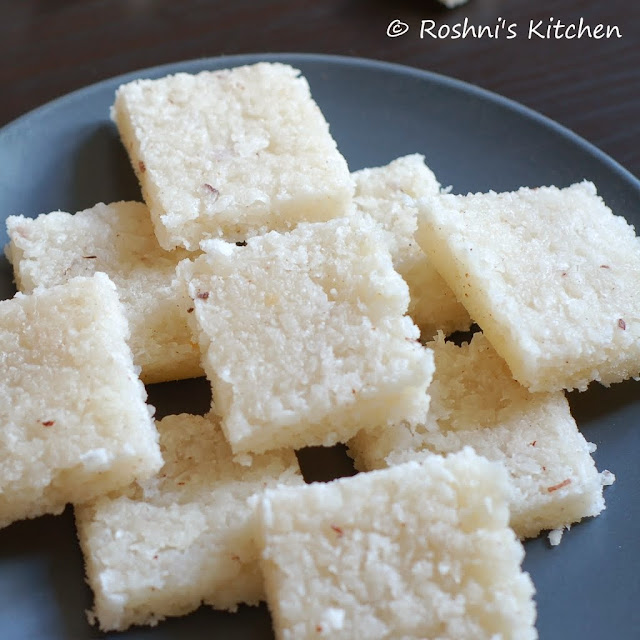
There are 2 kinds of Mysore Pak. One is called the Ghee Mysore Pak which as the name suggests will be soft and dripping with Ghee. The other kind is the Porous Mysore Pak also called Honeycomb Mysore Pak. It has a beautiful porous texture cause of the tiny air bubbles trapped inside. There is no argument as to which one is better. There are people who love both. I will post recipe for Porous kind some other day.


Now coming to this Mysore Pak recipe. Most people find making mysore pak very daunting. You have to know about the 1 string, multi string etc. (need to know more about what it is, read here). This recipe calls for none of that. I learned it a few years ago from a colleague's wife. I have been making it this way for years now and never had a bad lot.


Ingredients (Makes 16 pieces)

Chickpea flour (Besan) 1 Cup
Sugar 1.5 Cups
Ghee 1 Cup (Use upto 2 cups if you like. for me 1 was good enough. i have made with 2 cups and it will be wet with ghee and awesome. you can try that as well sometime!)

Method of Preparation

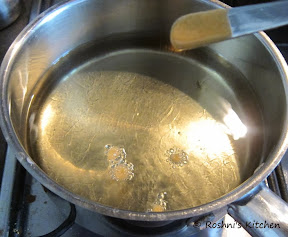
1. Melt the ghee in a pan and keep it warm and ready. Grease a 7*7 square cake tin (or any plate) ready.

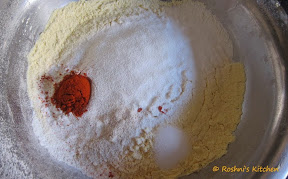
2. Sieve the chickpea flour well. In a heavy bottomed pan, add the besan and roast it till the raw smell is gone. It will take around 3-5 min. Keep aside in a bowl.

3. Add 1/2 cup of ghee to the besan. Mix well till there are no lumps. You can optionally cool the besan and then sieve it one more time before adding ghee.

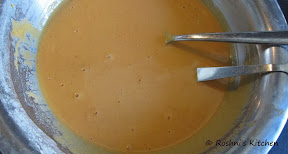
4. In the same pan, wipe with a cloth and add the sugar along with 3/4 cup of water. Mix well.

5. Let the sugar mix come to a rolling boil. Switch off.

6. Add the besan-ghee mix to the sugar and mix well.

7. Put the mix back on the stove and start stirring.

8. Add the rest of the ghee a little at a time mixing well. Cook in a medium low flame.

9. Mix till the whole thing starts to come together. If you work your spatula thru the middle of the pan, you can see the line clearly before the sweet joins up together. :-) It will start to collect at the base and change colour.

10. That is your cue. Pour the sweet into the greased plate. It will be quite liquid like at this stage. Don't worry. It will set.

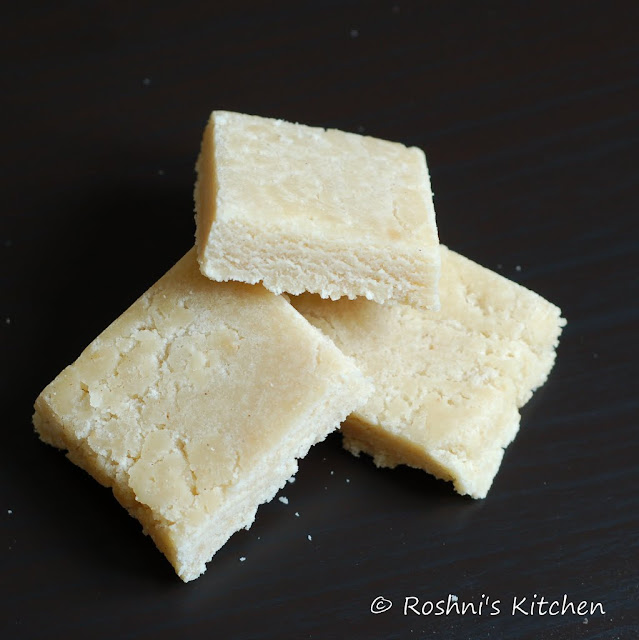
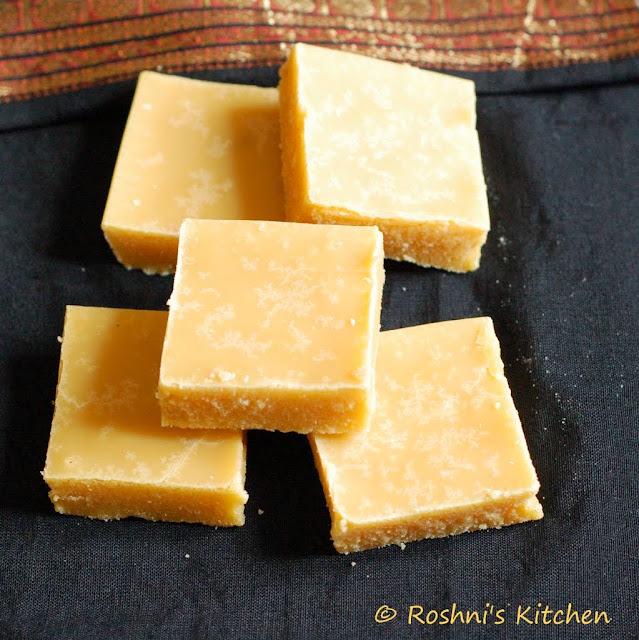
11. After about 10-15 min, cut the pieces (draw lines). Do not separate or try to take it out of the plate.

12. Once it is completely cooled, take the pieces out.

Store in an airtight container. Enjoy!

Wednesday 30 October 2013

Madras Mixture - South Indian Mixture - Diwali Snack - Step by Step Recipe


Mixture is a very popular Indian Snack. As the name suggests, it is a mixture of a lot of stuff! What goes into your mixture depends on who is making it. It varies also from place to place in India. Today I present to you the Madras Mixture. The main 2 components are the Boondi and Omapodi. Boondi is basically fried balls made from Chick pea flour. Omapodi (also known as sev) is little noodles made again from chick pea flour. The other components like Aval, Peanuts, Pottu Kadalai, Curry Leaves etc are added for enhanced taste.


My mother-in-law makes Mixture every year for Diwali. I have always wanted to try my hands on it. I did not have the boondi spoon required to make it till now. This time I got it and was waiting for Diwali to make it. It came out really good for me. Now I am thinking Boondi is probably one of the easiest things to make. No I am not kidding. Once you know what you are doing, it is quite fun to make.


I have prepared a big batch here. Do feel free to half the below recipe when you are making for 3-4 ppl.

Ingredients (Makes about 12 cups)

Boondi  (from 2 cups of besan) See recipe below
Omapodi (from 1 cup of besan) See recipe here
Peanuts 1.5 cups
Pottu Kadalai (Roasted Gram Dal) 1/2 cup
Aval/Poha/Beaten Rice flakes 1 cup
Curry Leaves 20-25
Chilli Powder 1 tsp (optional)
Salt a little

Oil for Deep Frying

Method of Preparation

1. Make boondi as mentioned below.

2. Make Omapodi as here

3. In the same oil add the peanuts in 2-3 batches and fry till it is roasted. It will take only a minute or less. Drain and keep aside. Be careful incase your peanuts burst.

4. Add the pottu kadalai and fry till it is roasted. Drain and keep aside.

5. Add the Aval and fry. This will be done in 5-10 sec. Drain and keep aside.

6. Finally add the curry leaves and fry for 5 sec. Drain and keep aside.

7. Add the peanuts, pottukadalai, and aval to a bowl. Add a little salt and chilli powder. Mix well.

8. Add the boondi and omapodi.  Mix everything well.

9. Finally stir in the Curry leaves.

10. Wait till everything cools. Store in an airtight container.

To Make Boondi

Ingredients
Besan/Chickpea Flour 2 cups
Rice Four 5 tbsp
Chilli Powder 2 tsp
Hing 1/4 tsp
Salt about 1 tsp (add to your taste)
Oil to deep fry

Method of Preparation

To prepare Boondi the first thing you need are these spoons


1. Sieve the besan and rice flour. Add the chilli powder, hing and salt. Mix everything together.


2. Add little water and mix well. Add more water to get a pouring consistency. I needed a little less than 1 cup of water. This will vary. Add very little at a time.


3. Once ready, dip the tip and let a drop fall into the hot oil. If it falls flat it means the batter is too runny add more besan (1 tsp at a time). If it forms a tail, it means it is too thick. Add a little more water (1 tsp at a time).


4. Now you are ready to make the boondi. Heat oil and then keep it at low.Pour a ladlde of batter on the boondi spoon. Gently do circular motion with the laddle to let the batter drip down to the hot oil.


5. Clean the boondi spoon and keep ready. Cook the boondi till it is done and using another laddle fish it out to a kitchen paper for the oil to be absorbed.

6. Repeat till all the batter is done. 

Tuesday 29 October 2013

Coconut Burfi - Thenga Burfi - Coconut Fudge - Diwali Sweet - Vegan Option


Coconut Burfi is a sweet made with just a very few ingredients. Main components are coconut and sugar cooked with some water. It is flavoured mildly with cardamom. You add a little bit of ghee (clarified butter) at the end for added flavour. If you want to make it Vegan you can skip it as well. It is one of the rare sweets made without ghee. Most indian sweets are drenched in ghee.


There is an incident that comes to my mind every time I think of coconut burfi. We grew up in a very close knit community where we would all eat from each other's houses (uninvited). So if a sweet or savoury is made in a house all the neighbourhood children got a share of it when they pop into the kitchen. But with coconut burfi, i once took it to a little extreme. One of my neighbours made it so well that I popped in to her house every 10-15 min to eat them. Well, I kept at it till I made sure that the entire box was empty :-)


Usually it is made with freshly grated coconut. When doing that make sure that you grate only the top white part and not the bottom brown bit. I actually made these with Frozen coconut and believe me, if I do not tell you, you will not be able to tell the difference. So for those of you sitting in foreign countries with no access to fresh coconut, do try it with a good quality frozen coconut. Take the required quantity. Thaw in microwave for 1.5 min and you are all set.

Ingredients (Makes 16 pieces)

Coconut Grated 2 cups
Sugar 1.5 cups
Water little over 1/2 cup
Cardamom Powder 1/4 tsp
Ghee (Clarified Butter) 2 tsp (optional)

Method of Preparation

1. Grease a 7*7 square tin. Or any plate.

2. Heat a Thick (Heavy) bottomed pan or a non stick pan. Add the sugar and water to it.

3. Boil till you reach the 1 string consistency. (Take a slightly cooled drop of sugar mix on your index finger. Touch with your thumb. Separate the fingers. If the sugar forms a thread it means you have reached 1 string).

4. Add the coconut and mix well on medium flame.

5. Keep stirring till the water mostly evaporates and the mixture comes together.

6. Add the ghee and cardamom powder.  Mix well.

7. Transfer to the plate. Even out the top. It will be a little moist at this stage. Do not worry. It will solidify as it cools.

8. Let it cool for some time (about 10 min).

9. Mark lines on it to cut the burfi. Do not cut fully or separate them at this stage.

10. Let it cool completely. Cut into pieces and store in an airtight container.

Monday 28 October 2013

Spooky Witches Fingers - Vanilla Butter Cookies

Halloween is just a few days away. When I lived in India, I was blissfully unaware of Halloween. That is not the case any more. I see more and more Indians having little fun for Halloween. Having lived in US for so long, it has kind of become part of festivals we celebrate. Here in UK the halloween is not as popular, but it is gaining popularity.


For me, as with most festivals the key is to make it a grand event for the kids. The holidays started this week (Half term). So my little one and I had a fun time baking these goodies. We did a little colouring and all this morning. Yes, it is the friendly witch that you see below.


Spooky Fingers not your cup of tea? No worries. Cause this recipe is a keeper. Just make the dough and shape them however you like. To quote my son - They are just scrummy! (scrumptious and yummy).


Check out other Halloween Goodies here

Adapted from here
Ingredients (Makes 60 fingers)

Butter (at room temperature) 225 gms
Icing Sugar 125 gms
Large Egg 1
Vanilla Extract 1 tsp (or use almond extract instead)
All Purpose Flour (Plain Flour, Maida) 350 gms
Baking Powder 1 tsp
Salt 1 tsp
Almonds 60
Strawberry Jam as required to paint red
Green Food Colour a little (optional)

Method of Preparation

1. Take the butter in a bowl. Using a stand mixer or hand mixer, beat well.

2. Add the egg, sugar and vanilla extract. Beat till well combined.

3. In a separate bowl, mix the flour, baking powder and salt.

4. Add this little at a time to the butter mix.

5. Beat till well combined.

6. Cover and refrigerate for atleast 30 min.

7. Take out small portion of the dough. Pinch about 10-12 gms of dough (a very small ball).

8. Make a ball. Roll it on the counter to make a string. Press with your fingers to create the knuckles. Add one almond at the tip as nail. With a sharp knife add a few cuts.

9. Arrange on a parchment lined baking tray.

10. Preheat oven to 160C.

11. Bake the cookies for about 18-20 min till nicely baked.

12. When it cools a little, take the almond out, add a little (a drop or 2) of jam. Press the almond back. Though this is step is optional, I found that if I do not do it, the almond falls off.

Cool and store in an airtight container. If you want to make in batches, you can store this dough in the freezer and use as required. Would recommend cutting into smaller portions and freezing. That way you can just pull out one portion and cool in fridge overnight and bake the next day. 

Sunday 27 October 2013

Maida Burfi - Maida Cake - Vanilla Fudge - Diwali Sweet


Diwali season has started. All the houses are buzzing with preparation for Diwali. Every year I also look forward to making some awesome sweets and savouries. Traditionally at home, my mom makes a few sweets and savouries. And along with that is a Lehiyam. Do check out the recipe on Lehiyam in my blog. It has amazing medicinal properties. After eating all the goodies, this works as a great digestive.


In the morning, we wake up much before dawn. Then have an oil bath. We all get special new clothes all purchased specially for the day. Then we enjoy some sparklers and fireworks. The whole street comes alive with the festivities. Next we visit our family and friends. We share our sweets with everyone and enjoy the holidays.


I start this diwali with this sweet recipe from my friend Radhika's blog. It is quite easy to prepare. The only thing you need to be mindful of is the 1 string consistency. In India we do not use Candy Thermometer. The doneness of sugar is defined by the strings. How, you ask? Spoon out a little syrup, and when it is warm enough to touch and still hot, take a drop on your index finger. Touch with your thumb and separate. If a single thin string forms, it is a one string consistency.

Ingredients (makes 32 pieces)

Maida/All Purpose Flour 2 1/4 cups (290 gms)
Sugar 3 cups
Ghee (Clarified Butter) 3/4 cup
Water 3/4 cup
Vanilla Extract 1.5 tsp
Cardamon a pinch

Method of Preparation

1. Grease two 7*7 square cake tins. Or just any big plate.

2. Sieve the flour and keep ready.

3. In a pan, add the ghee and melt it.

4. When ready, add the flour and still in low flame for 3-4 min till the raw smell is gone. Switch off.

5. In another pan, heat the water and sugar. Boil it till it comes to a 1 string consistency. See notes above.

6. Add the syrup to the flour mix. Stir vigorously for about 2 min till it comes together. Though mine came really good, I would have loved to stop just 10-15 sec before.

7. Keep a close eye. Once it starts collecting, transfer to the greased plates. Flatten the top with a flat surface.

8. Cut when the fudge is still warm.

9. Once cooled transfer to an airtight container.

Enjoy!

Whole Wheat Bread - Sandwich Bread - Brown Bread


Sliced Bread is consumed every week at our home. I have never made my own bread. I love my white bread. But with the buzz around Whole Wheat Stuff, we usually by a 50-50 bread. A good compromise I feel. 


As you might know, a group of bloggers have been baking breads together (we knead to bake) since the beginning of this year lead by Aparna. This month she sent us a Whole Wheat Bread recipe to try our hands on. A few bakers had mishaps in their bread and so I was not sure if my whole wheat is going to rise. But I was amazed at how well it rose. The one thing I did wrong was to try and shape the bread many times. Thankfully it did not spoil my bread much. Do check out the video link below to see the technique.


About the flour. I did not buy a whole wheat flour specifically from the market. We use Whole Wheat Flour (Indian Brand) almost daily for making our Chapati/Roti. So I just used that. I have used Pillsbury brand Whole Wheat Atta. 

Video on how to shape bread here

Original Recipe PeterReinhart
Adapted by Aparna

Ingredients:

For The Soaker:
Whole Wheat Flour 1 3/4 cups 
Salt 1/2 tsp
Water at room temperature 3/4 - 1 cup
Vinegar 1 tbsp

For The Biga/ Sponge:
Whole Wheat Flour 1 3/4 cups 
Instant Yeast 1/4 tsp
Milk 3/4 cup
Vinegar 1 tbsp

For The Final Dough:
All of the Soaker
All of the Biga/ Sponge
Salt 1/2 tsp
Whole Wheat Flour 1/3 cup (use only as required)
Instant Yeast 2 tsp
Oil 2 tbsp
Honey 2 tbsp

Method of Preparation

Soaker 
Mix all of the Soaker ingredients together in a bowl until all of the flour is hydrated.  Start using 3/4 cup and add till 1 cup if you need. Your Soaker should be somewhat like reasonably firm bread dough in consistency. Cover the bowl loosely with plastic wrap and leave at room temperature for 12-24 hours.


Biga/ Sponge
Mix all of the Biga/ Sponge in a bowl and knead together well till a soft ball forms. You might need more than the originally suggested 3/4 cup of liquid. Cover and refrigerate for at least 8 hours or overnight. This will keep for up to 3 days.

Final Bake
1. Two hours before you plan to mix your dough for the bread, remove the Biga from the refrigerator and allow it to come to room temperature. You might find your Biga rising a little during this time.

2. Divide the Biga and Soaker into small pieces (about 12 pieces each) using a sharp knife or scraper and put them in the food processor bowl (or stand mixer). You can knead this by hand too, but the dough will be tacky and a little difficult to manage. Do not be tempted to add more flour.

3. Add the remaining ingredients for the dough, except the 1/3 cup flour) and knead for about 3 minutes.  

4. Let it rest for 5 minutes, then add as much flour as needed (if necessary) to the dough and  knead for another 3-4 minutes. Your dough should now come away from the sides of the bowl but still be a little sticky but somewhat manageable. It’s really important to not add too much extra flour during this step. 

5. Place the dough in a lightly oiled bowl and let rise until almost doubled (about 1 1/2 hours). Then turn out the dough onto a lightly floured surface and pat the dough out into a rectangle with a width that just a bit less than your loaf tin. See that you do not tear the dough. Roll it up and shape into a loaf.

6. Place your loaf in a greased and floured loaf tin (I used a 9” by 4” loaf tin) and let it rise until it is just higher than your loaf tin. 

7. Bake the loaf at 180C (350F) for about 40 to 45 minutes until the top is a nice deep brown colour and the loaf sounds hollow when tapped.

8. Let the loaf cool completely (at least for about 2 hours), before slicing it. Refrigerate the loaf if not consuming immediately.

Wednesday 23 October 2013

Blueberry Muffins


As I mentioned earlier, I recently discovered the website Joy of Baking. I made a Donut from that site earlier this year. One lazy afternoon, my son and I were sitting and trying to find out what to do. It so happens that on such days our choice is invariably baking. Quite interesting considering my history

The next step is of course telling him what ingredients are available at home and giving him choice of what he wants to eat. He chose Blueberries and I showed him this muffin and he said, this is it. So we were off to bake and eat! 


Check out the video recipe here.


Ingredients

Wet Ingredients
Large Egg 1, beaten
Plain Yogurt 1 cup
Vegetable Oil 1/3 cup
Vanilla Extract 1 tsp


Dry Ingredients
All Purpose Flour 2 cups (260gm)
Granulated White Sugar 1/2 cup (100gm)
Baking Powder 11/4 tsp
Baking Soda 1/2 tsp
Salt 1/4 tsp

Blueberries 1.5 cups


Method of Preparation

1. Preheat oven to 190 C (375 F).

2. Line a muffin tray with paper liners.

3. In a bowl whisk the wet ingredients - egg, yogurt, oil and vanilla extract.

4. In another bowl, add the flour, sugar, baking soda, baking powder and salt. Mix well.

5. Add the Blueberries and mix making sure not to break them.

6.Add the wet ingredients to the dry mix and fold till combined. It will be a fairly thick batter.


7. Using an icecream scoop (or a big tablespoon) scoop batter into the lined muffin cups.


8. Bake for about 15-20 minutes till a toothpick inserted comes out clean. I baked mine for about 17 min. I will probably bake them for another minute or so next time.


9. Transfer to a wire rack. Let it cool completely before serving. 

Monday 21 October 2013

Filipino Sinangag - Garlic and Egg Fried Rice (Easy Vegan Option)

Garlic adds an amazing taste to dishes. Interestingly not everyone loves it. You are either a lover or a hater. I totally love it. So when someone says, Garlic Rice I jump in. That is exactly what happened. When Radhika made this here, I wanted to make it the same day. Am so glad I tried it.

It is a great way to use up left over rice. It will make an awesome lunch box recipe as well. Do not look at the quantity of garlic and think it is too much. This recipe serves 5-6 ppl. Also add the oil specified. The garlic absorbs a lot of oil. So adding this much oil gives you some garlic oil to coat the rice with. Chilli Paste will taste better I think. But I did not have, so used Chilli  Sauce. It gave a mild sweet taste. If using Chilli Paste add just 1 or 2 tbsp.


Ingredients

Rice 2 cups (uncooked) - 6 cups cooked
Garlic 1/2 cup Pealed and Crushed
Oil 1/4 cup
Chilli Sauce 5-6 tbsp
Salt to taste

Spring Onions to garnish

Method of Preparation

1. Cook the rice with enough water. Let it cool completely.

2. In a pan, heat the oil. Add the garlic and roast till it is nicely browned.

3. Add the chilli sauce and saute for another minute.

4. Switch off and add the rice along with required salt. Mix well.

5. Garnish with some spring onions

Serve with a side dish or egg if you prefer. 

Friday 18 October 2013

Zucchini Kootu - Zucchini cooked in a coconut sauce - Courgette Kootu


Kootu is a South Indian preparation of Vegetables (mostly watery kind) with dal (lentils) and spiced with coconuts, green chillies and curry leaves. It is finally given a tempering with mustard, urad dal and red chillies.

So now the question is - What is Zucchini or Courgette doing in a Kootu? A very valid question. The simple answer is that it is something that is easily available for me in the British Supermarket. So no need to make a trip to the Indian Store.

Now you might ask - How was it? The simple answer to that question is, it is out of the world. It works great in kootu. To be honest a perfect vegetable born to be cooked as a kootu!

So what are you waiting for? Go on, make a kootu this weekend with Zucchini/Courgette and let me know what you think!


Ingredients (Serves 6)

Zucchini 4 (about 8 cups)
Moong Dal 1 cup
Turmeric 1 tsp

To ground to a paste

Coconut 1/2 cup
Jeera/Cumin 1 tsp
Green Chilli 1
Curry leaves few

Tempering

Mustard 1/2 tsp
Dry Red Chilli 1
Urad dal 1 tsp
Curry leaves few
Hing a little
Coconut oil 2 tsp (or any oil)


Method of Preparation

1. Pressure cook the dal with 3 cups of water till it is well mushed. I have added lot of dal here as I feel it makes the curry filling, tasty and healthy. You can add just 1/2 cup or may be 3/4 th. We liked it this way with 1 cup of dal.

2. Chop the zucchini and add to a pot with a couple of cups of water. Add turmeric and salt. Bring to a boil. Let till cook till it is almost done.

3. In the mean while make a fine paste of coconut, green chilli (more for a spicy dish), curry leaf and jeera adding enough water.

4. Add the coconut mix and dal to the zucchini. Add more water and salt if needed. Simmer for a little while till everything comes together.

5. For tempering, heat a little coconut oil in a small pan. You can use any oil. Coconut oil gives it a nice flavour. Add mustard. When it sputters, urad dal. When it starts to brown, add red chilli, curry leaf and hing. Let it sizzle. Add to the pot of Zucchini.

Tuesday 15 October 2013

Thakkali Thokku - Tomato Pickle


Thakkali Thokku (a kind of tomato pickle) is a family favourite. It differs from chutney where tomatoes are sauted till cooked and then made to a paste. For a thokku, the tomatoes are cooked thru till most of the water is drained.


Every time we visit India, my Mother in Law makes us this huge jar full of thokku. It will be brought here and we would devour it for about a month. Somehow this was something she made and not something I ever tried. Since making it a few weeks ago, I have already made it a couple more times. We all love it at home, including my little one. So my version is pretty mild. You can make it spicy if you like it that way.


Be warned that a Kilo (10 medium) tomatoes will only fetch you a jam jar full of pickle. So if you want loads, do double or triple the quantity. When I get from India, it is a huge jar. Now I realize my MIL must be easily processing about 5-6 Kg of tomato!


Ingredients

Tomato 10 medium (1Kg)
Sesame Oil (see below) 6 tbsp
Mustard 1 tsp
Fenugreek Seeds 1/2 tsp
Curry Leaves 1 sprig
Hing generous pinch
Kashmiri Chilli Powder 3 tsp (for mild thokku)
Salt to taste (I used a little less than 1 tsp)

Method of Preparation

1. Pulse the tomatoes in a food processor or finely chop them.

2. Heat oil in a heavy bottomed pan. Add mustard seeds.

3. When it sputters, add fenugreek seeds, curry leaves and hing.

4. When it sizzles, add tomatoes.

5. Cook till the water drains from the tomatoes and oil starts to ooze. Initially the water will splash. So you can cover and cook.

6. Keep stirring well towards the end.

7. Cool and store in an airtight container in the refrigerator. Use a clean dry spoon to take the thokku every time.

Notes about Oil

* Any oil will work. But Sesame Oil/Gingely Oil (Nalla Ennai) especially Idayam Nallannai enhances the taste like none other can!

* You can use more or less oil as per your taste and dietary requirement. The  6tbsp I used was slightly above average and tasted perfect. Even 3-4 tbsp should work.


Sunday 13 October 2013

Monster Pizza

Halloween is round the corner. So time to get some spooky, crazy cooking done, right? If you live in a country which celebrates Halloween or not, you can always make such treats for your kids. Very interesting idea for kids parties as well. Groovy Gourmets are making spooky dishes this week. This is my entry to the event!

Making Pizza with kids can be a fun holiday project and your little one will be proud of his/her creation. We made a caterpillar pizza some weeks ago and thoroughly enjoyed that project. This time my little one wanted to make a monster. So here we are, a monster with 3 hands, 2 legs and 2 horns! Let your imagination run wild.


You will be using regular pizza dough to make this. So while adults can eat a regular pizza, the kids can enjoy crazy pizza. This could be a great party idea as well. Get the kids to shape it and top it. Then you can just bake it for them. You can make about 6-8 kids servings with the below quantity.

Ingredients

Bread Flour (or APF) 3 cups
Fast Action Yeast 1 (7g) packets

Salt 1 tsp
Sugar 1 tbsp
Warm Milk 11/2 cup (I used a little more than 11/4 cup)
Oil 2 tbsp plus a little to layer the top

Pesto Sauce (or just use a pizza sauce)
Mozzarella Cheese
Tomato Sauce

Method of Preparation

1. Take flour in a big bowl. Add yeast, salt,sugar and oil. Mix well. If using active dry yeast proof it first.

2. Add milk a little at a time and mix well till you get a spongy dough.

3. Apply a little oil on top. Cover the bowl with a damp cloth and rest for about an hour till the dough raises to atleast double.

4. Punch out the air and knead quickly. Take the required size of dough to make pizza. You can make any shape or any size you like.

5. Roll into required shape.

6. Place the dough in the baking tray.

7. Apply a thin layer of Pesto (or any sauce you are using). Use Vegan Pesto if you like. Add Mozzarella slices.

8. Drizzle a little olive oil on the pizza.

9. Preheat the oven to highest temperature. I baked it at 220C.

10. Bake the Pizza till the ends start to brown. It will be done in less than 10 min. Keep an eye!

11. Once it comes out of the oven drizzle some tomato sauce!

Friday 11 October 2013

Sweet Potato Soup


Wondering about that awesome soup that you saw when I posted the bread Khaliat Nahal? Here it is. It is a super simple soup with sweet potato as the main ingredient. I saw this online and tried it with a few variations.

A perfect soup for Fall/Autumn.


Ingredients

Sweet Potato 2
Onion 1
Garlic 2 pods
Ginger 1 inch piece
Red Chilli Powder 1/2 tsp

Oil and salt to taste

To Serve
Avacado
Tortilla Chips

Method of Preparation

1. Preheat oven to 200C. Slice the sweet potato into 2 vertically. Brush with a little oil.

2. Bake for about 45min till it is well cooked.

3. Scoop out the meat of the potato (or just peal it)

4. Heat a little oil in a pan. Saute chopped onions, garlic and ginger till it starts to brown.

5. Cool and grind to a smooth paste along with the sweet potato.

6. Add some milk and/or water/broth till the desired consistency is reached. I needed about 3 cups of liquid.

7. Simmer for a few minutes.

Serve with some avacados (optional) and tortilla chips. You can also add some herbs on top. I forgot to add :-) 

Wednesday 9 October 2013

Pasi Paruppu Sundal - Moong Dal Sundal with a twist!

Moong Dal is a popular Sundal for Navarathri. I have a made this version with a twist. Why not, right? You get bored after a few days of eating sundal with the same flavours. So the ginger will add a very different taste to this sundal and I have cooked the dal without adding much water. Sort of crunchy.


Ingredients

Moong Dal (Split Yellow Lentils) 1 cup
Ginger 1 inch piece
Green Chillies 2
Curry Leaves 1 sprig
Cumin 1/2 tsp
Hing a generous pinch
Turmeric 1/2 tsp
Water 1/2 to 3/4 cup

Oil and salt to taste

Method of Preparation

1. Soak the moong dal in water for 2-3 hours. This helps in quick cooking. Drain the water and keep ready.

2. Heat a little oil in a pan. Add the cumin, turmeric, hing, curry leaves, slit green chillies and chopped ginger.

3. When it sizzles add the moong dal. Stir well.

4. Add water little at a time and cook till the dal is cooked to your taste. You can make it as crunchy or as mashed as you like. Keep stirring occasionally to prevent sticking. This step should not take more than  5-10 min.

5. Add coconut and salt. Mix well. Cook in low flame for 2 more minutes.

Moong Dal Sundal - Paasi Paruppu Sundal is ready.

Tuesday 8 October 2013

Sweet Corn Sundal

Sundal forms an integral part of Navarathri in south India. When it comes to Sundal, the first thing that comes to my mind is dried lentils and legumes. Mostly salt version is  made with a few that are made as sweet versions as well. When challenged with making something different for Navarathri by my group AGC, I decided to make a sundal that is not made by my mom or for that matter, that I have never eaten before. This is unique because it is not made with dried stuff but with fresh vegetable! Hope you enjoy this sundal!


Ingredients

Frozen Corn 1 cup
Coconut 2 tbsp
Cumin 1/2 tsp
Turmeric 1/2 tsp
Dry Red Chilli 1
Oil and Salt to taste

Method of Preparation

1. Steam corn in microwave for 2-3 min.

2. Heat oil in a pan. Add the cumin, turmeric and red chilli.

3. When it sizzles, add the corn along with some salt. Stir well.

4. Cook in low flame for 2 min.

5. Add coconut and saute for 2 more minutes.

Corn Sundal is ready!

Saturday 5 October 2013

British Style Beetroot Curry - Beetroot Masala

Britain has a huge Indian population. So it is no surprise that it has developed it own variation of Indian food. Living here I like to explore and see their take on our food. This one is one such experiment. Read this Vegetable Curry recipe as well to see another one such inspired dish.

Inspired from here


Ingredients

Beetroot 1 kg (about 5 big ones)
Onions 2
Oil and salt to taste

To Grind to paste
Ginger 1 inch piece
Garlic 4 pods
Fresh Red Chilli (or use green) 1
Coriander leaves 1/2 cup packed (plus some for garnishing)
Cardamom 1 pod
Cumin seeds 1 tsp
Coriander seeds 1 tbsp
Fennel seeds 1 tsp
Clove 2
Pepper 1/2 tsp
Tomato Puree 2 tbsp
Cooked Beets 2 cups (see below)

Method of Preparation

1. Peal and roughtly cube the beets into big pieces. Add 2-3 cups of water and cook till it is almost ready. Drain and reserve the water.

2. In another pan, heat a little oil and add onions. Saute till it is slightly browned.

3. Make a paste of all the ingredients under 'to grind' adding a little water. Add  2 cups of cooked beets as well to this.

4. Add to the pan and saute for a couple of minutes.

5. Add the beets, some salt and a some of the reserved water (as required).

6. Bring to a boil and simmer for sometime.

Serve with some rice or roti or Naan!