Saturday 31 December 2011

Arusuvai Kurippu - Recap 2011

When I started blogging in November, I was not sure how this will unravel. I started posting some recipes and I started getting a lot of feedback from my friends. That was a great encouragement. Some of them tried the recipes that I posted and gave me feedback. When I get up in the morning, I check the comments to see all the feedback. It makes my day.

Then I moved to the next important step. I visited a few blogs. I was amazed by the effort all the lovely ladies have put into their blogs. I was humbled - the variety in recipes, the photos, the presentation. I have made new friends in the blogging world in this short time. I am sure there are a lot of beautiful sites yet to explore. That is what 2012 is for. I have created a bloglist for the websites that I have found. Do visit those pages for some amazing recipes. I learnt a lot of recipes in all these websites. Have tried a few and have bookmarked a few for making soon.

One of my friends suggested to check out various events. I have made my start by sending my posts to a few events. Hoping to do a lot more in the coming months.

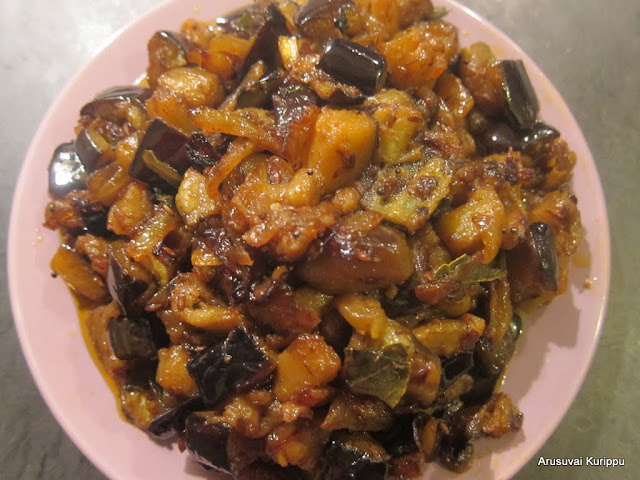
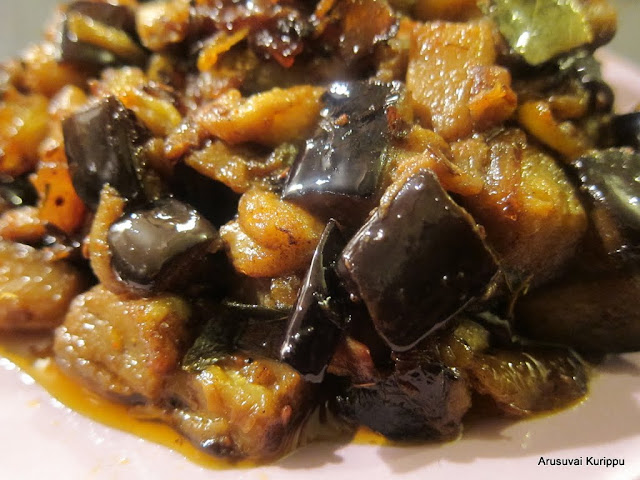
Most Popular Dish (based on page views) in my site is Vatha Kozhambu.


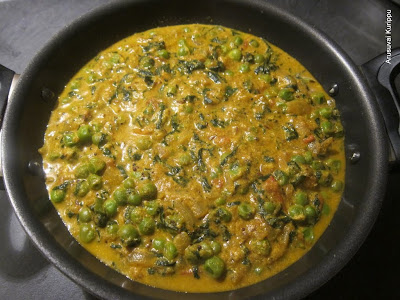
The recipe which became an instant hit (it is fast becoming the most popular) is Methi Malai Mutter. It is my favourite recipe (and my husband's as well) in the blog so far.


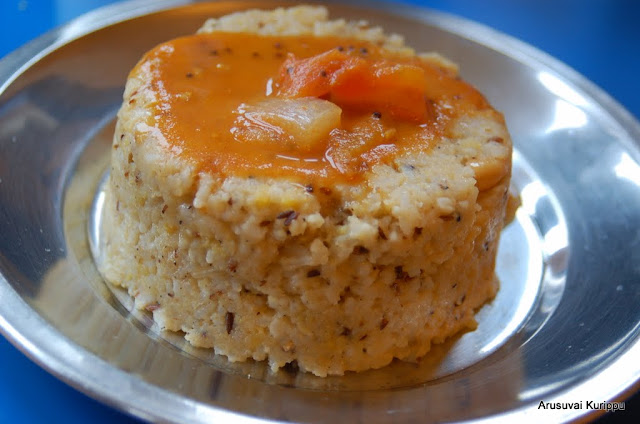
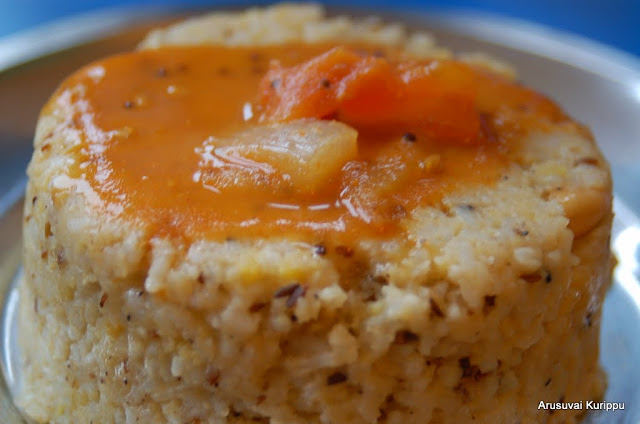
New to others - I make the Vermicilli-Semolina quite often and it is almost a quick breakfast in our house. I got the feedback from friends that it is totally new to them. Many tried and liked it a lot.


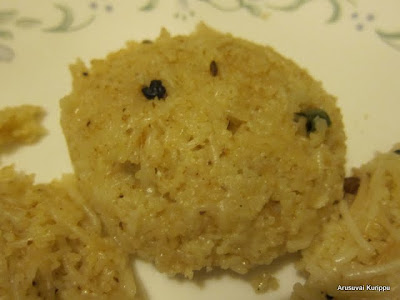
My favorite photo in my blog so far is in Rava Kesari. The reason is mainly cause, I was just going to post the other photo in the link. But my husband thought this was a good one. I posted it and every time I see that photo, I am tempted to make Kesari


For recipe that I learnt from other sites - I can name a lot as I have looked up ratio and combination of different items in many sites. But the one recipe that was totally new to me was the Spiced Nutella Hot Chocolate. It is so addictive. In the last few weeks, I have enjoyed it every Friday. It is so sinful, cannot enjoy more than once a week :-) I learnt it from Puja's website. She has a lot of recipes that I have bookmarked.


Events that I am looking forward to participating (missed out last year)
Blog Hop Wednesday by Radhika 
Indian Cooking Challenge by Srivalli

As I mentioned before, I can name a lot of blogs that I have found and love. I just have to name a few here.

Rajani's My Kitchen Trials - She was one of the main inspirations for me to start this blog. We have cooked together in our younger days. I was not a great cook at that time, mainly cause there were other cooks better than me. She has a beautiful website and some wonderful recipes.

Priya's Priya's Easy N Tasty - Just look at the number of dishes in her site. It takes a lot of effort to be consistent. She has lots and lots of yummy recipes. And she encourages me a lot with wonderful comments. Also check her bloglist. I found quite a few good sites there.

Revathi's Kaarasaram - The best photos and presentation of food. I sometimes keep looking at the photos for 15-20 min before even I start reading the recipes. Lot of interesting recipes and history of food.

Sarah's Vazhayila - You all know my love for Kerala food by now. I think I do not need to look any further than Sarah's website for super delicious and authentic Mallu food. Her presentations are also amazing.

I have met a lot of new bloggers in the last couple of weeks. Sorry that I am not mentioning you all. I have made a list here and I check everyone of your recipes every day.

Looking forward to documenting my favorite recipes, learning new dishes, participating in events, making new friends in 2012. Please do continue checking my blog and more importantly, keep the feedback/comments/suggestions coming. I love hearing from you all.

If you like my blog or you feel like encouraging me, please follow me. Add comments! :-) I will know about your blogs as well that way. I look forward to meeting new bloggers.

Happy New Year Everyone!!!

I am linking this post to Best of Year 2011 Event by Srivalli


Friday 30 December 2011

Grean Peas and Quinoa Soup

I used to make soups quite frequently when we were in US. Somehow have not made any in the last year in UK. My husband was asking me for the last couple of weeks - why don't you make some soup. My son also likes soup and bread. So I knew I have to start making again.

When I posted a couple of post for Priya's event CWS-Peas, my friend Sree asked me why don't you try and make Barley and Peas soup. I told her I will try. I do not have any barley at home. Never used it. Note to self - buy some and also look up all the blogs for different recipes. So I decided to make a soup with Peas and Quinoa.

Quinoa is a super healthy grain, packed with nutrients and super tasty as well. We were introduced to Quinoa a few years ago in a Whole Foods Store where they were having a cooking demo. We fell in love with it immediately. It is a south american grain. I mainly make an upma kind of dish with it. I had a friend who used to eat it instead of rice with sambar and vegetables.


Ingredients

Dried Peas 1 cup
Potato 1/2
Carrots 1
Onion 1/2
Celery 5 stacks
Quinoa 1/2 cup
Bay Leaf 1
Cumin Powder 1/2 tsp
Pepper Powder 1/2 tsp

Oil and Salt to taste

Method of Preparation

1. Soak the peas overnight and cook in pressure cooker. Make sure it is well cooked.

2. Boil 1 cup of water, add the quinoa and cook in low-medium heat till all the water is drained and quinoa is cooked. Let it sit for 10 min before using.

3. Cut the onions, potato, carrots and celery.

4. Heat a little oil in a pan. Add the cut vegetables and bay leaf and saute till the vegetables are almost cooked. Add a little water if required.

5. Add the cooked peas (along with the water in which it was cooked) and some additional water. You can use Vegetable stock as well. I avoid it these days due to the sodium content.

6. Also add salt, pepper powder and cumin powder. Simmer for a little while.

7. Add the cooked Quinoa  and cook for a couple more minutes.

Serve with Crusty Bread.

* I did not have parsley or coriander leaves. I would have added it if I did
* This was more like a 1 pot meal. So I made it really thick.

Linking this to CWS - Peas by Priya of Priya's Easy and Tasty recipes.

Thursday 29 December 2011

Omapodi

Omapodi is a easy to make snack. It has a melt in the mouth texture. I made salt version. You can add some chilli powder to the dough to make a spicy version as well.


Ingredients

Besan (Chickpea Flour) 1 cup
Rice Flour 2 tbsp
Ajwain powdered 1/2 tsp
Butter 1-2 tbsp
Salt

Method of Preparation

1. Mix Besan, Rice Flour, Ajwain, butter and salt in a bowl.

2.Mix by adding water little at a time to make dough like chappati

3. Make a ball with it and put it in the Nazhi (the equipment) with the correct chip.

4. Heat oil in a Kadai and press down the dough into the oil.

5. Cook till it is slightly browned. Drain and transfer to a bowl. Repeat for the rest of the dough

Enjoy!!!

Wednesday 28 December 2011

Dal Makhani

Dal Makhani is a simple to make, yet super delicious dal. Before I tried this, whole urad with peal is not a dal we used to buy at home. The pealed one is used for making idli/dosa batter, medu vada etc. I have been making this for 3-4 years now. Personally I feel it tastes great when made on the spicier side and also when consumed as soon as it is made.


Ingredients

Whole Urad Dal (Unpealed) 1 cup
Rajma 1/4 cup
Channa dal 1/4 cup

Onion 1 big finely chopped
Tomato 2 finely chopped
Ginger 1 inch bit
Garlic 2-3 cloves
Green Chillies 4 slit
Garam Masala 1 tsp
Chilli Powder 1/2 tsp
Milk or Heavy Cream 1/2 cup
Coriander Leaves for garnish

Oil, Butter and Salt as needed

Method of Preparation


1. Soak the dals together overnight. Cook well in a pressure cooker for 4 whistles. It should be well cooked.

2. In a pan, heat some oil/butter (or combination) and add the onions, ginger,  garlic and green chillies

3. When the onion starts to brown, add the tomato and cook till oil starts to ooze.

4. Add the chilli powder, garam masala and salt.

5. Add the cooked dal and milk (or heavy cream) and bring to a boil. Simmer for some time.

6. Garnish with coriander leaves and serve with roti or rice.

Tuesday 27 December 2011

Tofu Bhurji

We spent a great day out in London last weekend. We went to temple in the morning, ate lunch at Saravana Bhavan and did some shopping there. My son really enjoyed the visit to the temple. Its one of his fav places to go. When we got home late in the evening, we were in no mood or hunger for an elaborate meal. So just made this Tofu Bhurji (scramble) and moru kari. It was done in 15 minutes. The pressure cooker took more time to make rice than for me to make the 2 sooper simple, tasty dishes.


Ingredients

Tofu 1 cup
Onion 1/2
Green chillies 2
Mustard 1/2 tsp
Jeera 1/2 tsp
Turmeric 1/2 tsp
Hing
Cumin powder 1/2 tsp
Coriander powder 1/2 tsp
Curry Leaves few

Oil and Salt to taste

Method of Preparation

1. Heat oil in a pan and add the mustard seeds. When it sputters add the jeera, turmeric, curry leaves and hing.

2. After a few seconds, add the onion and saute till it is translucent.

3. Add the green chillies, cumin powder, coriander powder and salt. Mix well.

4, Cut the tofu to small pieces or grate it. I just cut into small pieced. Add and Mix well. Make sure you do not mush up the tofu too much.

It kind of resembled egg scramble. Enjoy as a side for roti or rice.

Monday 26 December 2011

Sprouted Moong Sevai

I had some sprouts left after making another dish and decided to make Sprouted Moong Sevai.


Ingredients

Sevai 1 cup
Moong Sprouts 1 cup
Onion 1/2 finely chopped
Tomato 1 finely chopped
green chillies 2
Turmeric 1/2 tsp
Mustard 1/2 tsp
Jeera 1/2 tsp
Hing

Oil and Salt to taste

Method of Preparation

1. Prepare sevai as normal. Today, we were making breakfast in a jiffy. So I just used Rice Noodles.

2. Heat oil in pan and add the mustard seeds. When it sputters, add the jeera, turmeric and hing.

3. When it sizzles add the onion. When it starts to brown, add tomoto and chillies

4. Cook till tomatoes are done and add the moong sprouts and salt. Cook for a little bit by sprinkling water. The sprouts can be cooked as per your taste.

5. Mix with sevai and enjoy!

It came out very good. Our son loved it!! Great way to get kids eat healthy.

Sunday 25 December 2011

Kashmiri Roti

Another Roti recipe I found in my Tarla Dalal book. We liked it.


Ingredients for 4 rotis

Wheat Flour 1 cup
Jeera 1/4 tsp
Fennel seeds (Saunf) 1/4 tsp
Coarse Ground pepper 1/2 tsp
Ajwain 1/4 tsp
Hing
Salt

Milk (optional)

Method of preparation

1. Mix all the ingredients (except milk) in a bowl and mix well.

2. Make a dough with milk or water. The recipe recommended milk, so I used it. You can use water as well.

3.  Keep it wrapped for a couple of hours. Split into 4 small balls

4. Roll like you will do for normal roti and cook in a tawa using ghee on both sides.

Just to show the texture after the roti is rolled


I felt that Ajwain kind of overpowered other spices. So if you are looking for varied flavours, skip or reduce the ajwain. But as I mentioned in the Ajwain Parata post, it is my new favourite spice. It adds a nice flavour to the roti.

Saturday 24 December 2011

Spinach with Peanut and Channa Dal

Growing up I remember that, I always used to like Spinach. But lately I have realized that I am not a big fan of it. Am wondering if it the kind of Spinach I used to get US and now in UK that has changed my opinion. Anyways, I am in a venture to make different dishes to make me like it cause I cannot set a bad example for my son :-) That quest brought me to this recipe on the internet. I forgot to note the source and since I did not bookmark it, I have made my own changes to it. It is quite simple to make. Bad photo! :-(


Ingredients

Peanuts 1/2 cup
Channa Dal 1/2 cup
Spinach (I used a big bag of spinach, may be around 4-5 cups when chopped)
Tamarind paste 1/2 tsp
Turmeric Powder 1/2 tsp
Besan (chickpea flour) 2 tbsp
Hing
Garam Masala 1/2 tsp
Chilli Powder 1 tsp
Jaggery (optional) 1 tsp
Mustard 1/2 tsp
Jeera 1 tsp

Method of Preparation

1. Soak the peanuts and channa dal together overnight. Pressure cook for 2 whistles. It should be cooked well, but not mushed up

2. Chop the spinach and add to a pot with 1/2 cup water and turmeric powder.

3. When it starts to wilt, add besan and smash and mix well. Cook till the raw smell is gone.

4. Add the cooked peanuts and channa dal, salt, chilli powder, garam masala, jaggery (if using), tamarind paste and hing. Mix well. Add water if necessary.

5. Bring it to a boil and simmer for a little while.

6. Temper with mustard and jeera. Serve with roti or rice.

Friday 23 December 2011

Ajwain Parata

I found a recipe for Ajwain Roti in a Tarla Dalal book that I had. I had not made this before and decided to give it a shot. I decided to make it as a Parata than a roti. It was super delicious. If you love the taste of Ajwain, you should try this. I cannot recommend this enough. I know I will be making it often.


Ingredients

Wheat Flour 1 cup (makes 4 paratas)
Ajwain 1/2 tsp
Salt
Oil 1 tbsp

Ghee for cooking paratas

Method of Preparation

1. Mix the wheat flour, ajwain, salt and oil. Make a dough with enough water.  Keep it wrapped for a couple of hours. Split into 4 small balls

2. I have never made Plain Paratas and have always done stuffed ones. I learnt how to do it recently. So the below description is only for those who need to know. Otherwise skip ahead.

3. Roll each dough ball into a very small circle. Apply some oil/ghee on the surface. Fold into a semicircle. Apply some more oil/ghee. Fold into a quarter circle. Then flatten using the rolling pin maintaining the
triangular shape. The oil/ghee helps in fluffing of the parata.


4. Put it on the tawa and spread some ghee on each side and cook.

Enjoy with Curry, Raita (or plain yogurt) and pickles!!

'How to name it' curry

Ilayaraja (Raja) needs no introduction to a Tamilian. But for those of who don't know he is one of the greatest music directors that Tamil Film Industry has seen. My husband and I are still very old fashioned when it comes to our taste of music. We are still in the Raja era (70s and 80s). My Hindi music is still in the Rafi era (50s, 60s and 70s). Though our knowledge of music (as in Raaga and taala etc) is nil, we enjoy listening to film songs. Our son shares our love for music.


Raja in late 80s made a fusion music instrumental Album called 'How to Name it'. Not sure what his thought process was when he named it like that. If you have not listened to it, do check it out. It is pretty good. He also has another  instrumental album called Nothing but wind.

When I was trying to cook something today, I was not sure what I was making. When my son asked me 'Amma what you making?', I did not know what to tell him. Cause I did not know 'How to name it'. Dedicated to Music Genius Ilayaraja. Comment on what your fav Raja movie or song is... Though difficult to select mine has to be Mandram Vantha Thennalukku from Mauna Raagam.


Ingredients

Cabbage 1 cup chopped
Carrot 4 grated
Potato 2 boiled and mashed
Onion 1 finely chopped
Coriander leaves
Besan (chickpea flour, kadala maavu) 2 tbsp

Coriander seeds 1 tbsp
Jeera 1 tsp
Pepper 1 tsp

Method of Preparation

1. Dry Roast the Coriander seeds, Jeera and Pepper. Powder and keep aside

2. Heat oil in a pan and saute onion till it is slightly browned.

3. Add the cabbage and carrots and cook till it is almost done.

4. Add the mashed potatoes and besan. Cook for a few more minutes till the raw smell of besan is gone.

5. Add the ground powder, salt and a little water. I made a think gravy. So did not use much water. 

6. Simmer and garnish with coriander leaves.

Great way to finish off my left over cabbage and carrot.

Thursday 22 December 2011

Thenga Aracha Kozhambu

Thenga Aracha Kozhambu is one of the Kozhambu varieties my mom used to make and I love it! Its been a while since I made it. After today I know I will be making it often - all of us including our son loved it. It is very simple to make.


Ingredients

Vegetables of choice cut into cubes. I used 1 potato, 2 carrots and 1 onion
Coconut 3/4 cup
Whole pealed urad dal 2 tbsp
Fenugreek seeds 1/4 tsp
Red chillies 4-5
Tamarind paste 1/2 tsp
Turmeric powder 1 tsp
Oil 1 tbsp
Coconut oil 2 tbsp (optional).
Salt to taste

Method of Preparation

1. Heat 1 tbsp of oil in a pan. Add the urad dal and roast till it starts to brown. Add the fenugreek seeds and red chillies and roast for a few more seconds.

2. Add to mixie along with the coconut and grind into a smooth paste with some water.

3. In the same pot, add all the vegetables being used and 2 cups of water, turmeric, salt and tamarind paste. Cook till the vegetables are almost done.

4. Add the paste and 2 more cups of water and bring it to boil. Simmer for a little while.

5. If you like the smell and taste, pour 2 tbsp of coconut oil before you switch off. It adds a beautiful taste and aroma to the kozhambu.

Enjoy with rice!!

Cabbage Thoran

Cabbage Thoran (Cabbage Stir Fry with coconut) is a post to try and show the Kerala way of making Dry curry with coconut called Thoran. As I have already told you before, though I am a Tamilian and love all Tamil dishes, I have a soft corner for anything from Kerala.

A few months ago when my brother (who is younger than me) came to visit, he volunteered to cook for us. I was all glad to give up the job. So he used to make dinner when I was in office and I would make the lunch for the next day. We all loved the food he cooked. For that matter, I was getting a little jealous. He was making things better than me. His food was done in Kerala style and spicy, just the way I like it.


Ingredients

Cabbage (I used half a small cabbage) finely chopped
Onion 1 finely chopped
Coconut 1/2 cup
Green Chillies 3 (adjust as per your need. I just used 2 cause of my son)
Jeera 1 tsp
Turmeric 1/2 tsp
coriander powder 1/2 tsp
Mustard 1/2 tsp
Curry Leaves few
Garlic 1 clove

Salt and Oil to taste

Method of Preparation

1. Add coconut, jeera, green chilli, garlic into a mixer and grind into a coarse paste without adding any water (just pulse a little).

2. In a pan, add oil. Add the mustard seeds. Let it sputter. Add the curry leaves and after a few seconds, add the onion and saute till it is slightly browned.

3. Add the cabbage and cook till it is almost done.

4. Add the ground coconut mix, salt, turmeric powder and coriander powder. Cook till the cabbage starts to brown and the raw smell of garlic and coconut is gone.

Serve as a side for rice. The same recipe can be used for any vegetable like beans, carrot, beetroot etc.

If I were making in Tamil style, I would probably skip the onions, garlic, coriander powder. Also I would not grind the coconut with jeera and chillies. But even in Tamil cuisine there are lot of styles. 

Wednesday 21 December 2011

Kesari Parata

Kesari is a sweet made with Rava or Semolina. I made some this morning and had a little bit left over. While making Roti for Lunch, my sweet tooth kicked in. I was planning to roll my roti with ghee and sugar. Have you tried that? Make a paste of ghee (soft not melted) and sugar. Make roti, let it cool (otherwise the ghee will melt). Layer roti with the ghee sugar paste. Roll and eat. Be the child in you :-)

I suddenly remembered the kesari sitting in counter. I made this super delicious parata with it. This post is just to give you the idea of using Kesari. So I will not go to details of how to make Parata as you all know that. :-)


Ingredients for 2 paratas

Kesari 6 tbsp
Wheat Flour 1/2 cup

Method of Preparation

1. Make Kesari as per the recipe in this link

2. Make dough with the wheat flour as you would for roti

3. Make a small circle with the dough, add 3 tbsp of kesari and join the edges. Flatten and roll again.

4. The parata can be rolled really thin and you will see the semolina starting to show thru the surface.

5. Heat a tawa and cook on both sides by spreading some ghee. Enjoy!!

It tasted like a sweet me make called Boli.

Pepper Rice with Peas and Tofu

I had some tofu in the fridge and I was just trying to make something with it. I was not sure what I wanted to make for dinner. Yes, another one of those unprepared days. So I started throwing things in and adding stuff and this is the result. I was not sure if I wanted it to be a side for Roti or a mixed rice. So I kept the options open till the end. You can enjoy it either ways. It tasted good both ways :-)


Ingredients

Basmati Rice 2 cups
Frozen Peas 1 cup, heated in microwave for 10 min
Potato 1 big or 2 small, boiled or microwaved, and cubed
Tofu 3/4 cup, cut into small cubes. Buy firm vairety
Onion 1, thinly sliced
Tomato 2, cut into small pieces
Green chillies 2 sliced
Pepper 1 tbsp, coarsely ground.
Jeera 2 tsp
Mustard 1/2 tsp
Turmeric 1 tsp
Hing
Salt and Oil to Taste

Method of Preparation

1. Cook the rice with enough water.

2. In a pan, add oil and mustard. When it sputters, add the jeera, turmeric and hing.

3. When it sizzles, add the chopped onion.

4. When it browns, add the tomatoes and green chillies. Cook till oil starts to ooze from the sides.

5. Add pepper, tofu, potato, peas and salt and toss it gently without mushing up anything.

Enjoy with Roti or mix with rice and enjoy!!


Linking this to CWS - Peas by Priya of Priya's Easy and Tasty recipes.

Tuesday 20 December 2011

Ribbon Pakoda

We were watching a movie on Friday and in the middle of it, at around 10:30 in the night, we felt like we needed a snack. There was none at home other than a bag of chips. I told my husband that we can snack and watch movie if you give me 15 minutes. He knew I will not stop till I made it. So we ran to the Kitchen. We were both buzzed by then and so I am just glad we survived the venture.


As I mentioned in my Sevai post, I am now equipped with a new nazhi for making things. A friend of mine brought it for me when she came back from India. Though it was not very great for making Sevai, it was sooper good for making snacks. I used to struggle at level 9/10 with my old one. This one can be rated at 1/10 for difficultly. So if you are using the old style nazhi like me, switch now. Thanks to a friend of mine who suggested this in one of my blog posts.

My New one (shown with a different chip)


My Old one


Ingredients

Besan (chickpea flour) 1 cup
Rice Flour 1/2 cup
Chilli Powder 1 tsp
Hing
Butter 2-3 tbsp
Salt
Oil to fry

Method of Preparation

1. Mix the besan, rice flour, chilli powder, salt and hing.

2. Add the butter and mix.

3. Mix by adding water little at a time to make dough like chappati

4. Make a ball with it and put it in the Nazhi (the equipment) with the correct chip.

5. Heat oil in a Kadai and press down the dough into the oil.

6. Gently break down the ribbon pakoda and cook till it is slightly browned. Drain and transfer to a bowl. Repeat for the rest of the dough

Enjoy!!!

Venn Pongal with Tomato Gothsu

Pongal is made of Rice and Moong dal. Venn Pongal literally means white pongal. It is the salty version of the Chakkara Pongal (sweet pongal) made during the Pongal festival. If you are wondering why I did not make the Chakkara Pongal today, read my post on Sweet Idli. I am still heart broken.

It is the standard recipe. But I have made one small change to it. Usually the rice and dal are cooked together. I somehow don't like that much as my dal always fails to cook well. Also, the ratio is of rice and dal are different for Sweet Pongal. So if I cook separately, I can mix whatever ratio I want.


Ingredients

Raw Rice 2 cups
Split yellow Moong dal 1 cup
Melted Ghee 1/2 cup
Pepper 2-3 tsp
Cumin 2 tsp
Cashew few
ginger small piece finely chopped
Salt

Method of Preparation

1. Pressure Cook the rice with 5 cups of water. (1:2.5 ratio). Cook the dal as well till well done.

2. Coarsely powder the pepper and cumin.

3. In a pan, heat half the ghee. Add the cashews. When it starts to brown, add the ginger, pepper and cumin.

4. After a few seconds, add the rice, dal and salt. Add the rest of the ghee. Add a little water if required. Stir well and mash everything together.

Serve with chutney or gothsu.

Gothsu is usually prepared with Eggplant (Kathirikka). As I have told you already about my husbands 'love' for Kathirikka, I make a tomato Gothsu that works well with Pongal.

Ingredients

Onion 1 big sliced
Tomato 3 chopped into small pieces
Curry leaves and green chillies (optional)
Sambar powder 3 tsp
Mustard 1/2 tsp
Tamarind 1/2 tsp
Salt and oil to taste

Method of preparation

1. Heat oil in pan and add the Mustard.

2. When it sputters, add the onion, curry leaves and green chillies.

3. When the onion starts to cook, add the tomatoes. Cook till it is wilted.

4. Add sambar powder and tamarind and some water and boil.

5. If it is too watery, you can add some rice flour to thicken it. I did not add it today.

Monday 19 December 2011

Ulundu Sevai

Have you read the story of my attempt to make idiyappam? Do read it. Now I equipped myself with a new device (one which rotates in the hand), courtesy my friend who came back from her India trip. The story was slightly better cause I managed without husband at home. But I still struggled. I found it difficult to hold as it was hot and also slippery.

For many, the words sevai and idiyappam are synonymous. Technically they are not the same. To begin with I differentiate them as Idiyappam being a kerala dish and sevai being a tamil dish. That is also not true. Sevai though not made by malayalees, idiyappam I have learnt many tamilians make. So coming to some actual differences. Idiappam is made of Raw rice and Sevai with Boiled rice. Idiappam - you make a dough, press and then steam into idli plates. Sevai - you make dough, steam and then press ready to eat. Not sure if many of you will agree with me. Let me know what you think.

I am not going to describe how to make sevai. Just a small post describing how to make Ullundu sevai. This is a variety like making Lemon sevai, coconut sevai etc. It is a new recipe to me that I learnt from my mother in law. To be honest I am not a big fan of this. But my husband loves this soooo much. His mom always makes a batch of this whenever she makes variety sevai. Luckily for me there will always be 4-5 varieties of sevai, I can get away with eating just a little bit of this. My son also liked this when I made it.


Ingredients

Whole Urad Dal 1 cup
Green chillies 2
mustard 1 tsp
hing
salt
oil

Method of Preparation

1. Soak the Urad dal for an hour.

2. Drain and grind into a course paste with salt and green chillies.

3. Make balls of it and steam in idli plates for 8-10 minutes. Crumble and keep aside.

4. Heat oil in a pan and add the mustard. When it sputters, add the hing and crumbled urad.

5. Saute for a few minutes till it cooks a bit. Make sure it does not become really hard.

6. Mix with sevai and enjoy!!

Vazhakka Bajji

Vazhakka (Raw Banana or Plantain) Bajji (fritters) reminds me of my college days. I used to be a day scholar, did not live in a hostel and commuted in the college bus. The last class ends at 3:45 and the bus leaves at 4. That does not leave enough time to go get some snack before boarding the bus. So the best days when the last hour is free or if the class gets over early or when we cut that class :-) We used to go hangout in the canteen. The tea and snack and all the chit chat was fun. Vazhakka Bajji, Pazham Pori, Parippu vada - wow!!

Another thing that always makes me wonder is how people eat their snack and tea (coffee). I always read at the end of your posts - enjoy with a hot cup of tea :-) My husband and most tamilians I have observed, enjoy eating their bajji (or any tiffin or snack) and then finish off with coffee. I love eating my snack and tea together. 'Kadiyum Kudiyum' - loosely translated as bite in one hand and drink in another. How do you enjoy yours??


Ingredients

Vazhakka (I used long big one) 1
Chickpea Flour (Besan) 1/4 cup
Maida 1/4 cup
Rice Flour 1/2 cup
Chilli Powder 1 tsp
Hing
Baking soda a pinch
Salt to taste
Oil for frying

Method of Preparation

1. Mix all the ingredients other than oil in a bowl.

2. Add water and make a thick paste.

3. Cut the vazhakka into thin slices or circles. Mine was a long big one, so I decided to just cut in circles along the length. Typically it is done in long slices. No need to peel it. The peel tastes really good in the bajji.

4. Heat the oil for frying. Dip the cut Vazhakka and drop a few into the oil. Fry well on both sides and remove.

5. Repeat for the rest of the Vazhakka. Same can be done with potato, onion, egg plant etc.

My son was not interested in waiting till the photos were taken. :-)


Sunday 18 December 2011

Sweet Idli


I have a huge love for anything sweet. That is not to say I don't love anything savoury. I do love them as well. I love food :-) Anyways, coming back to my love for sweet things - I really love the instant sweets that you can make. I always try to make something while making salt version of the tiffin items like sweet wheat dosa (with wheat dosa), kesari (with upma), sweet aval (with poha), chakkara pongal(with venn pongal). My husband broke my heart today when he told me that he does not necessarily care for the sweets made with Jaggery. He eats them fine. So how was I supposed to know he did not care for them. So I asked - do you not like it or you don't care for them? Thankfully he said - I don't care for them. That means I can make it once in a while :-). So my plans for making Ada Pradaman are shelved for a little while now.

My mom used to make this amazing thing which till a few days ago I thought was called Kinnanappam. But a discussion with a fellow blogger made me realize I was after a wild goose chase. I did not know the name of the recipe. I did not know what the flour used was. All I remember is that she used to make it with Jackfruit and it had jaggery in it. It is not the therali appam or the elayappam. I love those 2 very much. So anyways, knowing fully well that I am not making what she used to make,I pulled out a vessel and started adding all the things that I felt like adding. The result was an idli that I really enjoyed. And though my husband broke my heart saying he does not care for stuff with Jaggery, he ate more idlis than me.


Ingredients

Wheat Flour 1 cup
Jaggery 1/2 cup
Cardamom 1/2 tsp
Raisins 1/4 cup
Banana 1 big one
Coconut 3 tbsp
Ghee for greasing the idli plates

Method of preparation

1. Melt the jaggery with 1/2 cup of water and let it cool.

2. Take the wheat flour in a vessel. Mash the banana and add it the flour.

3. Add the melted jaggery to it and make a dough. Add enough water. Keep is really thick.

4. Add the raisins, coconut and cardamom powder. Mix well.

5. Grease the idli plates with some ghee and pour the batter into it. Steam for 8-10 minutes. Enjoy this yummy and healthy sweet. It is not a very soft idli. It will be a little hard, tasty nevertheless.

Saturday 17 December 2011

Coconut Rice

Do you guys believe that the pregnancy craving is really the baby wanting specific things or the hormone high mom craving for food? I always used to believe that it is the mom. She is going thru a lot and her hormones are high and she wants to find comfort in food. Boy, was I wrong.

When I was pregnant with my little one, or even before that I had made big plans to eat a lot of my favourite stuff. Ripe Mango, Ferroro Rocher, Vendakka (Okra) curry. My husband even got me this huge box of Rocher. I had one from that and did not touch it after that. My son took over from that point. Orange was my favourite fruit (eww). Carrot the vegetable. Oh and I did crave for a lot of Coconut rice. I remember one of my colleagues' wife sent me a separate box for lunch. That could be cause a week before that I finished his lunch and he had to go get himself a sandwich.

You might be wondering what is the point of this story. I made coconut rice yesterday after a long time. My son loved it soooo much. It made my day!!!


Ingredients

Rice 1 cup
Coconut 1 cup
Mustard 1/2 tsp
Hing
Cashew few
Channa dal 1 tsp
Urad dal 1 tsp
Curry leaves few
Green chillies 1
Red chilli 1
salt
oil

Method of Preparation
1. Cook the rice with enough water and transfer to a vessel to let it cool a bit.

2. In a pan heat some oil. Add mustard seeds. When it sputters, add the cashew, channa dal and urad dal and roast till slightly browned.

3. Add the red chillies, green chillies and curry leaves and after a few seconds add the coconut and sauté till it is slightly red.

4. Switch off and let it cool. Mix the rice and salt. Enjoy!!


Friday 16 December 2011

Carrot Parata

I was running out of ideas of what I wanted to make. I know I could go online and check some blog and find a recipe. But most things require prep work and it was already 5 in the evening when I started making plans for dinner. So I resorted to my next best way to decide what I wanted to make. Open the fridge and stand in front of it for a few minutes. I almost always forget what I was standing there for. Then close the fridge. Come back to the living room. Sit in front of the Laptop. Check this and that. Then I remember - dinner. Run back to the kitchen. This time, I found a bag of carrots.

I could make carrot curry and rasam and we can eat with rice. For those of you who might remember, my husband is not a great fan of rice. (Yes, I still cannot believe it). So if I really need to make something that he will feel good eating I have to make roti. Suddenly I decide - let me make Parata with carrot. Ok, no time to go online to get ideas. It's already 6. So I just do what I feel like. The result was not bad and it is definitely different from the usual Carrot Parata recipes.

Note that I have used carrot alone. So there is no binder. You could use some potatoes as well. Also, I have used raw carrots. So it was very juicy and it was spraying juice when I was rolling if I were not careful. So be mindful of that.


Ingredients

Whole Wheat Flour 1.5 cups
Carrots 3 grated finely
Coriander Seeds 1 tbsp
Channa Dal 2 tbsp
Pepper 1 tsp
Turmeric 1/2 tsp
Salt
Oil 1 Tbsp
Ghee for spreading on Parata.

Method of Preparation

1. Prepare the wheat flour by adding some salt, turmeric, oil and water like you would for making roti. Keep it wrapped for a couple of hours. Split into 6 small balls

2. Grate the carrots finely and keep aside.

3. In a pan, dry roast the channa dal. Remove and then roast the coriander seeds. The roast the pepper. Grind all of them to a fine powder and add to the grated carrots.

4. Add some salt as well to the carrot and mix well. The stuffing is ready to be used.

5. Roll each dough ball into a very small circle. Place the vegetable mix in the centre and pat it down.

5. Roll the sides of the dough to close the vegetables. Flatten, dust with wheat flour and roll into thin paratas.

6. Put it on the tawa and spread some ghee on each side and cook.

Enjoy with Raita (or plain yogurt) and pickles!!

Spicy Kathirikka Kari

This is a totally sinful recipe for Kathirikkai (also known as brinjal, eggplant, aubergine - wow different english names in all the countries we have lived). You will see when you read the recipe why it is sinful. But, I will tell you why I made it like that.

Before that, I need to tell you my history with Kathirikkai. Growing up, the rule in the house (my dad's rule) was that we were not allowed to say "I don't like it" for anything that my mom made. But just for kathirikka my mom used to make another curry so that I can eat just a little kathirikka. I am sure our dad knew this. But he never insisted.

When I went to live in Chennai, there were 2 girls in our house who loved Kathirikka. So both of them will pick up some on the way back from work. That meant that we will have Kathirikka atleast twice every week. I learnt to tolerate it.

Now comes my husbands story. He says he does not like Kathirikka. He does not eat it when his mom or I prepare it. We are ok with that. But when we go somewhere and someone prepares it, he leaves every other curry and just eats this. This has happened many times. Once when we were camping a friend made some on the grill, other time at friends home she had made this amazing dish. I asked him to atleast try once at home. He kept insisting that he does not like it.

I decided to take charge today. I did not want to try any complicated recipe. All I wanted to prove to him was that the regular spicy kathirikka that we make is one of the best dishes :-) With that mission, I set out to make it today. I am usually a little stingy with oil, spice level and salt though I love all the 3 in my dishes especially hot food. Today I liberated the inner demon in me. He ate the curry with warm rotis and accepted that not only was it one of the best Kathirikka dishes, but one of the best dishes. See what the simplest dishes can do when you let out your inner demon.


Ingredients

1 Big Kathirikka - thinly sliced. I did not even have the yummy small Indian variety. I used the huge British variety.
Onion 1 big finely sliced

Mustard 1tsp
Jeera 1 tsp

Chilli Powder 1 tsp or more if desired
Turmeric 1/2 tsp
Hing - little

Generous supply of Oil and salt to taste

Method of Preparation

1. Heat oil in a Pan. How generous - just be generous beyond your imagination and add the mustard. When it sputters, add Jeera. When it sizzles, add the Turmeric Powder and Hing.

2. After a few seconds, add the cut onion and sauté till slightly browned

3. Add the cut kathirikka, chilli powder and salt. Mix well and cook till the kathirikka is done stirring in between. Do not let the vegetable mush up.


Linking this to Sinful delights hosted by Vardhini