Tuesday 25 December 2012

Ginger Bread Cookies

Christmas is a special time of the year and all houses are filled with festive spirit (and not to forget the smell of all the yummy bakes). Our Christmas tree is up and Our little one helped us decorate it with baubles. He even made a couple of baubles.

Christmas Eve - we set up cookies (yes this very same) and milk for Santa. We also kept some carrots for the reindeer. My little one was sooo excited about taking care of things for Santa :-)


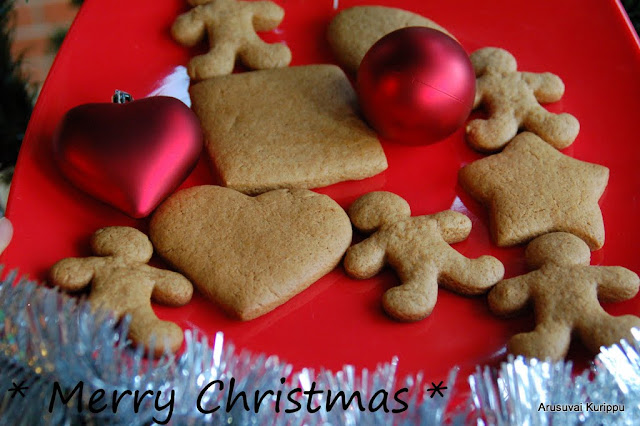
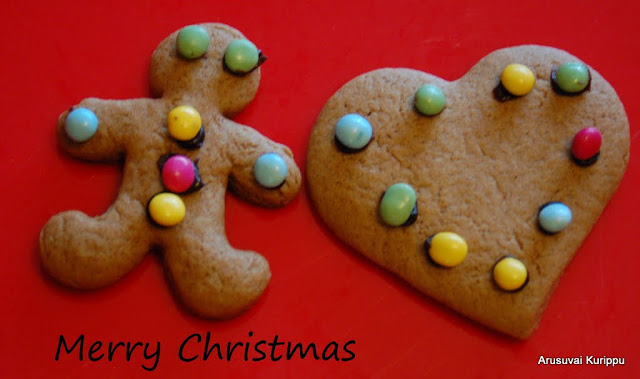
Happy Birthday Jesus! Merry Christmas to all of you.

Did I tell you that my little one was in the kitchen doing every bit of this baking. I was just measuring out stuff and telling him what to do.. and ofcourse helping him do things he could not. But he is so happy to 'bake' with me :-)

I have made it without eggs


Ingredients

Flour 2.5 cups
Baking Soda 1 tsp
Ginger Powder 2 tsp
Cinnamon Powder 1/2 tsp
Butter 125 gm
Brown Sugar 1/2 cup
Golden Syrup 1/4 cup
Milk 1/4 cup


Method of Preparation

1. Sieve the flour,  baking soda, ginger powder and cinnamon powder into a bowl.

2. Add the butter to it and mix to get a crumbly texture.

3. Add the sugar and mix again.

4. Now add the golden syrup and milk. Mix to form a dough.

5. Refrigerate for about an hour.

6. Take out and roll the dough using a rolling pin.

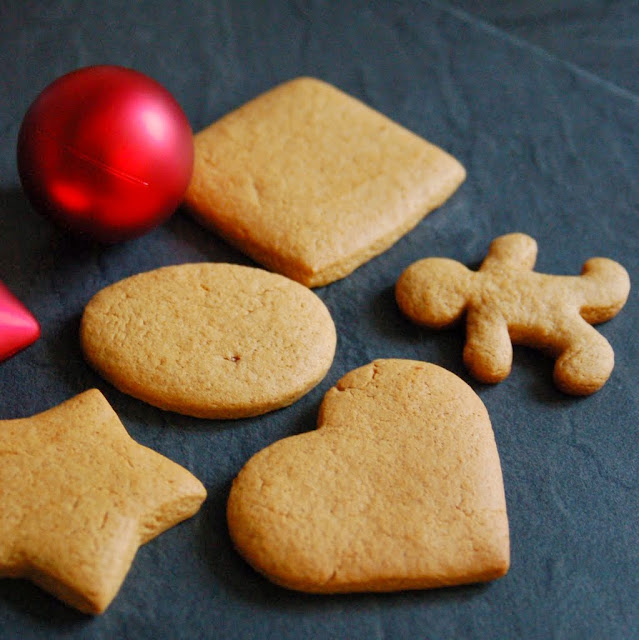
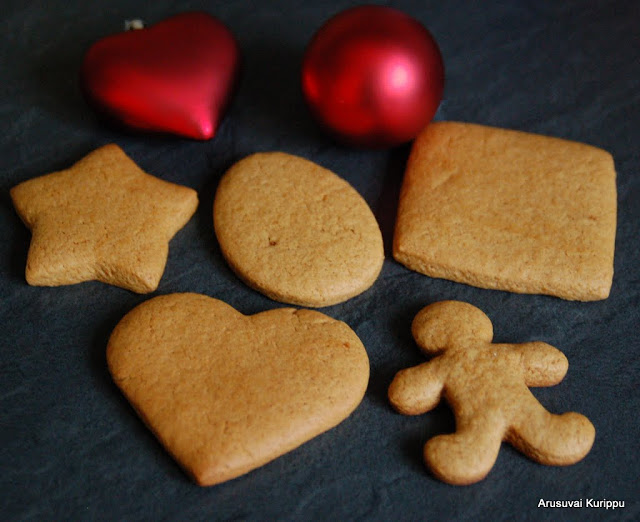
7. Cut into shapes as required. I made a batch of ginger bread cookies and another of shape cookies. It would be a good idea to separate out smaller ones from larger ones as my ginger bread ones were ready a minute or so sooner.


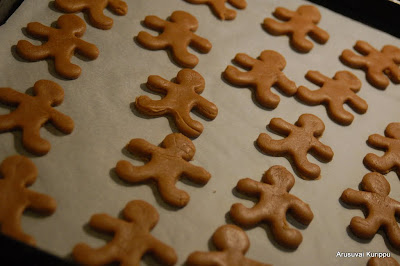
8. Place them in a baking tray lined with parchment paper.

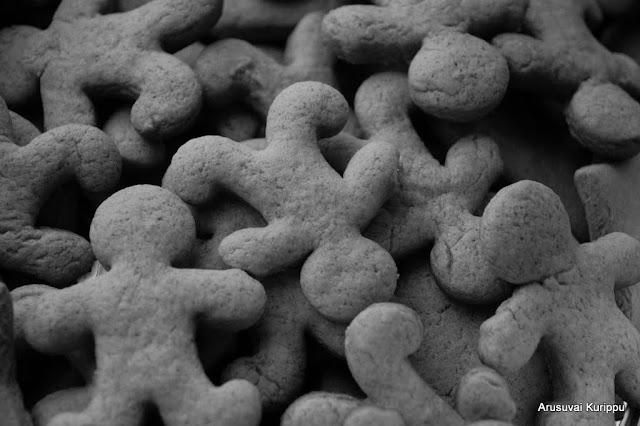
9. Preheat oven at 180C. Bake the cookies for 12-15 min. Cool on the tray for 10 minutes. Then cool on a wire rack for some more time.


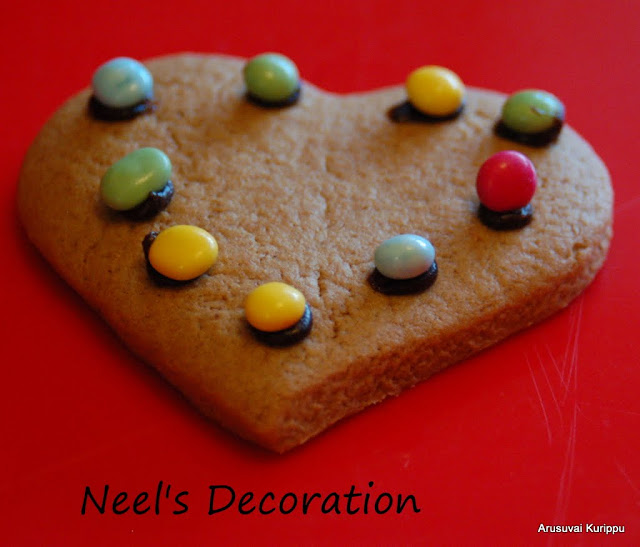
10. Decorate once completely cooled.


AGC are doing Christmas Bakes this week. Check out the other AGC thoughout this week 
AnushaJayanthiKavithaPriya MRadhikaVeenaPriya S


Linking this to Sangeetha's Show me your HITS - Festive Food hosted in my blog.


Saturday 22 December 2012

Ceylon Parata with potato and channa stuffing

Ceylon Parata is a new recipe to me. I saw this a little while ago in my friend Radhika's blog. Really liked the idea. Have made it almost like her recipe skipping a couple of ingredients that I did not have.

The stuffing I made this time is with chickpeas and potatoes. It was really good. I might try with a different stuffing next time. We all loved this dish.

Never had it before and though Radhika says it is popular street food, I somehow missed it. But now I know to make it and it will be made at our house often.


Ingredients

For Dough 
Maida/APF  2 cups
Oil 4 tbsp
Salt 1 tsp
Water to knead

For stuffing
Cooked Channa 1 cup crushed
Potato 2 Boiled and mashed
Onion 1
Green Chilli 1
Coriander leaves 1/4 cup
Coriander powder 2 tsp
Chilli powder 2 tsp

Oil and salt to taste

Make a Paste
Onion 1
Ginger 1 inch piece
Garlic 5 pods
Cinnamon 1 inch piece
Cloves 3
Star Anise 1
Fennel 1 tsp
Cumin 1 tsp

Method of Preparation

For dough
1. Take the flour and salt in a bowl. Add a little oil.

2. Add enough water and mix into a dough like you make for chapatti.

3. Take some more oil in your hand and smear on the dough.

4. Divide into 6 portions.

5. Cover and let it rest for a couple of hours.

For the stuffing
1. Make a paste of all the ingredients under 'make a paste' - onions, ginger, garlic, cinnamon, clove, star anise, fennel and cumin. Keep aside.

2. Soak the chick peas overnight and pressure cook.

3. Boil potatoes and peal and cube them. I use a microwave to cook potatoes.

4. Heat oil in a pan. Add chopped onions and saute till it starts to brown.

5. Add green chillies and coriander leaves. Saute for another minute.

6. Add the ground paste and saute till the raw smell is gone.

7. Add Coriander powder, Chilli powder and salt. Mix well.

8. Add the cooked chickpeas and crumbled potatoes. Mix everything well. And cook for a couple more minutes. Switch off and let it cool.

9. Divide into 6 portions.

To make paratas
1. Take a portion of the dough. Roll it thinly into a big circle. Use the kitchen counter itself so that you can roll into thin big shape. Dont worry if it is not a circle. We will be folding it soon. :-)

2. Place a portion of the stuffing in the center. Pat it into a square shape.

3. Fold the dough from the left to the center. Then from the right to the center, overlaying a little to the left fold. Do the same from top to bottom and bottom to top making a parcel.

4. Heat a tawa and add a little oil. Place this parcel on the pan. Cook on one side.

5. Flip (adding some more oil to the pan) and cook on the other side.

6. Repeat for the rest of the dough.

You can eat this as is. My little one enjoyed it by dipping it in yogurt. It mellowed the heat a little for him. The spice level mentioned above is a little high for little ones. I took out his share before spicing up the rest of the stuffing. Please adjust according to taste.

Wednesday 19 December 2012

Tofu Mutter Pasanda

Tofu has a great place in my kitchen. I use it a lot in many 'chinese' dishes. And many times as a substitute for paneer. Well, paneer is paneer. Nothing can beat its taste. But it is not easily available for me (unless i decide to make it). Tofu can be easily procured and we both love it.

And paneer mutter is such a popular dish. This is my tofu spin on it. Ofcourse, you can use the same recipe and make with paneer.


I decided to make this dish when Anusha of Tomato Blues gave me fresh or frozen peas as my secret ingredient for this week. Thank you Anu. It was a simple ingredient, yet got an awesome dish out of it

Pasanda is a white creamy sauce and paneer is usually stuffed with cashews and raisins. I have tried to incorporate the same flavours to the gravy.

Needless to say, it was a rich and creamy gravy. Fingerlicking at that. Please please do yourself a favour. Don't think about calories when you are making this. Just enjoy this heavenly side dish.

Ingredients

Tofu 2 cups
Peas 2 cups
Milk 2 cups
Water 1/2 cup
Chilli Powder 1 tsp
Coriander leaves a little to garnish

Oil and salt to taste

To make a paste
Onions 2
Garlic 6 pods
Ginger 1 inch piece
Cashews 3 tbsp
Raisins 1 tbsp
Cinnamon 1 inch piece
Clove 2
Star Anise 1
Poppy seeds 1 tsp
Water 2 cups

Method of Preparation

1. Cube the tofu and shallow fry it till it is slightly fried on all sides. You can ofcourse substitute with Paneer. If you get tofu in water like I do, wrap it is a couple of tissues. Place it between 2 plates or cutting boards. Place something heavy on top and leave it for a couple of hours (atleast 30 min). You will get nice firm tofu.

2. Steam the peas in the microwave for about 5 minutes. I used frozen peas. Adjust time as required.

3. In a pot, add all the ingredients under 'to make paste' including the water. Boil till the onions are cooked. The water will almost drain by the end. I used red onions and so did not get quite a white colour. Use Yellow onions if you can.

4. Grind into a fine paste.

5. Heat oil in the pan. Add the paste and saute till it comes together, about 5 minutes. Keep stirring to prevent sticking to the bottom.

6. Set the gas to low. Add the milk and stir to mix. Add the chilli powder and salt as well. Add the 1/2 cup of water if the gravy is too thick.

7. When it heats up, add the fried tofu and cooked peas. Mix well and simmer till it thickens.

8. Switch off and garnish with finely chopped coriander leaves.


AGC are making going Hush Hush (secret ingredient) this week. Check out the other AGC thoughout this week 
AnushaJayanthiKavithaPriya MRadhikaVeenaPriya S

Monday 17 December 2012

Rava Idli

Have you made something and felt that even proffessional chefs can't beat this taste? This rava idli was one such moment for me. I have been meaning to make this for some time now. A long time ago I had tried making rava idli and for some reason this batter was very runny and I did not like it much.

When I made Oats Idli, it came out really good. So I decided to try rava idli by the same principles. It was just soft yet porous and grainy with the texture of rava coming thru perfectly. Treat your loved ones with this perfect breakfast and you will have to come and thank me for this recipe :-)


Ingredients

Rava 1.5 cups
Curd 1 cup
Water 1.5 cups
Eno Fruit salt 1.5 tsp
Salt 1 tsp

Mustard 1/2 tsp
Channa Dal 1 tsp
Split Urad Dal 1/2 tsp
Jeera 1/2 tsp
Hing a little
Cashews few
Carrot 1 big grated
Green Chilli 1 finely chopped
Ginger a little finely chopped
Curry leaves few finely chopped
Coriander leaves a little finely chopped

Method of Preparation

1. Heat a pan. Add the rava and roast it till a nice aroma comes. Keep aside.

2. In the same pan, add a little oil. Add mustard.

3. When it sputters, add channa dal, urad dal and cashews. Stir till it starts to brown.

4. Then add the carrots, green chilli, ginger, curry leaves, jeera and hing. Mix and cook for a couple of minutes.

5. Add the rava and mix well for a minute or 2.

6. Transfer to a vessel. Add the curd and water and mix well.

7. Add salt and coriander leaves. Mix everything together.

8. Grease an idli plate and keep ready.

9. Add eno to the batter. Mix well and pour into plates and immediately steam for about 10 minutes.

10. Let it cool a little and then take out of the plates. Serve with some chutneys or molaga podi. It actually tasted very good as it is cause it already has a lot of flavours.

Friday 14 December 2012

Banana Strawberry and Orange Ice lolly

I bought a ice lolly tray a few weeks ago. My son (all of 3 years) is interested in what I do in the kitchen. The first thing that we made together was the banana cake. We made this ice lolly together. Him doing most of the work :-) He was very proud of his creation... I worked the mixie for him while he made the sound to make sure he was contributing!


Ingredients (makes 6)

Banana 1
Strawberry 6-8
Orange Juice 1/2 cup

Method of Preparation

1. Roughly chop the bananas and strawberries. Add to a blender. Pulse till it is a little mushed up. I left a few chunks here and there so that it will be there in the lolly.

2. Add the orange juice and pulse once more. You can add a little sugar or honey if you want. But I chose to keep it just natural and it tasted ok for my son.

3. Pour into ice lolly moulds. Cover with the lolly stick/lid. Keep in freezer for a few hours.

4. When ready to use, just run it under hot water and turn the lid to pop the lolly off the mould..

Enjoy with your little ones!!! And be proud of giving a healthy treat. 

Tuesday 11 December 2012

Tofu Veggie Sandwich with Peri Peri Dressing

As an Indian I always struggle to make sandwiches which are not really Indian. Somehow I add that Indian touch to it. I made this quick sandwich and was very pleased with myself for not making an Indian one. I was trying to name it and asked my husband for a suggestion. He usually starts suggesting funny names. The first one he came up with was Indian Tofu Sandwich. I could not believe what he said. Did I after all end up making another Indian Sandwich... Guess it does not matter. We loved this simple sandwich for a quick lunch....

You can make this with Paneer as well.


Do check out other Sandwich recipes in my blog!

  1. Nutella Strawberry Sandwich
  2. Carrot Tofu Sandwich
  3. Cucumber Mint Sandwich
  4. Eggplant Parmesan Sub
  5. Cutlet Sandwich - Mixed Vegetable Sandwich

Ingredients (Makes 1 sandwich)

Tofu 1 slice (the size of a bread)
Cucumber Sliced few pieces
Tomato Sliced few pieces
Peri Peri Sauce (or a chilli sauce will also work)
Cheese (used grated mozerella) as required
Butter a little


Method of Preparation

1. On a slice of bread spread some cheese.

2. Add a slice of tofu, then a layer of cucumber, a layer of tomato.

3. Add a dash of peri peri sauce or chilli sauce. I used tomato sauce for my little one.

4. Add another layer of cheese. Cover with a slice of bread.

5. Toast in a sandwich maker or on stove top. I used the stove top this time as it was a bulky sandwich.

Enjoy with tea!


AGC are making Sandwiches this week. Check out the other AGC thoughout this week 
AnushaJayanthiKavithaPriya MRadhikaVeenaPriya S

Sunday 9 December 2012

Broccoli Poha

Poha is one of my favourites. We in south call it Aval Upma. As I have mentioned before my husband is not a big fan of Poha, mainly cause of the dryness. I have been trying to experiment with a few different varieties to make it interesting for him. This is another variety that I tried. Do check out the other versions that I prepared.

Tomato Poha
Soya Poha


Ingredients

Poha 2 cups
Broccoli 6 florets plucked into small pieces
Onions 1 finely chopped
Peanuts 2 tbsp
Channa Dal 1 tsp
Turmeric 1/2 tsp
Cumin 1 tsp
Lime Juice 1 tbsp

Oil and salt to taste


Method of Preparation

1. Take Poha in a sieve and run it under the tap for a minute or two. Let it sit and drain.

2. Heat oil in a pan. Add the mustard. When it sputters, add the channa dal and peanuts. When they start to brown, add the turmeric and jeera. When it sizzles, add the onions.

3. Saute onions till it is slightly browned. Add broccoli and salt. Cook till broccoli is done and crunchy.

4. Switch off. Add the poha and lemon juice and mix well.

Thursday 6 December 2012

Vegetable Paella

Paella is a spanish rice dish. I had it for the first time when we went to a restaurant La Tasca, here in UK. We liked it, it reminded us a lot of tomato rice. I got this recipe in a Vegan cookbook that I borrowed from the library. We loved it. The only flip side was that we felt it was closer in taste to risotto than to paella, tasty nevertheless.


Ingredients

Arborio risotto rice 1.5 cups
Saffron a large pinch
Cherry Tomatoes about 20
Peas 1 cup
Green beans about 20
Zucchini 1
Garlic 2 pods
Rosemary 2 sprigs
Water 3.5 cups

Oil 1/3 cup

Method of Preparation

1. Warm 1/2 cup of water and add saffron to it. Let it infuse.

2. In a pan heat, half the oil. Add the chopped zucchini and green beans. Saute for a few minutes till it is almost cooked. Keep aside.

3. Add the peas and saute for a couple of minutes. Add to the other vegetables.

4. Add tomotoes and saute till the skin starts to peal and juices come out. Add to the other vegetables.

5. Add the remaining oil to the pan. Add chopped garlic and rosemary. Cook in low heat for a minute to infuse the flavours into the oil.

6. Add rice and saute for a couple of minutes.

7. Add the saffron water and the rest of the water (you can use veggie stock) and bring to boil.

8. Simmer and cook till the rice is cooked and the water is almost evaporated.

9. Add the veggies and cook in very low heat for 5 more minutes.

Wednesday 5 December 2012

Roasted Red Pepper Thogayal

Roasted Red Peppers have a special place in heart. Love adding them to italian sauces and to hummus. Do check out my Red Pepper Hummus recipe. I used to buy these in jars a long time ago. No idea why. It is so simple to just roast it on stove top.

As I was roasting pepper for hummus last month, I really wanted to make a thogayal with it. And the result came out really good.


Ingredients

Red Pepper 1
Coconut 1 heaped cup
Urad dal 2 tbsp
Red Chillies 1 (this was very mild. add more for spicier version)
Oil and Salt to taste

Method of Preparation

1. Roast the red pepper on the stove top till it is charred all around.

2. Cut and trim off the ends and the seeds. Chop into smaller pieces and add to mixie.

3. In a pan, heat a little oil. Add the urad dal and roast till it starts to brown. Add the red chillies and roast for another minute. Transfer to the mixie.

4. Add coconut and some salt. Grind into a coarse paste. You will not need to add much water as the pepper will give out water. Add a little water if need be.

Serve with any dosa or idli. We enjoyed it with the milagu adai

Tuesday 4 December 2012

Milagu Adai - Karthigai adai

Milagu Adai or Karthigai Adai is one of the neivedhyams prepared for Karthigai. My Mom and MIL don't make it. It is a tradition I learned in the internet and thought of trying this time. It was a really good varaition of the regular adai. I used the recipe idea from this site.


Do try the other adai recipes as well from my blog.
Adai
Oats Adai
Adai Paniyaram


Ingredients

Raw Rice 1.5 cups
Urad dal 1/2 cup
Toor dal 1/2 cup
Channa dal 1/2 cup
Pepper 1 tsp
Hing 1/8 tsp
Salt

Optional
coconut and curry leaves

Method of Preparation

1. Soak the rice and dals together for a few hours.

2. Grind into a coarse paste, along with the pepper, hing and salt adding enough water.

3. Add coconut and curry leaves. I skipped it.

4. Pour a laddle into a hot dosa pan and spread like you would for a dosa. Add a little oil. Cook on one side. Once done, turn and cook on the other side.

Serve with chutney or molaga podi. Adai tastes great with jaggery as well.

Can you see the grains of pepper in the click below. Loved the peppery adai. And note that is it lighter in colour than regular adai.


Linking this to Sangeetha's Show me your HITS - Festive Food hosted in my blog.


Monday 3 December 2012

Eggless Peanut Butter Banana Muffin

I was watching a cooking show - Rachel Allen's Cake Diaries with my little one. She made a banana peanut butter muffin and my little one wanted to make those 'cup cakes'. I did not have the heart to tell him that they were not technically cupcakes, and they are muffins. To be honest even today I have not quite figured out the difference myself.

I googled and found this link for an eggless, butterless version of the same muffin and we made it together. My son says he made it and I was his helper. Well he did do most of the mixing and putting the ingredients in the bowl. All I did was measuring them out :-). This is turning out to be a cute mum and son thing.. loving it.


The 'cake' turned out very moist and soft. Really loved it. Do use the chunky peanut butter if you can, as the little bits of peanuts added to the taste of the muffin.

You can make this vegan by using soy yogurt. And for milk you can use soy milk or almond milk or even juice. The original recipe did use some juice instead of milk.


Ingredients

Ripe Banana 3
Chunky Peanut Butter 3/4 cup
Milk 1/2 cup
Yogurt 1/2 cup
Flour 2 cups
Sugar 1 cup
Baking Soda 1 tsp
Baking Powder 1 tsp
Salt 1/2 tsp

Method of Preparation

1. Preheat an oven to 190 C (375F).

2. In a mixing bowl, mash the bananas. Add peanut butter, yogurt and milk. Mix it all together with a wooden spoon.

3. Now add the rest of the ingredients and fold it in with a fork.

4. Pour into greased pan or in a paper lined pan. Mine is a non stick and I just poured directly.

5. Bake for 20 minutes or till a skewer comes out clean.

6. Cool in a wire rack.

Enjoy this healthy treat with evening tea or as a morning breakfast.


Linking this to Sangeetha's Show me your HITS - Festive Food hosted in my blog.


Sunday 2 December 2012

Coastal Indian Channa Masala

Coastal India has a unique blend of spices. Coriander, Cumin, Fenugreek, Red chillies, Curry leaves and Coconut combine to give the dishes its unique taste. I was watching a show the other day and chef Madhur Jaffrey was talking about spices. I totally agree with her about how walking into a kitchen you will know if it is a south indian one or a north indian one. The smell is unique.

I have tried to capture the essence of Coastal South Indian flavours in this dish. Serve it with rice, appam, idiyappam, parota or even rotis.


Ingredients

Coriander seeds (malli) 2 tbsp
Cumin seeds (jeera) 1 tbsp
Dry Red Chillies (Vatta Molaga) 2
Fenugreek seeds (Medayam) 1/2 tsp

Coconut 3/4 cup
Turmeric 1/2 tsp

Onions 2
Tomato 2
Garlic 2 pods
Curry Leaf few

Dry Chickpeas 2 cups

Thick Coconut Milk 1 cup

Method of Preparation

1. Soak Chickpeas overnight and then pressure cook till it is cooked and has its shape.

2. Dry roast coriander seeds, cumin, red chillies and fenugreek seeds. Add to a mixie.

3. Add the coconut and turmeric. Grind into a smooth paste adding enough water. Keep aside.

4. Heat oil in a pan. Add curry leaves, onions and garlic. Saute till the onion browns.

5. Add chopped tomato and cook till it is well cooked. Add a little water if it starts to stick to the bottom.

6. Add the coconut paste and cook for 5 more minutes. Keep stirring.

7. Add the chickpeas along with the cooking water as required to make a thick gravy. Simmer for a few minutes.

8. Add the coconut milk and salt. Mix well and simmer for a couple more minutes.

Serve with roti or rice.

Friday 30 November 2012

Event Announcement - Show Me Your HITS - Festive Food

Happy to Announce an event in my blog. This month I am guest hosting Sangeetha's Show Me Your HITS (Healthy Interesting Tasty FoodS). Do I need to say more?


Going with the festive nature of the month, I chose the theme as Festive Food.

When I think of festive food, the first things that come to mind are the ones that we make for Indian Festivals - all the sweets, kheer/payasam, savouries etc. Then of course all the western ones - Christmas bakes, savoury bakes, and all the dishes, gravies and soup that go for Christmas Lunch (or if you still have any of your Thanks Giving recipes to post). I may even give a shot at making some sweet/savoury for Hanukkah (Jewish Festival of Lights). Oh well, it need not be a festival celebrated this month. The options are many. All you have to do is don your cooking hat, get cooking and clicking and send me the recipes.

1. Cook any Course or Cuisine for the theme Festive Food. Please remember that it has to be a healthy/low calorie dish.

2. Vegetarian dishes only. Eggs can also be included both in baking and as a recipe.

3. Use of logo is appreciated as it helps spread the word.

4. Link to Sangeetha's HITS announcement and this page is mandatory.

5. Only 2 Archived entries are accepted as long as they are linked with both announcements.

6. Multiple New Entries are accepted.

Tuesday 27 November 2012

Roasted Red Pepper Hummus

We @ AGC are cooking Turkish Cuisine this month. I decided to make this simple Hummus for that. I used it as a spread for sandwich.


Ingredients

Cooked Chick peas 1 cup (about 1/2 cup dried)
Red Pepper 1
Chilli Powder 1/2 tsp
Cumin Powder 1/2 tsp
Lemon Juice 1/8 cup
Cilantro/Coriander handful
Garlic 2 pods
Salt to taste
Tahini (Sesame paste) 1/4 cup


Method of Preparation

1. If you are using dried chick peas, soak overnight and pressure cook. Drain and add to the mixie.

2. Add the chilli powder, cumin powder, lime juice, coriander leaves and garlic. Add Tahini as well if using. I did not use it, and it did not change the taste much. Not having Tahini should not prevent you from enjoying this awesome dish.

3. Give the mixie a run till it is all mixed and the chickpeas and garlic are ground.

4. Roast the red pepper on the stove top. Just show it over the flame and keep rotating it till all the sides are blackened

5. Chop the pepper removing the stem and the seeds.

6. Add to the mixie and run again. This time it will be smoother as the red pepper will provide juice to get the mixture going.

7. Refrigerate till you need to serve

Use it as a dip for carrots/celery/chips or as a spread over bread or use in sandwiches.

To make this sandwich, i just cooked some mushrooms in the microwave and the layered it on a bread with a spread of the hummus. Just hummus on the bread also tasted awesome.


Check out the other AGC thoughout this week 
AnushaJayanthiKavithaPriya MRadhikaVeenaPriya S

Monday 26 November 2012

Sambar - Vah re Vah Style

Sambar is a must have in any south indian meal. Every state and to some extent every house has their own variation of Sambar.

Check out other versions of Sambar posted in my blog
  1. Ezhukari/Thaalakam
  2. Sambar for Tiffin
  3. Sambar Version 1
  4. Kerala Style Vegetable Sambar
I found a version of Sambar by Vah Chef Sanjay Thumma. Most of you don't need an introduction to him. He has this super addictive personality and true to his word, Vah re vah is all about inspiring others to cook. Just looking at his show will make you want to run to the kitchen and try it immediately. This Sambar is no exception. It tasted awesome. It is quire similar to the arachu vitta sambar made in our homes. But a couple of things that I found different was the use of garam masala and ginger/garlic. Never heard of anyone using it, we quite liked this.

His sambar was very watery for my taste. So I made it slightly thicker.


At the end of this video, he tells how Sambar and rice taste best when eaten with hand and not with cutlery. So true. Our son now taken a crazy liking to eat his rasam rice with hands. Well what a mess he makes. But we love watching him eat. (He is this guy who needs to wipe his face between every mouthfuls even when he eats with his spoon. So this is saying something)

The spice level in this is slightly higher than my usual ones. Still not too spicy. Just a warning


Ingredients (Makes a big pot. Can easily serve 4-5 adults)

Do not be over whelmed by the number of ingredients. I have tried to group them in sets of how they go into the pot.

For Sambar Masala 

Set 1
Coriander Seeds 2 tbsp
Cumin 1 tbsp
Red Chilli 4
Pepper 1 tsp
Rice 1 tbsp
Channa Dal 2 tbsp
Fenugreek Seeds (Mendayam) 1/2 tsp
Clove 2
Cinnamon 1 inch piece
Star Anise 1
Fennel Seeds 1 tsp

Set 2
Mustard 1 tsp
Ginger 1 inch piece
Garlic 5 pods
Coconut 1 cup
Curry leaves few
Turmeric 1/2 tsp
Hing a little
Tomato 1

Other Ingredients
Onions 2
Potato 1
Carrots 2
Okra/Vendakka 4
Beans 3-4
Peas 1/2 cup
Tomato 3

Puli 1 tsp
Toor Dal 1/2 cup
Mustard 1 tsp
Cumin 1/2 tsp
Green Chilli 2
Curry leaves few

Coriander leaves a handful

Oil and salt to taste


Method of Preparation

1. Pressure cook the dal with enough water till it is well mushed. Keep ready.

2. The next step is to prepare sambar masala. We are not using ready made sambar powder at all. In a pot, dry roast the following ingredients together till they are slightly browned. Coriander Seeds, Cumin, Red Chilli, Pepper, Rice, Channa Dal, Fenugreek Seeds (Mendayam), Clove, Cinnamon, Star Anise, Fennel Seeds. Transfer to a mixie

3. In the same pot, add a little oil. Add mustard. When it sputters, add the Ginger and Garlic. Saute for a minute. Add the Coconut, Curry leaves, Turmeric, Hing and Tomato. Stir for a minute or 2 and then transfer to the mixie.

4. Grind to a smooth paste by adding a little water. Keep aside.

5. In the same pot, add some more oil. Add the Mustard. When it sputters, add the Cumin, Green Chilli and Curry leaves.

6. When it sizzles, add onions (chopped into 1 cm squares), cubed potato, cut carrots, sliced beans and peas along with some salt. Stir well and let it cook for a couple of minutes. Add tomatoes and saute for another minute

7. Add tamarind paste and a cup of water (or tamarind water). Simmer for a little bit till the vegetables start to cook.

8. Add the sambar masala and mix well. Add more water as required (3 cups or so). Do not make it too watery. Keep it thick. I felt that the Vah chef made it a bit too watery.

9. Simmer for a little while till everything comes together.

10. Add the mashed dal and cook for a few more minutes. You can adjust water again. 

11. Switch off and garnish with some coriander leaves.

Serve with rice and some papads or some dry side dish.

Sunday 25 November 2012

Chana Jaisalmer Ke

Kala Channa features regularly in our house. I make it especially as a side for Puttu. And ofcourse perfect side for Rotis. Did I tell you it is my favourite sundal as well.

This time I wanted to try something different and that search ended when I saw a recipe by Sanjeev Kapoor. We loved this recipe. The only disappointment I had was that similarity of this with Kadhi. So instead of the fancy name, I could have named it Kala Channa Kadhi. But it had to have this fancy name to justify its origins. It is a dish from Jaisalmer in Rajastan.


Ingredients

Kala Channa (dry) 1 cup
Yogurt 2 cups
Besan 4 tsp

Coriander powder 2 tsp
Cumin powder 1 tsp
Garam Masala 2 tsp
Turmeric 1/2 tsp

Green Chilli 1
Curry leaves few
Cumin 1 tsp

Oil and salt to taste

Method of Preparation

1. Soak Kala Channa overnight and pressure cook with enough water till it is well cooked. Drain and save the cooking water.

2. In a bowl, mix yogurt with besan, coriander powder, cumin powder, garam masala, turmeric and salt.

3. Heat oil in a pan. Add the jeera, green chilli and curry leaves.

4. When it sizzles, lower the flame and add the yogurt mix and stir.

5. Add the cooked channa and the water it cooked in as needed.

6. Simmer till the raw smell of besan is gone (5-10 minutes).

Serve with hot rice.

Wednesday 21 November 2012

Aloo Palak

My husband when he was a bachelor used to cook his food regularly. As he lived on his own, every night he would come and cook his curry (do read his description of how curries are all the same in this link). He will eat it with store bought tortilla (instead of roti) and mix the left over with some rice (oh just enough cooked in a pan, apparently he did not believe in using pressure cooker. don't ask me why). On days he was late from work, there is always Cafe Angelino where he would take out Eggplant Sub.

His pantry used to be so minimal. I still cannot believe the house I walked into. He still makes fun of me saying you really do not need all these ingredients to make dishes. I keep warning him that I will start cooking his style :-)

Anyways, this is one of the important dishes a bachelor can make. But to be honest, it is not the basic version. I have used masalas and stuff. I just don't know to make a dish with just chilli powder and salt :-)


Ingredients

Palak/Spinach 500gm bag
Potato 3 big
Onions 2
Tomato 3
Garam Masala 1 tsp
Cumin Powder 1/2 tsp
Coriander Powder 1 tsp
Turmeric 1/2 tsp
Chilli Powder 1 tsp (i skipped it and made a mild one and my son was sooo happy. it tasted great without the added spice)
Cumin 1 tsp
Saunf 1 tsp
Bay leaf 2
Clove 3
Cinnamon 1 inch piece
(ginger and garlic paste can also be used. i skipped that as well as i did not have at home)

Oil and Salt to taste

Method of Preparation

1. Heat a little water in a pot. Add the spinach and wilt it. Do not be taken aback by the quantity of spinach. Once it wilts down, there will be hardly any. Once done, drain the spinach and add to a mixie. Once cooled, grind into a smooth paste. Keep the spinach cooked water.

2. Boil the potatoes. You can do it pressure cooker or shortcut in microwave as I do. Peal, roughly chop and keep ready.

3. Heat oil in a pan. Add Cumin, Saunf, Bay leaf, Clove, Cinnamon and let it sizzle.

4. Add chopped onions and saute till it is nice and brown.

5. Add tomatoes (finely chopped) and cook till it is well done. Add a few tbsp of water if needed to prevent from sticking.

6. Add Garam Masala, Cumin Powder, Coriander Powder, Turmeric and Chilli Powder. Mix well and cook for a few more minutes.

7. Add the cooked potatoes and salt. Mix well.

8. Add the spinach puree and a little water to adjust the thickess. You can also add some cream or milk to it if you want.

9. Simmer for  a few minutes.

Serve with some warm rotis.

Tuesday 20 November 2012

Curd Rice - Yogurt Rice - Thayir Sadam

Curd rice or thayir sadam has to be the favourite dish of a Tamil Brahmin. No meal is complete without this. It is called bagala bath as well (its kannada name, not to be confused with bisi bela bath which is like sambar rice)

It is best when accompanied by pickle or mor molaga (which is chillies dipped in yogurt, dried and then fried).

Other variations are to add grated carrots, cucumbers, coriander leaves. Some also add fruits like grapes, pomegranate etc. You can ofcourse make super simple curd rice by just mixing rice and curd.

You must have read my post of Lemon Rice a few days ago and how my husband was pulling my leg... This one I am posting cause a friend did mail me and ask me how I made my curd rice. Those who are reading this - please please post your simplest recipes as well. If I am not from your region in India, it is likely that I will not know that recipe and would like to see it in your blog and then try it.


Ingredients

Rice 1 cup
Mustard 1/2 tsp
Channa Dal 1 tsp
Curry leaves 2 sprigs
Green Chilli 2
Ginger a small piece
Hing 1/8 tsp
Yogurt/Curd 3/4 cup (1 cup if eating later)
Milk 3/4 cup (1 cup if eating later)
Salt
Gingelly oil/Sesame Oil (or any oil) 2 tbsp


Method of Preparation

1. Cook rice first. Though you can cook normal method, you might find that it tastes better if you have cooked it to a little mushy consistency. I usually cook rice with 1:2 water. So for curd rice I use 1:3 ratio.

2. Mash it a little while it is still hot. Let it cool a little.

3. Add curd/yogurt and milk. Mix well. The amount of milk and yogurt you add depends on some factors. If you are eating immediately, you will find that about 3/4 cup will make a loose rice. But if you are going to eat later, I would recommend a cup or even a little more. Also, if your curd is sour, you can add more milk and a little less curd. When packing for train journeys, my mom used to add just a little (1/2 cup or less) of curd and the rest milk. As we will be eating only next day, the rice will be correct taste. Otherwise you will end up with sour rice. But ofcourse that is assuming Indian hot weather. :-)

4. Now comes the tempering. Heat gingelly oil in a small pan. Any oil will work, but gingelly tastes better.

5. Add mustard. When it sputters, add channa dal. It is not a standard ingredient. But I find it tasty.

6. When it starts to brown, add chopped green chillies, ginger and curry leaves along with some hing (kayam).

7. When it sizzles, transfer to the rice. Add some salt as well. Mix everything together and serve with some pickles. As there are chillies and stuff going in the rice, you can eat it just like that as well.

Enjoy!

Monday 19 November 2012

Barley Pradaman

When I told my husband I am making Barley Pradaman, his first remark was - ungal imaginationukku ellaye illaya? (meaning is there no limit to your imagination). I am glad I am like that. As I told you before, pradaman is basically payasam (kheer) made with jaggery and coconut milk. It is made with a variety of ingredients and I really loved this version with barley.

AGC Week 2 this month is Sweets. This is my entry to the event.


Ingredients

Pearl Barley 1/2 cup
Jaggery 1 cup
Coconut milk 2 cups
Cardamom 1/4 tsp

Method of Preparation

1. Soak barley overnight. Pressure cook with 1.5 cups of water for 3 whistles.

2. In a pan add the jaggery along with 1/4 cup water (i just added the water from the cooked barley). Let it melt.

3. Add the barley and simmer for a few minutes.

4. Add coconut milk and cardamom. Mix well and cook in low flame for 5 minutes.

You can serve this immediately warm. I liked it best the next day after I kept it in the fridge. It had an awesome creamy texture and the barley had absorbed some of the sweetness as well.


This is off to my event Cooking with Seeds - Barley, event by Priya


Check out the other AGC thoughout this week 
AnushaJayanthiKavithaPriya MRadhikaVeenaPriya S